Basically, all of the links on this page are affiliate links. I receive a commission (at no extra cost to you) if you make a purchase after clicking one of the affiliate links below. Read our Affiliate Link Policy for more information.
The controller goes in your hands. The receiver goes in your quad. You move the sticks on the controller, and those commands are transmitted wirelessly to the quad via the receiver. The controller has a radio module that transmits the signal to the receiver. The type of radio module determines which protocol the system uses. The radio module can be either built into the radio (internal) or it can be a separate unit that plugs in to a module bay in the back of the radio.
Different brands of controllers use different protocols to talk to their receivers. So an ExpressLRS receiver won’t bind to a Crossfire module. When you buy a controller, you need to realize that you’re also locking yourself into which receivers you’re going to buy. For example, TBS Crossfire has receivers with mature support for vehicles with servos, while ExpressLRS receivers are mostly designed to work with a flight controller. But you can always get an external module to put in the back of the radio, so you’re never locked into just one protocol if you don’t want to be. But life is simpler if you have most/all of your vehicles on the same type of receiver. And it’s easier if your radio’s internal module matches the most common protocol that you use.
WHICH CONTROL LINK TO BUY?
At this time, there are basically only two control links you should be considering for new builds: ExpressLRS and Crossfire. Which one should be built in to your radio and which should be an external module? The decision has kind of been made for you. There’s basically one radio that comes with Crossfire built into it: the Tango 2. All the other radios come with ELRS. Read the Tango 2’s description on this page for more info on this decision.
In other words, it’s almost certainly the best choice for you to buy a radio with internal ELRS module, then if you want to run Crossfire, buy a Crossfire module to put in the back of the radio.
The exception to this would be if you have a lot of existing vehicles with last-generation receivers in them (FrSky, FlySky, Spektrum, Futaba, RadioLink, etc). In that case, buy a radio with a 4-in-1 module in it. The 4-in-1 module can bind to most (but not all) last-generation receivers. Use the 4-in-1 module to bind to your existing vehicles and get an ELRS or Crossfire module for future builds.
There is almost no reason at all to put a last-generation receiver into an FPV drone that you’re building today. In the fixed-wing and RC car space, it’s very common to buy pre-built vehicles with receiver pre-installed. And that receiver usually uses a legacy protocol. But for FPV drones, you can almost always buy them with ELRS or Crossfire on board; and you should.
CONTROL LINK PROTOCOLS
ExpressLRS (ELRS) is the most popular control link protocol in the world of FPV today. What makes it so appealing is that it’s open source, so any manufacturer can make ELRS hardware. The development work on the ELRS software is done for free by volunteers. This might make you think it’s inferior in terms of quality or reliability, but it’s really not. In fact, it’s class-leading. The open-source nature of ELRS keeps prices down and availability high.
The weaker point of ELRS is its complexity. It’s designed for capability and performance, more than ease-of-use. Even basic functions like binding come with a learning curve. The fact that hardware is made by different manfuacturers means you can’t assume that a given ELRS radio or receiver is good-quality. You have to learn which manufacturers usually make good hardware (hint: the ones on this page) and stick to them.
TBS (Team Blacksheep) Crossfire (CRSF) was once the king of long-range RC control links. It was the first of the current-generation control links using LoRa technology. While the range and penetration of Crossfire is still excellent, it has been surpassed in many ways by ExpressLRS. Crossfire has only two packet rates: 50 Hz and 150 Hz. ExpressLRS goes all the way up to 1000 Hz, which gives extremely low latency to racers and other pilots who prioritize responsiveness over range. One reason for this is that ELRS was designed from ground up to have a lean, efficient packet structure. So ELRS can fit more packets-per-second in the same RF channel. ELRS also has more advanced transmission methods, such as one where each packet is transmitted twice, to increase link reliability.
Despite all this, CRSF is still very popular. And its adherents swear by it. TBS ensures that all Crossfire hardware is of the highest quality and reliability. You pay a little more for it, but you know what you’re getting. And you can actually get support from the company if anythihng goes wrong. Crossfire is also significantly easier to use than ELRS. Nearly every aspect of CRSF, including binding and firmware updates, is more user-friendly than ELRS.
And we assume that TBS is not taking the encroachment of ELRS laying down. We’d guess that hot new version of Crossfire is already in the works, to close the performance gap between ELRS and CRSF.
Other “modern” control links include ImmersionRC Ghost and TBS Tracer. For the most part, we consider these to be obsolete. Ghost and Tracer were mildly popular among some racers, but they never gained critical mass and most of their users have moved to ExpressLRS. We don’t recommend buying into them today.
You may also see radios with last-generation control links like FrSky, FlySky, Spectrum, and Futaba. We don’t recommend buying into these, as their range and peentration is significantly less than ELRS and Crossfire. If you see a radio advertised as 4-in-1 or CC2500, it’s for use with these last-generation protocols, and you should avoid it.
The exception to this rule would be if you’ve been in the hobby for a long time and already own a buch of vehicles with last-generation receives in them. In this case, it might make sense to buy a 4-in-1 radio, rather than having to replace a bunch of receivers in your existing vehicles. But any new vehicles you buy or build should come with ELRS or Crossfire.
Radiomaster
TX16S Mk2
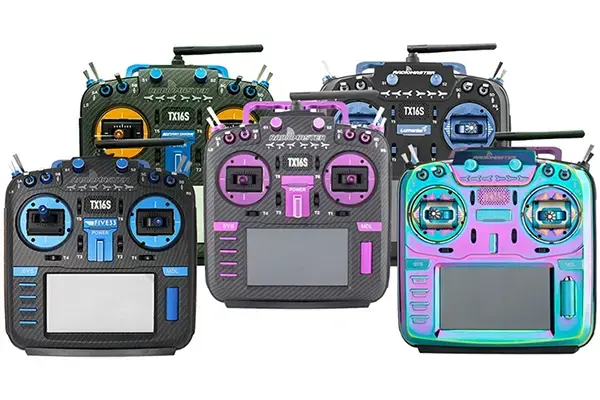
The TX16S is the oldest of RadioMaster’s designs. It’s the most like a “traditional” RC controller. It has more switches, knobs, and controls than any of Radiomaster’s other radios. If you wanted to fly a plane with lots of features like retracts, doors, dropper servo, and so forth, the TX16S has enough controls to do it. Robotics is another discipline where a large number of controls on the radio is desirable. But for FPV multirotors, the TX16S may be overkill. FPV pilots often just need 2 or 3 switches for arm/disarm, angle mode, maybe return to home, and they’re done.
The TX16S has a large color touchscreen. This makes configuring the radio faster and more convenient. The entire interface is redesigned around this touchscreen, with touchable buttons and menus. On the flip-side, there are lots of people who get on just fine with the smaller black and white displays on other radios. There’s no right or wrong answer here. Either this feature calls to you or it doesn’t.
One thing to note about the TX16S is that this radio was designed before ExpressLRS became a Thing. This means it was not designed to cool a high-powered ELRS module. If you buy the ELRS version of this radio, the internal ELRS module will only go to 250 mW. Other radios can do up to 1W, which gives about double the range. 250 mW will still give plenty of range, but maybe not as much as you’d want, esepcially if you are in an environment with a lot of obstacles, or if you want to use higher packet rates for reduced latency.
There are two variants of the TX16S. The base Mk2 has plastic buttons and regular Hall Effect gimbals. These gimbals are “fine” but not “premium”. They have ball bearings and Hall sensors, so they are adequatly precise and will last for a long time. But they also have a plastic frame, so they feel a bit lightweight and cheap. The Max versions of the radio have metal buttons and jog wheel and AG01 gimbals. AG01 gimbals have CNC metal frame, so they feel weighty and premium. They have zero flex at full deflection. My opinion is that AG01 gimbals are like leather upholstery in a car. They don’t make you a better pilot, but it sure feels nice every time you interact with them. If you can afford a radio with the AG01 gimbals, it won’t be money wasted, but if you can’t afford them, you’ll still be able to do everything you want to do with the standard Hall Effect Gimbals.
For what it’s worth, the TX16S is the most expensive of the Radiomaster product line, but it’s not the most capable or the most premium. Its price has a lot to do with its size and the big color screen. Many pilots will be better served by a less expensive radio in a more compact form factor, at a lower price. You should also know that there are some “special edition” versions of this radio, with custom colors and cases, being sold at exorbidant prices. These radios are only cosmetically different from the regular TX16S Mk2. Only buy them if you really, really want that color scheme.

Radiomaster
GetFPV
NewBeeDrone
Five33
Rotor Riot
Radiomaster
Boxer
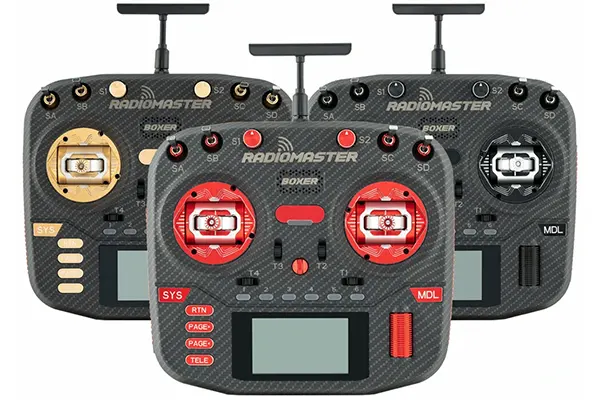
The Boxer is one of my favorite radios. It was my daily driver for about 2 years. It’s much more compact than the TX16S, while still being big enough to not feel like a “game controller” style radio in the hand. It feels solid, especially when combined with the AG01 gimbals. It has a mid-sized B&W screen–much smaller than the TX16S, but larger than the tiny screen on radios like the GX12. The battery bay is big enough to hold a 5000 mAh LiPo (sold by Radiomaster) so it lasts for a LONG time. And it can be purchased with a 1W built-in 2.4 GHz ELRS module, so you can get just about the most range you can possibly get on ELRS, without having to put an external module into your module bay.
What’s to dislike? The radio has four toggle switches on the front face, but the two shoulder switches are flat and press into the body of the controller. To me, this makes the left shoulder switch unsuitable for use as an arming switch, because to disarm, you have to push in, then release. In my opinion, arming and disarming should always be a single movement, so you can disarm as quickly as possible. On top of this, I find it difficult to press the shoulder switch without repositioning my hand off the gimbal.
Speaking of missing controls, the Boxer has no sliders that are accessible during flight. There are two potentiometer knobs on the face of the radio, but you can’t easily access them without taking your hand of the stick. So if you wanted to adjust a camera gimbal while flying you’d have a difficult time.
I’m also frustrated by the Boxer’s antenna. It comes with a very high-quality antenna that screws onto an plug on top of the radio. But the antenna eventually got damaged because every time I put the radio in my backpack, it bent over. I ended up using a 3D print to put the Pocket’s folding antenna onto my Boxer and, although I did see some reduction in range, the convenience was more than worth it.
If you’re looking for a traditional style controller, and you are okay with the selection of switches on the Boxer, I think it’s a better choice for many people than the TX16S. It has a more powerful ELRS module. And it’s way easier to store, transport, and handle than the TX16S.
The Boxer comes in several varients. The standard Boxer comes with plastic buttons and Hall Effect gimbals. Read the TX16S description for details about this. The Boxer Max has metal buttons and knobs and AG01 gimbals. The Boxer Crush has custom-colored casess and AG01 gimbals.

Radiomaster
RaceDayQuads
GetFPV
NewBeeDrone
Five33
Rotor Riot
Radiomaster
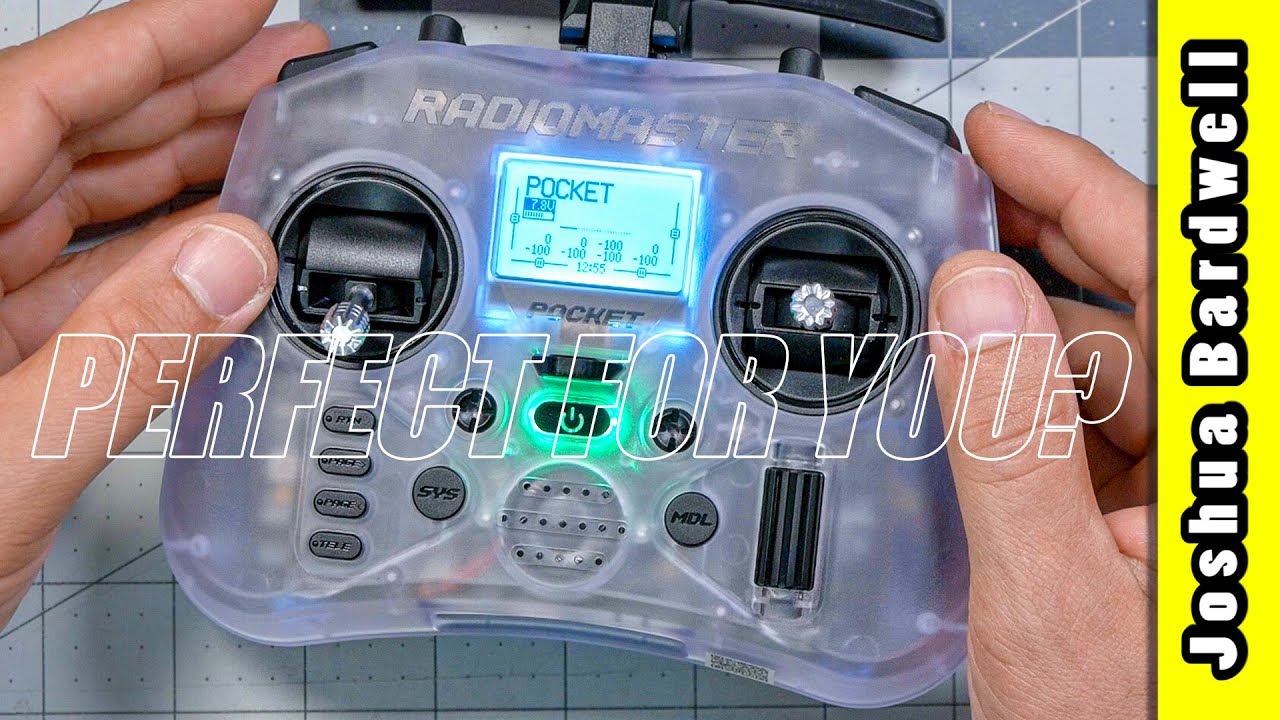
Pocket
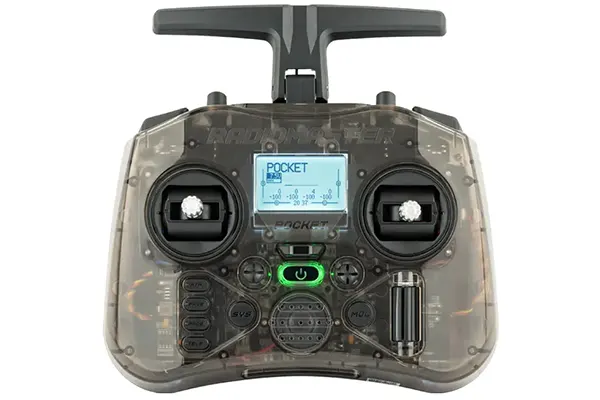
The Pocket is Radiomaster’s least expensive radio. It makes some compromises to get the price down, but it’s still very capable. Because it’s so compact, it’s actually the preferred radio of some pilots would could afford to spend more.
The beauty of a radio like the Pocket is that, because it runs EdgeTX (like all the Radiomaster radios) it’s got the full feature set of any other EdgeTX radio at any price point. There’s nothing a TX16S Max can do that the Pocket can’t do. The size isn’t really a compromise either. It’s just a choice. There are plenty of people with small hands and small backpacks that love the Pocket. It’s even got a folding antenna to protect it from damage!
The Pocket’s gimbals are smaller than other Radiomaster radios. And they’re plastic Hall effect gimbals. Again: perfectly functional, just not premium. If you did want premium gimbals, you can buy the AG01 Nano gimbals, which are all-metal CNC gimbals. (In the past, Radiomaster has offered to pre-install the AG01 gimbals if you buy them at the same time as the radio. It might be worth asking if this offer still stands.) The Pocket also doesn’t have a plethora of switches: two 3-position; two 2-position latching; one momentary; and one slider knob. Fine for a typical FPV drone, but you’ll quickly run out of you start adding advanced functions like GPS, flaps, landing gear, lights, and so forth.
The Pocket’s built-in ExpressLRS module only goes to 250 mW. Although this isn’t a deal-breaker, it might be the single biggest drawback of this radio. Compared to a 1W module (like the Boxer or the GX12), the Pocket’s module will give about half the range, all else being equal. In most situations, this is still plenty of range. But if you start stacking other drawbacks–like using an EP2 receiver with ceramic antenna, or using a 1000 Hz packet rate for ultra-low latency–then you might find yourself running out of signal before you’d prefer.
The Pocket comes in a standard and Crush version. Whereas the Boxer Crush includes an upgrade to AG01 gimbals, the Pocket Crush only has a custom-colored case. AG01 gimbals have to be ordered separately.
Radiomaster
RadioMaster
GetFPV
NewBeeDrone
Five33
Rotor Riot
Radiomaster
Zorro
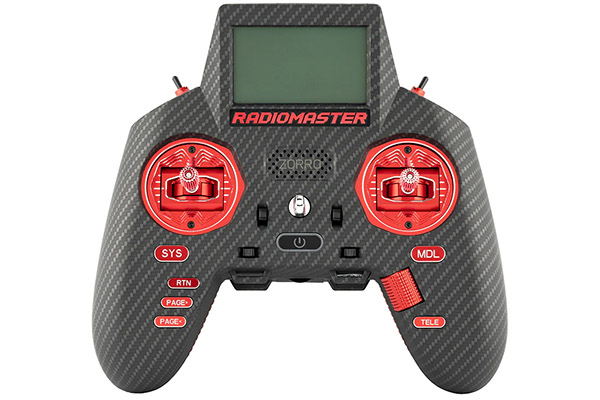
The Zorro is the smallest controller that Radiomaster makes. Its ergonomics will be instantly familiar to anybody who’s held a game controller. But unlike a game controller, it has proper RC-style gimbals. It can even be upgraded to full-metal AG01 gimbals for those who like a more premium feel. Although it’s small in size, it sports a relatively roomy screen — the same size as the much larger Boxer radio. And it’s got a generous compliment of switches and knobs. It’s not even that expensive!
Which probably makes you wonder why it’s one of my least favorite RadioMaster radios. The answer is its extremely short battery life. Instead of using 18650 cells, the Zorro uses 18350 cells — about half the size. The runtime is nowhere near long enough to last through a full day of flying. It just feels like it’s constantly runnign out of battery. There are workarounds for this: it has an external 2S balance port, which allows it to connect to a “piggyback” battery that straps to the outside. But now you’ve ruined the compact form factor and excellent ergonomics! I have to acknowledge that some pilots love the Zorro so much that they put up with this limitation, but for my money, the short battery life is a total deal breaker.
The internal ELRS module on the Zorro only goes up to 250 mW. If you want full range/power from the ELRS system, you need an external module (which will further shorten battery life). The Zorro Max comes with AG01 metal gimbals and upgraded metal buttons and jog wheel.

RadioMaster
RaceDayQuads
GetFPV
NewBeeDrone
Rotor Riot
Team Blacksheep
Tango 2
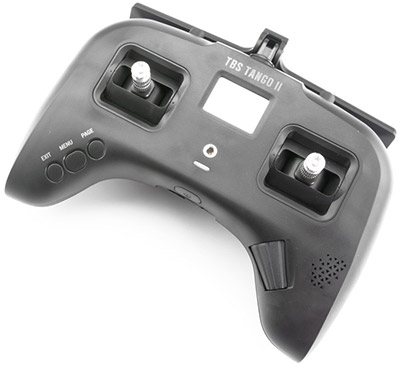
The Tango 2 is the only radio to come from the factory with a Crossfire module built in. Compared to an external Crossfire module, the Tango 2 maxes out at 500 mW, while the Micro module goes to 1W. This amounts to about 40% more range for the Micro module, but Crossfire’s range is very good. You’ll still get excellent range out of the Tango 2, unless you’re pushing really extreme distances. The Tango 2 is very compact, making storage and transportation a breeze. And it’s got great ergonomics for a small radio. A built in 5000 mAh 2S battery will easily make it through a day of flying.
If you run TBS Crossfire as your control link, you might think the Tango 2 is the obvious choice. But it comes with some drawbacks. It’s got relatively few switches (2x three-position, 2x two-position, 2x momentary) and no knobs or sliders. For airplane pilots, the Tango 2 lacks trim switches. There is a trim function but accessing it is cumbersome and difficult to do in flight. The gimbals on the Tango 2 are prone to going out of calibration. Some people seem to avoid this problem while others have to calibrate their gimbals weekly. The screen on the Tango 2 is tiny. It’s usable, but you really have to squint. If you’re older and have trouble with small text, you might want to stay away from it.
The Tango 2 runs a firmware called FreedomTX. Although this is based on the open-source EdgeTX/OpenTX firmware, it’s not compatible with any of the usual tools used to flash, back up, and configure EdgeTX/OpenTX. For example, theree is no desktop-based app for configuring the Tango 2. You have to do everything using the (tiny) screen on the radio.
The Tango 2 doesn’t come with a module bay by default, but TBS sells one that you can add to the radio. This requires opening up the radio. With the module bay, you can add aftermarket modules for ExpressLRS or other protocols.
Is the Tango 2 right for you? If Crossfire isn’t your primary control link, we think the answer is no. If Crossfire is your control link, then ask yourself if you absolutely must have the compact size of the Tango 2. If not, then we think you’ll likely be happier buying another radio with larger screen and more knobs and switches. Just get a Crossfire module to go into the radio’s module bay and you’ll be good to go.
There’s one more reason you might choose the Tango 2. If you care about NDAA compliance, an NDAA-compliant version of the Tango 2 is available. If you know, you know.
The Tango 2 comes in Pro and non-Pro version. The only difference is that the gimbals on the Pro version fold for storage.

Team Blacksheep
RaceDayQuads
GetFPV
NewBeeDrone
Almost all of the radios on this page have both an internal RF module and an external module bay. The internal module supports one or more radio protocols — for example, the Internal module might be an ELRS module. It can’t bind to non-ELRS receivers. The external module bay lets you install a 2nd radio module, to allow the radio to bind to a different type of receiver.
Most commonly, you’d want to do this if you owned an older radio and you wanted to upgrade to the latest-and-greatest control link. You could put an ELRS module into the radio and save yourself the cost of buying a whole new radio with internal ELRS module. Sometimes you want to use two different types of control link. You might want to fly aicraft with both ELRS and Crossfire receivers. The external module would let a single radio bind to both types of receiver.
900 MHz vs. 2.4 GHz
One of the distinguishing characteristics of an RF module is which frequeny band it uses. The modules on this page all use either 2.4 GHz or 900 MHz.
2.4 GHz has smaller antennas (about 1/2 the size of 900 MHz) that are easier to mount and less prone to damage. It has about half the range and penetration of 900 MHz, all else being equal. The 2.4 GHz frequency band is significantly wider than the 900 MHz band, so you can get way, way more pilots in the air at the same time without interference. This makes 2.4 GHz preferable for drone racing and fly-ins where lots of people will be flying at the same time.
900 MHz has about twice the range and penetration of 2.4 GHz, all else being equal. Its antennas are larger (about 2x the size of 2.4 GHz) and more prone to damage. The 900 MHz band is only about 15 MHz wide, so interference between pilots can happen even with 3-4 pilots in the air at the same time. 900 MHz is preferable for medium and long-range flying; for flying around buildings, where maximum penetration is needed; and for flying in mountains where 900 MHz is slightly better and “bending around” terrain. When we talk about “900 MHz,” we mean both the 915 Mhz band used in the USA and the 868 MHz band used in Europe.
ExpressLRS supports equal functionality, packet rates, and latency on both 2.4 GHz and 900 MHz. TBS Crossfire operates only in 900 MHz.
Almost all ELRS radios default to 2.4 GHz. The GX12 operates in both 2.4 and 900. The TBS Tango 2, a Crossfire radio, operates only in 900 MHz. Adding 900 MHz support to a 2.4 GHz radio is one of the main reasons someone might buy an external ELRS module.
MODULE FORM-FACTORS
External module bays come in two form-factors. The first is JR Bay, which is a larger, more square shape. It is typically found on bigger radios. The second is the Lite Module Bay, which is narrower. It’s typically found on smaller radios. You should learn to recognize these by sight, as the radio product listing doesn’t always denote them.
When buying modules, make sure to buy the correct module to match your radio’s form-factor. Again, you have to recognize them by sight, because the naming is inconsistent. It is possible to buy an adapter to change over one module type to the other, but this is bulky and cumbersome.
JR form factor is often referred to as “micro module”. Lite form factor is often referred to as “nano module”. However this isn’t universal.
ELRS GEMINI
Gemini is a feature supported by a few ELRS modules and radios. A Gemini module will have two radio chains and two antennas. It is capable of transmitting on both antennas simultaneously. This can be used in various ways to improve link reliability, especially at the edge of usable range. Gemini is especially useful when there is interference in the frequency band.
Don’t think of Gemini as a way to increase your usable range. Think of it as a way of maximizing your link quality within the usable range of the system.
Gemini XRossband is exclusive to dual-band radios like the GX12 and the Nomad module. XRossband means that one radio is on 900 MHz and one is on 2.4 GHz. This is a little counter-intuitive since the 900 MHz radio will pretty much always have better range than the 2.4 GHz radio. So what’s the point of even having the 2.4 GHz? If you expect to encounter interference on one band, being able to transmit on a completely separate band can save the link. The example we like to use is a cinema pilot operating on a movie set, where lots of other wireless equipment is in use, and you might suddenly find the entire 2.4 GHz band swamped with some other transmitter.
Radiomaster
Bandit Module
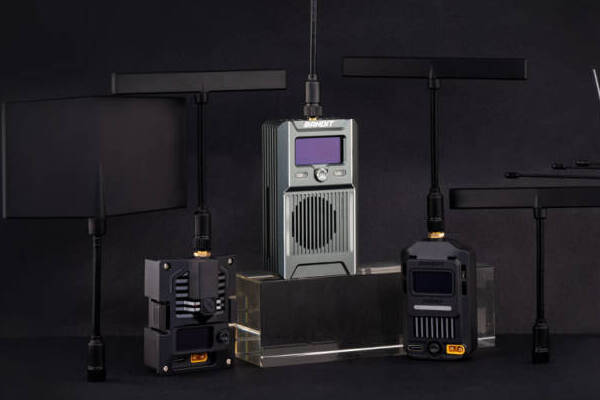
The Bandit is RadioMaster’s 900 MHz ExpressLRS module. It has output power up to 1 Watt.
The Bandit comes in three sizes. Nano is for radios with “Lite” style module bay, such as the Zorro. Micro is for radios with “JR” style module bay, such as Boxer, TX16S, and GX12. The full-size module mounts outside the radio and has an adapter for either JR or Lite bay.
Since all of the modules have the same 1W output power, what’s the advantage of the full-size module? With the full-size module you get a screen and joystick to manipulate the system without having to load the ELRS Lua script on the radio screen. It has an accelerometer that can detect when you set the radio down and turn down the ELRS output power. You also get shortcut buttons that can be assigned to various functions. The full-size module also has a CRSF output jack that can be used to connect it to a few Spektrum and Futaba radios. Finally, it has a UART output that, with the right firmware, can be used to turn the TX module into a receiver with 1W of telemetry power. This is mostly useful for long-range builds using Mavlink telemetry. (For those who are wondering, no, you cannot “hack” the full size module to get 2W output like you might have heard rumored. The power amplifier doesn’t support it.)
RadioMaster
GetFPV
Rotor Riot
NewBeeDrone
Radiomaster
Ranger Module

The Ranger is RadioMaster’s 2.4 GHz ExpressLRS module. It has output power up to 1 Watt.
The Ranger comes in three sizes. Nano is for radios with “Lite” style module bay, such as the Zorro. Micro is for radios with “JR” style module bay, such as Boxer, TX16S, and GX12. The full-size module mounts outside the radio and has an adapter for either JR or Lite bay.
Since all of the modules have the same 1W output power, what’s the advantage of the full-size module? With the full-size module you get a screen and joystick to manipulate the system without having to load the ELRS Lua script on the radio screen. It has an accelerometer that can detect when you set the radio down and turn down the ELRS output power. You also get shortcut buttons that can be assigned to various functions. The full-size module also has a CRSF output jack that can be used to connect it to a few Spektrum and Futaba radios. The full-size Bandit can also be “hacked” to increase its output power to 2W.

RadioMaster
RaceDayQuads
GetFPV
Rotor Riot
NewBeeDrone
RadioMaster
Nomad Module
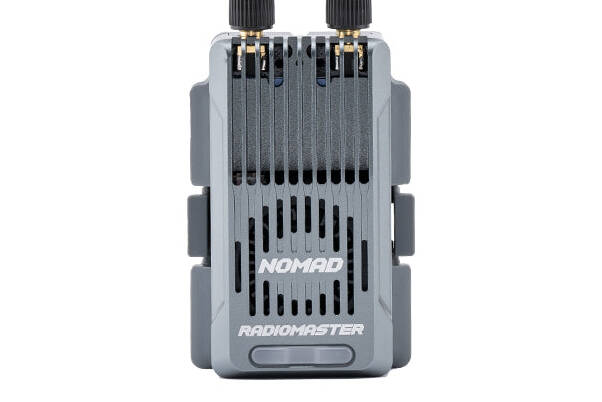
The Nomad is RadioMaster’s dual-band 900 MHz / 2.4 GHz module. It outputs up to 1W of power.
There’s a strong argument that almost everybody should pick the Nomad module over the Bandit or Ranger modules. The Nomad does everything the others do and gives the option to use both frequency bands instead of locking you in to one band. In addition, it supports Gemini.
Why might you skip the Nomad? In theory, the dual-band antennas that come with the Nomad have slightly worse range than a single-band antenna; but you can buy aftermarket single-band antennas if you really care about that. The Ranger and Bandit have the full-size module with screen and buttons, which the Nomad doesn’t. And the Ranger (2.4 GHz) module can be hacked to output 2 watts, which will give about 40% more range than the Nomad’s 1W. The full-size Bandit (900 MHz) module can be turned into a receiver with 1W telemetry power for long-rnage builds that require bidirectional communication.
If none of those situations apply to you, the Nomad is probably the ELRS module you should buy.
This all assumes that you’re buying a module, though. If you’re shopping for a new radio, it probably will come with a 2.4 GHz ELRS module in it (the main exception being the GX12, which comes with a dual-band module). In that case, don’t over-think things. You’ll probably get more range out of 2.4 GHz than you need. But the minute you start thinking about dipping your toes into 900 MHz, the Nomad should be near the top of your list.

RadioMaster
RaceDayQuads
GetFPV
NewBeeDrone
Rotor Riot
Emax
Aeris Link ELRS
Emax Aeris Link modules offer ELRS compatibility in both 2.4 GHz and 900 MHz frequency bands. Emax does not offer a dual-band or Gemini transmitter at this time, so our recommendation would be for most people to get the Radiomaster Nomad module instead. But one of Emax’s offerings is unique: their JR-sized module has an OLED screen and joystick, but still fits inside a standard JR module bay. With Radiomaster, you have to use an over-sized module that hangs off the back of your radio to get an OLED screen. And the Emax 900 MHz module goes to 2 watts output power, which gives about 40% more range than the 1 watt output of the Radiomaster module.
If you want a module that does 900 MHz only, the Emax Aeris can be argued to beat the Radiomaster Bandit for these reasons. If you’re shopping for 2.4 GHz ELRS, the Aeris is the most compact way of getting an OLED screen on your module.
Be sure you buy the 2.4 GHz or 900 MHz version of this module per your requirements. They look identical and people have bought the wrong one by accident before.
Emax
RaceDayQuads
GetFPV
The transmitter goes in your hands. You move the sticks and switches on the transmitter to make the drone fly. The transmitter transmits the stick and switch positions into the air with RF waves. The receiver goes on the vehicle. It receives the transmissions from the transmitter and converts them into a format that the flight controller can understand, so the flight controller can know what you’re wanting the vehicle to do.
You have to buy a receiver that is compatible with your transmitter. If you have a Crossfire radio, you need a Crossfire reciever. If you have a 2.4 GHz ELRS radio, you need a 2.4 GHz ELRS receiver. And so forth.
TELEMETRY POWER
The receiver doesn’t just receive signals from the transmitter. The receiver also transmits telemetry data back to the transmitter. Examples of telemetry include the signal strength that the receiver is seeing from the transmitter, or the voltage of the battery on the vehicle. This data can be displayed on the transmitter, or the transmitter can take actions in response, such as playing a sound or modifying the controls in some way.
The transmitter’s control signal typically has a power of 250 to 1000 mW. The receiver is much smaller and consumes much less power, so its telemetry transmissions are usually much weaker. A typical receiver has a telemetry transmit power of 10 mW to 100 mW. This means that the range of the telemetry data is much less than the range of the control link.
This usually isn’t a big deal. Telemetry data is not mission-critical, and a lot of telemetry data is duplicated in the video feed’s on-screen display (OSD). But long-range pilots sometimes want their telemetry link to have similar range of their control link. So some receivers advertise a high-powered telemetry radio. This is of almost no benefit to the typical pilot.
DIVERSITY
The simplest recipe for a receiver is to have one antenna and one radio chain. The receiver listens on its only antenna all the time. If that antenna happens to miss some data, the data is gone.
Diversity is a method of improving on this recipe. The receiver has two antennas. The antennas are placed in different locations (like the front and back of the aircraft) or in different orientations. This improves the odds that one of the antennas will receive the data.
There are two types of diversity. Antenna diversity means that the receiver has two antennas but only one radio chain. The radio switches from one antenna to the other, trying to find the strongest signal. But it can only listen to one antenna at a time, so sometimes it picks wrong and misses the data.
Receiver diveristy means that the receiver has two antennas and two radio chains. Each radio chain can listen to its antenna 100% of the time, so as long as one antenna has a strong enough signal, the data will never be missed. The down-side of receiver diveristy is increased cost. Any ELRS receiver that supports receiver diversity can also support Gemini, which was discussed in the Modules section.
PWM VS SERIAL
Most of the receivers on this page output digital serial signals. These are intended for use with a flight controller. Multirotors always have a flight controller, but some airplanes, boats, and ground vehicles don’t have a flight controller. The servos and ESC’s run directly off the receiver. If you have one of these vehicles, you need a receiver that outputs a PWM signal. Although all the receivers on this page can do that, most of them are not optimal for that use. We will call out the ones that are.
Radiomaster
RP Series Receivers

The Radiomaster RP series of ExpressLRS receivers operate in 2.4 GHz and output serial CRSF signal to a flight controller (not a servo). All RP series receivers feature a temperature-controlled oscillator (TXCO) which means the performance of the system stays stable as the temperature of the receiver changes.
The RP1 has a UFL connector for an external antenna. This gives the best range. Use this as the default option for any build where external antenna mounting is acceptable and where a good balance of cost and range is desired.
The RP2 has an integrated ceramic antenna. This is the most compact, but has about half the range of the RP1. Exact range reduction depends on where the receiver is mounted in the frame. It may be more! Use this for builds where light weight and compact size are more important than maximum range.
The RP3 has two-antenna diversity (note: not radio diversity). This means it switches between antennas to find the best signal, but can only listen to one antenna at a time. It also can’t do ELRS Gemini. It has a receive amplifier for increased range. And it has 100 mW of power for its telemetry transmissions (compared to 10 mW for the RP1 and RP2) . This is useful for longer-range systems where getting telemetry back from the aircraft is just as important as getting control signal to the aircraft. This receiver is ideal for longer-range builds and larger builds where antenna diversity can protect against one antenna being shadowed by the body of the aircraft. However, for almost all of these situations, it’d be better to spend a few dollars more on the RP4TD.
The RP4TD has two-antenna radio diversity. This means it can listen to both antennas at the same time and always pick the one with the best signal. It can also do ELRS Gemini. It has dual 100 mW telemtry transmitters. Use this antenna for the same builds as the RP3. The ability to do Gemini gives increased link reliability at the edge of range and increased resistance to interference.
The RP4TD-M is a smaller version of the RP4TD. It has two-antenna radio diversity and can do ELRS Gemini. It leaves out the telemetry amplifiers, so it only has 10 mW of telemetry power. Us this for racing drones where you want to use Gemini for maximum link reliability in crowded racing environments, and you don’t need the increased telemetry range.

RadioMaster
RaceDayQuads
GetFPV
NewBeeDrone
Rotor Riot
Radiomaster
BR Series Receivers
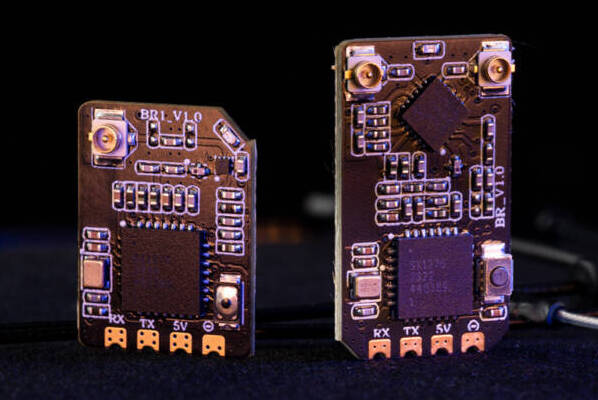
The BR series receivers all operate in 900 MHz. Compared to the XR series, the BR series have single-band 900 MHz antennas, while the XR series have dual-band 2.4/900 antennas. So the BR series antennas will have better performance, since they are tuned to exactly the right band. (Of course, you can always buy different antennas, but who wants to do that?)
The BR1 has a single external antenna.
The BR3 has dual antennas and a single radio chain. So it can do antenna diversity but not receiver diversity. See the RP series definitions for more detail on this.
There isn’t any BR series receiver that can do Gemini.
RadioMaster
GetFPV
Radiomaster
XR Series Receivers

Radiomaster’s XR series receivers almost all operate in both the 900 MHz and 2.4 GHz frequency bands. They come with dual-band antennas so you can freely switch bands without changing any hardware at all. Although this sounds appealing, we question how useful it is to most pilots. A typical pilot is going to build a racing drone and put a 2.4 GHz receiver on it, with its smaller antenna. Or they’ll build a long range drone and put a 900 MHz receiver on it.
We think there are limited situations where you’ll have a single drone and one day, want it to be on 2.4 GHz, and another day, want that exact same drone to be on 900 MHz. So for most pilots, we think a single-band receiver will be better. On top of this, a single-band receiver will have an antenna that is tuned to exactly to that band. So you’ll get better range than the dual-band antennas on the XR receivers. So who really needs an XR series receiver? Somebody who expects to encounter interference on one band, and need to move to the other band to avoid it. For example, a cinematic pilot working on a movie set, where there are lots of different RF devices transmitting on various frequencies.
The XR1 is a single-antenna receiver with external antenna.
The XR2 is a single-antenna receiver with integrated ceramic antenna. This receiver operates only in the 2.4 GHz band, but it uses the Semtech 1121 chip so it supports the same packet rates as the other XR receivers. The main reason to choose the XR2 over the RP2 is that the XR2 supports the DK500 packet rate. If you don’t intend to use this packet rate, then you should use RP2 receiver instead.
The XR3 is a dual-antenna, single-radio receiver with external antennas. This receiver has antenna diversity, not radio diversity. So it will switch between the antennas to pick the one getting the best signal, but it can’t listen to both antennas at the same time. See the RP series description for more details.
The XR4 is a dual-antenna, dual-radio receiver with external antennas. It can listen to both antennas at the same time and supports Gemini functionality. See the RP series description for more details.
The DBR4 is a quad-antenna, quad-radio receiver. Since ExpressLRS only supports two-channel diversity, what’s the point of having four radios? It allows all of the radios to have a correctly-tuned antenna. You have two radios with 2.4 GHz antennas and two with 900 MHz antennas. Now you can do full dual-band Gemini diversity without the compromise of multi-band antennas. Be warned though, this receiver is total overkill for most applications. Not only do most people not really need an XR series receiver (as described above), most people don’t need that last little bit of performance from a single-band antenna.
RadioMaster
RaceDayQuads
GetFPV
Rotor Riot
Team Blacksheep
Nano RX & Nano Diversity RX

The Nano RX is the “default” receiver used by most people running the Crossfire system. It has only a single antenna so no diveristy, but you still get extremely long range. It doesn’t have servo pins, but if you want to use it with servos, you can buy a PWM adapter that lets the Nano RX support up to 6 servos.
The Diversity version of the Nano RX has two antennas and two radio chains so it can do full radio diversity. This means it listens to both antennas at the same time and the incoming commands are received if either one of the antennas manages to pick them up. This is especially useful for longer-range flying, but is overkill for short and medium range. It’s also useful for larger aircraft where the body of the aircraft might shadow one antenna.
The Nano RX Pro has increased telemetry output power of 500 mW. This is useful for long-range flights that require bidirecitonal communication between the aircraft and the ground station. For typical hobby/recreational use, the Pro RX has no advantage. Even for many long-range flights, telemetry may not be essential.
The Nano RX SE variant is a regular Nano RX with an upgraded (more durable) “Immortal T” antenna. You should buy this if you can find it because the Immortal T antenna is vastly superior to the one that’s included with the non-SE receiver. You should buy the Immortal T separately if you can’t find the SE version of the Nano RX.
For those who require NDAA compliance, an NDAA version of the Nano RX exists.