Basically, all of the links on this page are affiliate links. I receive a commission (at no extra cost to you) if you make a purchase after clicking one of the affiliate links below. Read our Affiliate Link Policy for more information.
Are you looking to build your first quadcopter? Do you want instructions
for every step from start to every step from unboxing to your very first flight?
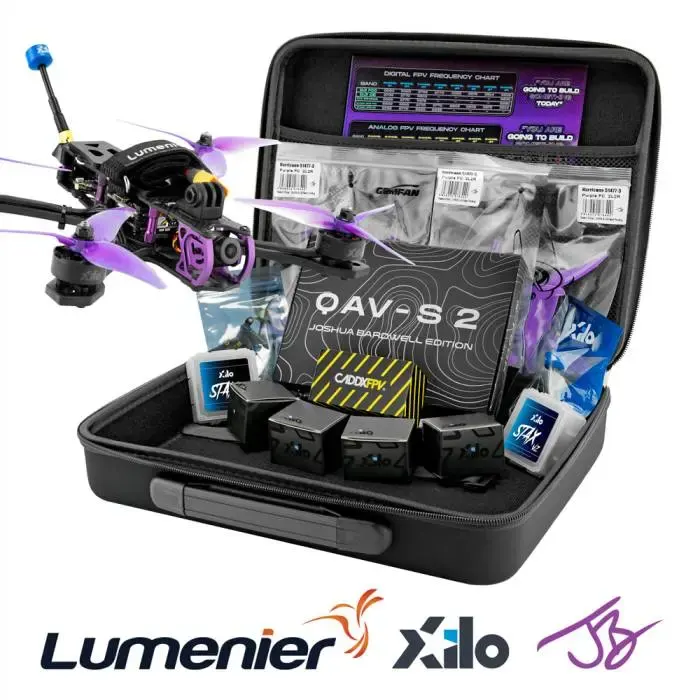
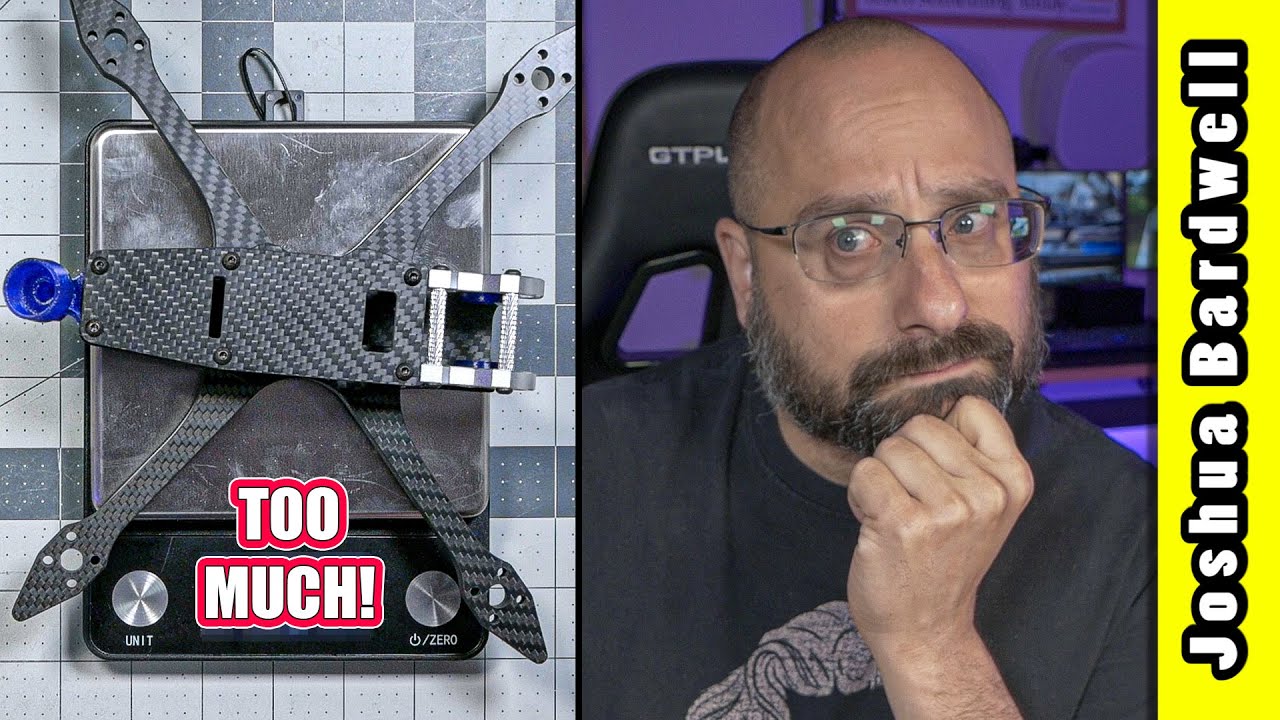
I created the JB Xilo Beginner Build kit to make it as easy as possible for you to build your first FPV freestyle quadcopter. I picked all the parts you’ll need so you know everything will be good quality and will work together. And I made a complete video tutorial taking you through every step of the build, all the way through the first test flight. This kit is available with both analog and DJI video system, depending on your budget.
Although the whole point of this kit is to learn to build it yourself, you might prefer to have GetFPV build a “bind-n-fly” version for you, so you can see how a pro would do it. There are links to both the DIY Kit and the Bind-n-Fly (BnF) version below.

BIND N FLY / RTF
FPV drones crash. A lot. Which means they break. So if you’re going to get into FPV, eventually, you’re going to have to learn how to repair your drone. And the best way to learn to repair your drone is to build it yourself. So you’ll find people who argue that “real” FPV pilots shouldn’t buy pre-built drones like the ones in this section.
But the flip-side of that is that learning to build a drone can be incredibly frustrating. And a lot of people never get over that hurdle and give up before ever getting a taste of flight. And once you DO learn to build your own drone, sometimes you just want to buy something and get in the air. That’s what the drones in this section are for.
Bind-n-Fly / Ready-to-Fly (BNF / RTF) drones come from the manufacturer pre-assembled and (mostly) ready to fly. We say, “mostly,” because you still have to bind them to your controller and do some basic setup before you can use them. But these are just about the closest thing you can get to a hassle-free FPV experience.
The days when BnF drones were significantly more expensive and lower-quality are gone. These are as good as anything even the best builder would build themselves. And because the manfuacturer benefits from economies-of-scale, they’re often less expensive too. There are still reasons to build your own drone, if you just enjoy the experience, or if you want specific hardware. But don’t feel like you’re compromising if you buy something from this section.
Best Budget BnF
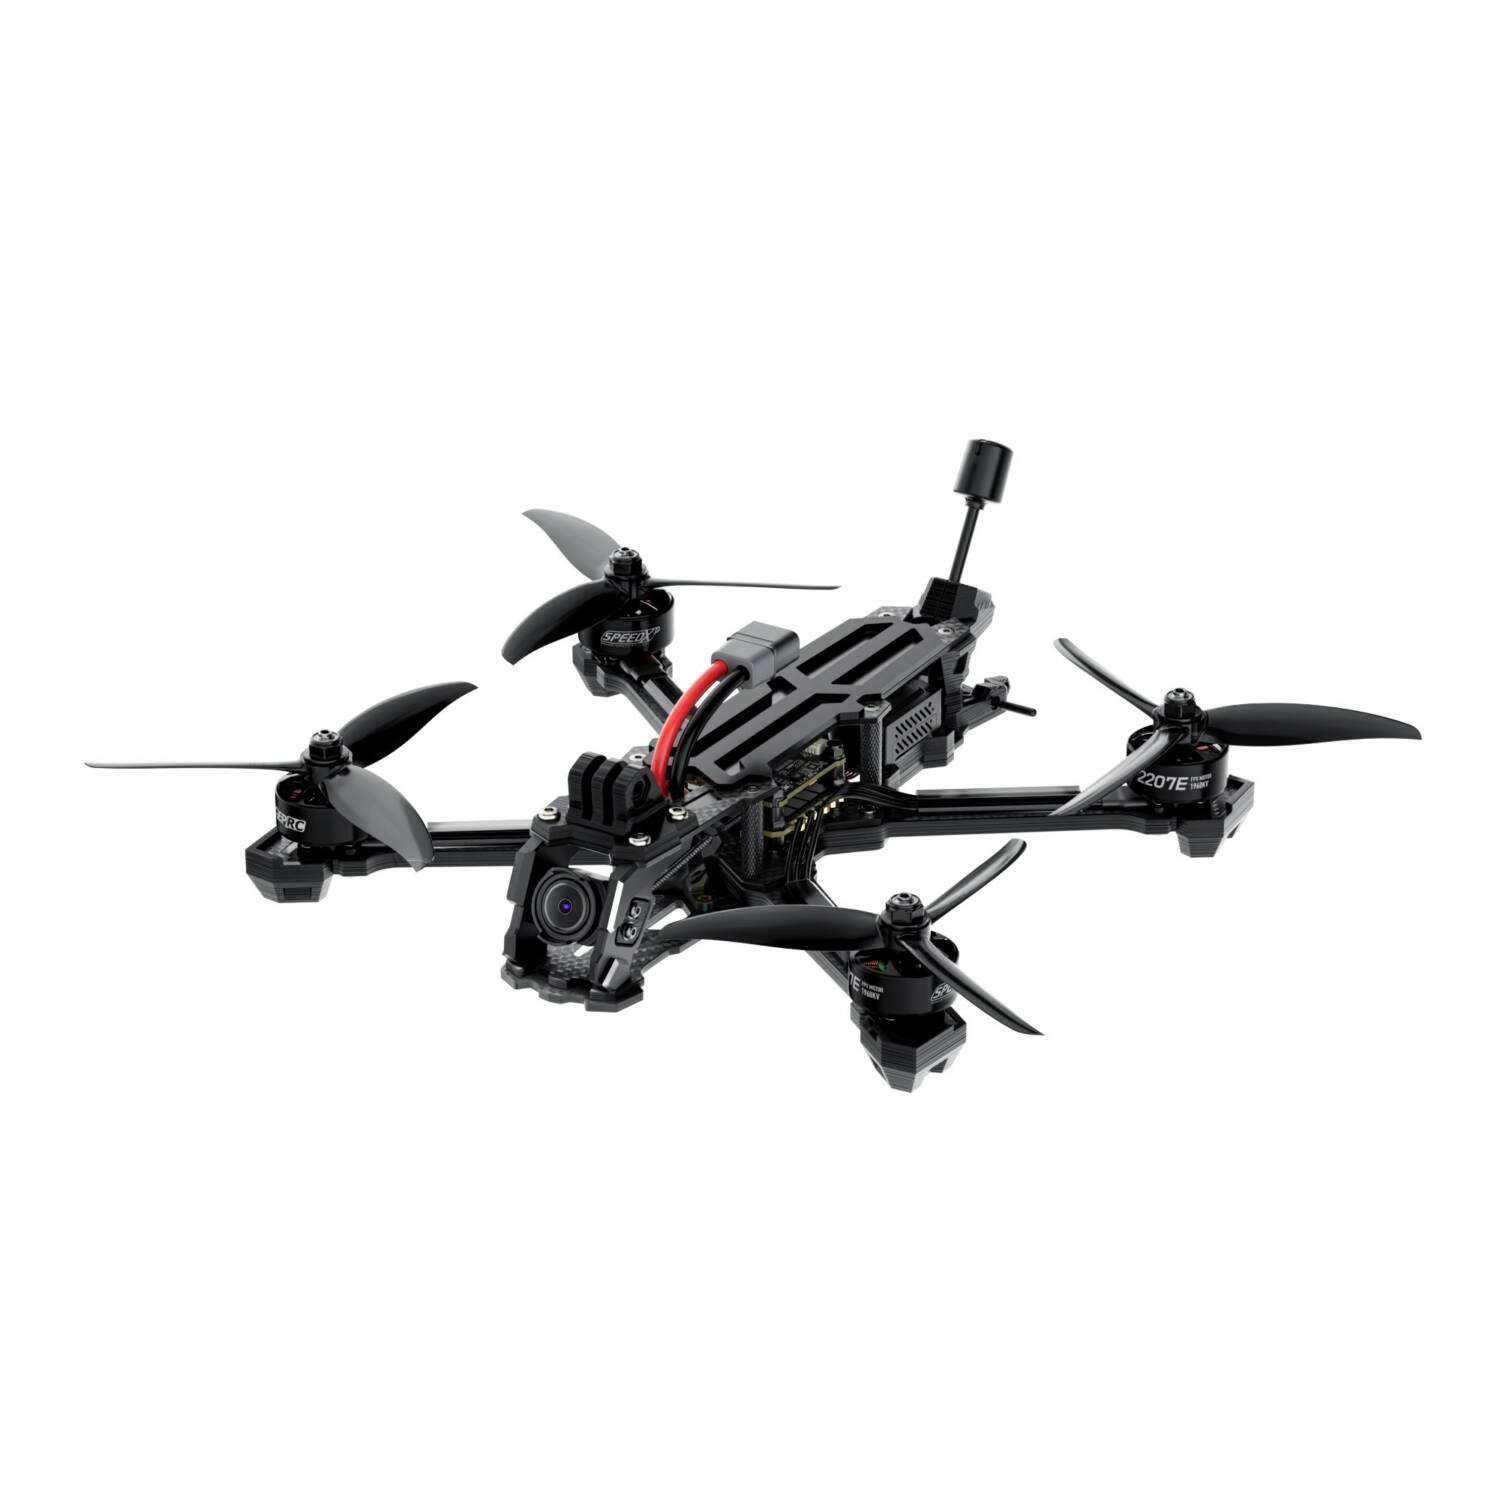
Nazgul Eco
The Nazgul Eco is iFlight’s “budget” freestyle quad. But you barely give up anything compared to the “premium” Nazgul Evoque. The Eco’s Xing-E Pro motors have hollow steel shaft instead of titanium alloy shaft, so they might be slightly less durable. And the Eco comes with a slower ATF435 processor in its flight controller instead of the Evoque’s F722. Effect of these changes on your flight experience? ZERO. But you’ll definitely notice the money you save!
The Eco comes in several variations, so make sure you’re buying the one you want. First, there is XL vs. DC, which designates whether the arms are true X or deadcat style. Deadcat arms are spread wider in the front, which means you don’t see the props in your FPV camera view. But the assymetry makes the quad slightly less neutral when doing snap rolls and other fast maneuvers. iFlight offers the DJI air units only with the DC frames, on the assumption that you don’t want to ruin your beautiful HD footage with props in view. The analog version is available only as true-X, on the assumption that you care most about handling.
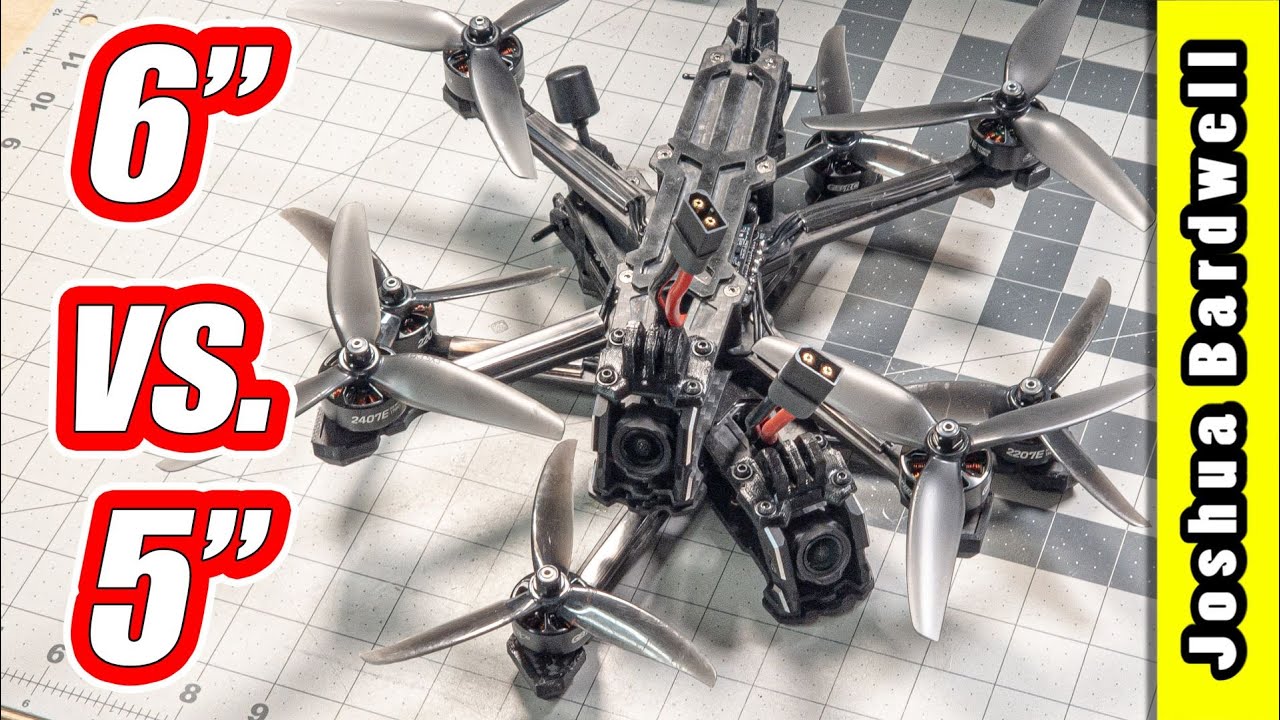
Second, the Eco comes in both a 5″ and 6″ version. 6″ will carry more weight, be more stable, and should have slightly longer flight times under some conditions. But it will be less nimble. We recommend 5″ for pure freestyle pilots; 6″ is better for cinematic flying and vehicle chasing.
Third, the Eco can be ordered with an analog camera and vTX or a DJI O4. Make sure to buy the version that matches the goggles you own.
iFlight’s long reputation for great-flying, capable bind-n-fly drones, coupled with the lowest-in-class price means that the Nazgl Eco should be near the top of the list for anybody looking for a bind-n-fly 5″ freestyle drone.
iFlight Store -
XL5 Analog / DC5 O4
GetFPV -
XL5 Analog
RaceDayQuads -
XL5 Analog
Amazon -
All Variants
Best Budget BnF
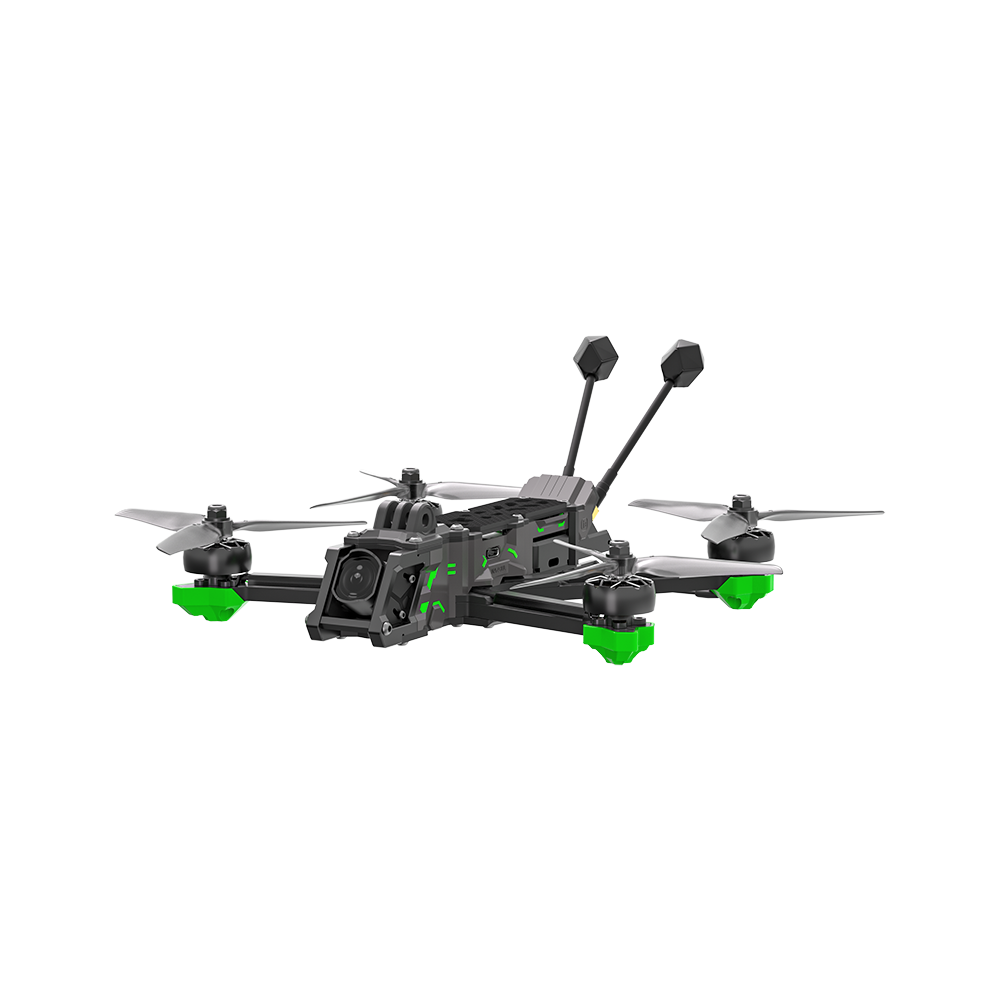
Vapor X5
I’ll be honest: when it comes to “best budget five-inch,” I think GEPRC’s Vapor just barely beats the iFlight Eco in most categories. The Vapor costs the same with a receiver as the Eco does without. Vapor has an F7 processor instead of the F4 processor in the Eco. And personally, I prefer the open design of the Vapor over the side plates on the Eco, which make maintenance cumbersome (but do provide some protection). I was also incredibly impressed with how the 5″ Vapor flew. I don’t know what exactly made it feel so responsive and connected, but I liked it.
Like the Eco, the Vapor comes in both X and deadcat configurations. And it can be ordered with analog or DJI O4. Read the iFlight Eco’s description for more information about that, and make sure to buy the one that you really want. GEPRC also sells the “WTFPV kit,” which is a quadcopter that includes everything except the video camera and transmitter. This allows you to easily install your own spare video system (maybe recycled from another build?) without having to build a whole drone around it.
Is it really that much better?
Nazgul Evoque
The Nazgul Evoque is iFlight’s “premium” line (vs. the Eco, its “budget” line). What do you get when you pay a little more? Xing2 motors have titanium shaft and a few other upgrades that make them a little tougher. F7 processor on the flight controller can run a little faster and has more flexible UART functionality. Fancier side plates with LEDs.
Oh — and the Evoque is only available with a DJI O4 video transmitter. You can’t get it in anlog. Because analog is for The Poors.
If you’ve got a little more to spend, you will get concrete upgrades by going with the Evoque. But to be honest, I’m not sure it’s worth it. I’d probably just take the Eco and save a few bucks.
Be sure to read the notes in the Eco’s entry about X vs. DC geometry. The same notes apply to the Evoque.

Rotor Riot
Starter Kits
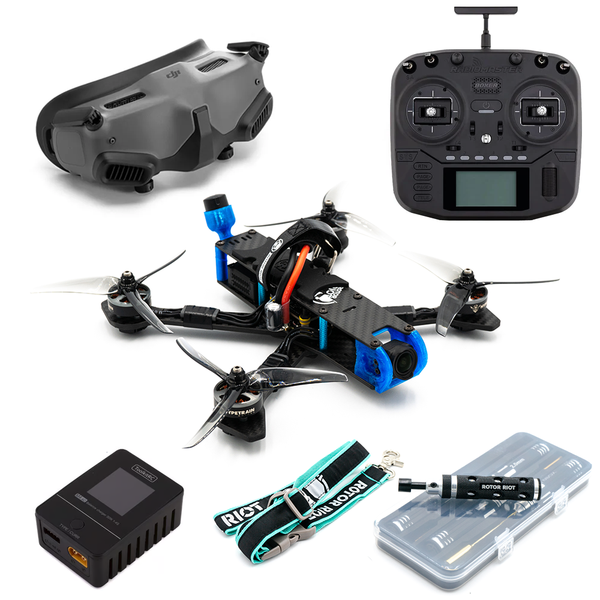
Wouldn’t it be great if somebody sold a kit containing everything you need to start flying an FPV drone, all pre-configured and ready to go. Just charge your battery, turn on your transmitter, power up your drone, and fly? That’s what the Rotor Riot Starter Kits are! They come with the drone of your choice, a controller, a set of goggles, batteries, and charger–all set up and ready to go.
Just pick which drone you want to start with and pick which video system you want to use. That’s it.
Not sure which is right for you? Want to mix-and-match components from the kit or customize something? Contact Rotor Riot support and they can take care of you.
The main criticism of these kits is the price. The quads are hand-built and the kits are configured and tested in Orlando, USA, which means you don’t get the “Chinese labor discount”. People who already know how to do this stuff will say, “I could do all that in ten minutes. And Rotor Riot charges how much?!” To which I say, okay, if you can do it all in ten minutes, then this isn’t the product for you. But if you can’t do it all in ten minutes and you just want to pay somebody else to do it for you, the Rotor Riot Starter Kits are one of the only options available. So I guess they can charge however much they want, and it’s up to you to decide if it’s worth it.
Rotor Riot Pro-Spec builds are made to your exact specificiations, hand-built in Orlando, USA, and with a custom tune made exactly to a pro pilot’s requirements. Like all Rotor Riot Pro-Spec builds, you should contact Rotor Riot customer service if you have questions or want to customize your build.
Rotor Riot
Durability Above All Else
Tanq V2
What if you designed a quadcopter for durability above everything else? You’d get the Tanq. The idea behind this quad is that you can’t fly your best if you’re worried about crashing. And you can’t fly at all if your quad is broken. 8mm thick arms promise to bounce back from the worst bashing. A massive assortment of 3D prints provide even more protection.
Is it heavy? Yup. Frankly, my first impression was that it’s too heavy to really be fun. And I passed it over. But people argued that this is the perfect frame for beginners, who benefit more from its durability than they lose in terms of its lack of agility. So let’s not say it flies “worse”. Let’s say it flies “different” than a lighter quad. The Tanq is significantly less nimble than its more delicate brethren. It’s ideal for more smooth, flowy, exploratory freestyle. If you prefer fast, flippy-floppy style with lots of tricks, this may not be the build for you. But if you want to be able to crash without fear and (almost always) bring home the same number of working quads that you showed up with, the Tanq should be near the top of your list.
Rotor Riot Pro-Spec builds are made to your exact specificiations, hand-built in Orlando, USA, and with a custom tune made exactly to a pro pilot’s requirements. Like all Rotor Riot Pro-Spec builds, you should contact Rotor Riot customer service if you have questions or want to customize your build.
Rotor Riot
The "Only" BnF with Walksnail?
Manta5 Walksnail
The Axisflying Manta5 is a solid contender in this category, but to me it always comes in a close third to iFlight and GEPRC. But what makes this specific drone unique is that it can be ordered with the Walksnail video transmitter pre-installed. That pushes it to the top of the list for Walksnail pilots!
AxisFlying is always trying new things to make themselves stand out. The Argus ESC and FC are cased, with the intent of increasing durability. Accessories plug into the FC instead of soldering, for easier repairs — at least, as long as you buy AxisFlying parts that have compatible plugs. A CNC aluminum plate adds durability and stiffness to the arms. The quad comes with GPS installed as standard, which is a paid upgrade on iFlight and GEPRC models. But check pricing to see which is more expensive in your preferred configuration!
The Manta can be ordered with several different receivers: TBS Crossfire, ExpressLRS 2.4G, and DJI RC controller (PNP). Make sure to order the one that matches the controller you intend to use.
AxisFlying
When selecting a frame, pay attention to whether you’re buying a “deadcat” (DC) or X-geometry version. X-geometry frames will have the arms in a symmetrical X shape. This prodcues a square or rectangular motor layout that gives the most neutral handling for acro moves. But it usually pushes the front motors forward enough that you can see them in the FPV camera. This bothers some pilots, especially those who are recording with a DJI O3 or O4, and who might plan to use the FPV footage for professional editing. Deadcat style pushes the front motors back, which makes the arms un-symmetrical. This can result in some coupling between yaw and roll axis (in other words, the quad will yaw slightly when you do snap rolls). The difference isn’t massive, and many pilots won’t notice a difference, especially if you’re not doing fast, snappy freestyle moves. So don’t be too concerned about buying a DC frame if you want to keep the FPV camera view clear. But if you’re more focused on pure acro performance, buy an X-geometry frame.
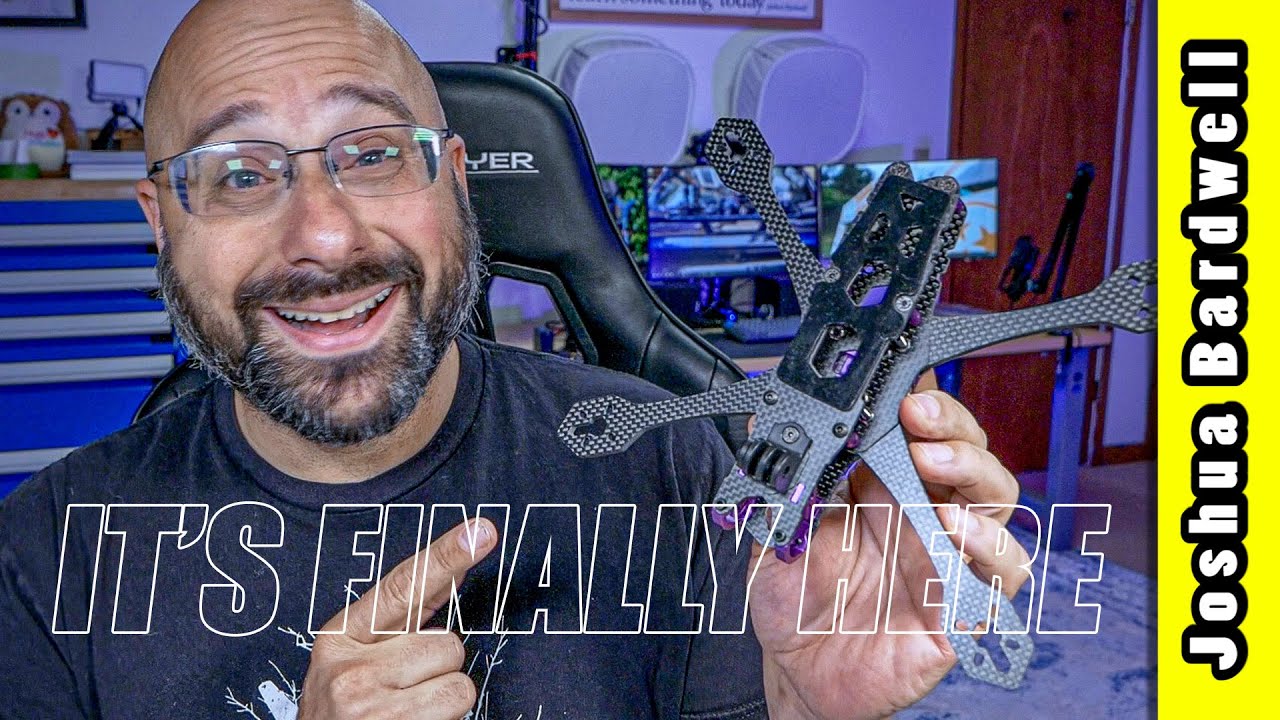
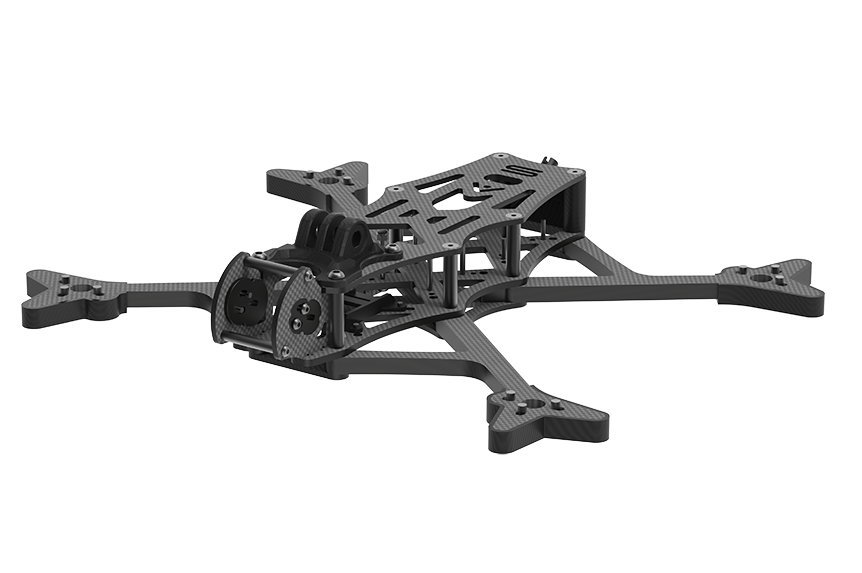
JB Edition
QAV-S 2 Freestyle Frame
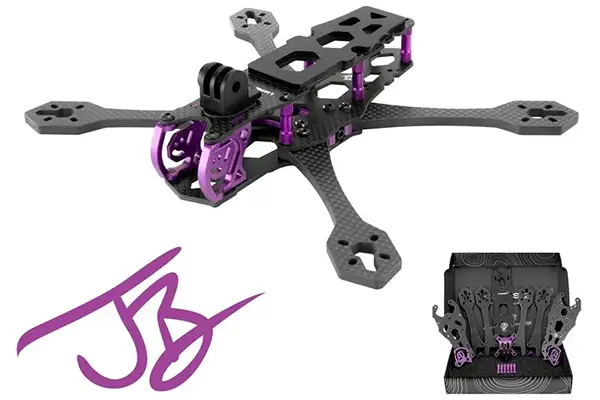
I fell in love with the QAV-S because of the genius way its arms join to the frame, allowing for one-screw arm changes, without putting a weakening screw hole through the center of the arm. But there was a problem: the arms sometimes got wiggly, especially after taking a few crashes. V2 of the QAV-S fixes that with an innovative aluminum arm mounting mechanism. This is the only frame we’re aware of that applies lateral force to stabilize the arms, as well as sandwiching them between frame plates. And if the arms start to wiggle, you just tighten the screw a little and they’re good as new!
The QAV-S hits the sweet spot of being roomy enough to build with ease, without being so big that it compromises flight characteristics. It’s also relatively lightweight, but still tough enough for typical freestyle bashing. (If you are the hardest-core of concrete bando bashers, you might want a heavier and more durable frame.)
As much as I loved the original QAV-S, there were a few things I changed to make the JB Edition. I requested a solid top plate for increased rigidity and strength; this also allowed the removal of one standoff. I shortened the standoffs to a 22m height. I thickened the front-bottom plate from 2mm to 3mm. Finally, I added a few notches to the tapered rear of the top plate, to allow a 2nd battery strap to be used without it sliding backward. All of these changes increased the frame’s strength and durability while keeping the overall weight below 125g, which I think is the sweet spot for great flight performance.
This frame will hold a Caddx Vista, O3, O4, and Walksnail video transmitter, but not an original DJI Air Unit. HDZero Freestyle will just barely fit in the rear, but with so little room to spare, we don’t recommend it.
GetFPV
RaceDayQuads
Engineered to ... Perfection?
AOS5 Evo Freestyle Frame
The AOS5 was created by Chris Rosser, an Aerothermal Engineer who turned his professional expertise towards making the best-flying quadcopter frame ever. Chris used computer-based stress and resonance analysis to balance lightness and strength while pushing vibration frequencies above the range that the FC cares about. The result: clean, smooth-sounding motors, and the ability to turn filtering down and PID gains up for the sharpest flight response you’ve ever had.
All that aside, my favorite characteristic of the AOS-5 is its flexibility. It’s got multiple 20mm, 25mm, and 30mm mounting slots, so you can mount almost any electronics you want. Need to put your DJI O4 in front of the flight controller, leaving the rear free for … whatever? You can do it! The Evo also supports up to 5.5″ props!
If this frame’s up-side is that it was designed by an engineer first and a pilot second, that’s also its downside. The frame is a bit fiddly to build and maintain, and it’s not as durable as some other frames. This isn’t just an issue for concrete bando bashers; even more “normal” pilots may find the balance too far in the direction of “lightweight agility” and not enough in the direction of “heavyweight durability”. I tend to LOVE how the AOS5 flies when it’s brand new, but once the frame gets beat on a little bit, it sometimes flies worse than a more rugged frame with a less “perfect” PID tune.
GetFPV
Indestructible? No way!
ItsFPV ERA
Stealing the best ideas from the past, while innovating into the future: that’s the ItsFPV ERA frame. The most innovative feature is its nylon polymer camera cage. The plastic is near-indestructible. And the custom molding protects and secures the camera like almost nothing else. ItsFPV claims that its carbon fiber is “up to 55% stronger than other frames,” but we don’t know how you’d verify that. It uses T700 carbon for most of the frame, with T800 used in the high-impact front and bottom plates.
A single screw secures your GoPro using the clips built into the bottom of the camera. The “Freestyle Cage” holds the GoPro at a fixed angle, so it doesn’t shift in crashes. You can change the angle by 3D printing a different base for the camera. If you prefer to adjust the angle in the field, choose the “Cinematic Cage” version, which gives step-free angle adjustment from 10 to 30 degrees. But the angle is likely to change if you crash.
The rest of the frame is not as groundbreaking. It just uses all the best design choices of other frames developed to date. Nothing wrong with that.
The main down-side of the frame is its price. It’s one of, if not the most expensive 5″ freestyle frame you can buy. Its proponents would argue that the increased durability makes up for this, but I’m not sure I’m convinced. If you’re shopping for the O4 Pro, make sure to buy the version of the frame specifically designed for that, as the standard version doesn’t fit the O4 camera.
GetFPV (Standard Version Only)
RaceDayQuads (Standard Version Only)
ItsFPV Store -
Standard / O4 Version
FlyfishRC
Volador VX5
The Volador VX5 is a deeply thought-out, well-engineered 5” freestyle frame. Everywhere you look, there are little touches that show the designer was really thinking about how to make the frame better, and not just copy-pasting somebody else’s design. There’s a channel underneath the rear plate where you can tuck the XT60 wires, for example. A hard-mounted XT60 connector (included with the frame) reduces the likelihood of chopping the battery wires. Ample 3D prints allow the frame to accommodate almost any hardware.
But some people will find the frame over-engineered and cumbersome. There are SO MANY PARTS. You’ll probably need to refer to the assembly instructions the first time you put it together. And considering its weight, it’s only average in terms of durability. If you prefer bare-bones simplicity, this isn’t the frame for you.

Quadmula
Siren F5
The Siren gets a place on this list because of its versatility and well-thought-out design. It’s not perfect, but it’s got enough going for it that some people are going to love it. It can mount almost any video transmitter and camera you prefer, even large digital ones; and there are clever 3D prints to keep things clean and tidy (we love the dual capacitor mounts).
There are four versions of the Siren F5. The “standard” one has a single-piece bottom plate with 25mm height through the entire length of the frame. This version can fit up to 5.5” props, and those using 5” props will appreciate a little extra room between the body and the props (fewer chopped battery leads). The “split” version splits the bottom deck similar to frames like the QAV-S and the Apex. This means the middle and rear of the frame have shorter standoffs, for a more compact build. Both the “split” and the “standard” versions are also available in a “mini” version which has shorter arms and is lighter weight. The “mini” only fits up to 5.2” props, but otherwise shares the features of the larger version.
The “standard” Siren frames weigh around 105g, and the “mini” around 95g, which is extremely light for a freestyle frame. Lighter builds can be more nimble and fly longer. They have been carefully designed for stiffness and resonance, so they should fly well on default PIDs, and those who push PID tuning the limit will be able to get a lot more out of these frames. However, lightweight freestyle frames are not the most durable. If you fly hard and crash a lot (especially into concrete or asphalt), this may not be the frame for you.
Most complaints about the Siren frames center on durability. The standoff screws are M2 size, with a vibration-isolating “sock” over them to bring them up to the standard M3 diameter. M2 screws are much more likely to bend in a crash, and most FC and ESC already have vibration-isolating “gummies”, so many people would prefer this frame come with M3 stack screws. Unfortunately, this isn’t possible without modifying the frame.
The frames also don’t have mounting for 20mm FC/ESC. A larger 30mm ESC hangs out over the hourglass shape of the frame, and some users complained that this caused the ESC to take more hits and die sooner.

Quadmula Store
Best Budget Choice
SourceOne V6
The Source One is one of the best values in FPV frames. It’s community-designed and all the CAD files are open-source and available for anyone to manufacture. As a result, The Source One is one of the least expensive frames you can get and is available nearly everywhere. (You could even cut it yourself if you have a CNC machine!)
While the Source One will get the job done, it’s obviously been manufactured to a price. It’s a sparse and utilitarian frame, but if you’re on a tight budget, it’s a great choice (and no guilt over buying a “clone”).
If you go shopping for a SourceOne, be aware that there are different versions of it for sale. The most common today are V3, V4, V5, and V6. And some people think the V3 is the best! So consider carefully which one you want to get. Because it’s open source, not all versions of it are manufactured by TBS themselves. There’s nothing wrong with that; just make sure you know what you’re buying.

GetFPV
RaceDayQuads
Team BlackSheep
MOTORS
Motors make the props spin and the quadcopter fly. When selecting motors, it’s important to choose the correct size and kv for your propeller. A deep dive on that topic is way too much for this paragraph, so we’ve selected appropriate motors for this category. If you really want the deep dive, check out this Chris Rosser video.
All of the motors on this page assume that you’re using a 6S battery. Most people doing 5″ freestyle choose 6S, and if you’re a beginner starting out, you should probably choose 6S as well. In the past, there was a debate as to whether beginners should choose 4S batteries, because they’re a little less expensive and the performance benefits of 6S are a little less relevant to beginners. The problem is that 4S has fallen so out of favor that there are relatively few motors being made for 4S batteries any more. So we think you should just bite the bullet and go 6S. It’s where you’re probably going to end up anyway.
The best ... on paper
AOS Supernova 2207 / 1980KV
Chris Rosser, founder of AOS, set out to make the lightest, most powerful, most efficient motor in existence. He found a piece of software that simulates the electromagnetic fields inside a brushless motor. Then he designed an AI front end that changes the parameters of the motor over tens of thousands of generations until it finds the perfect design to produce the desired outcome.
The result is a motor that when compared to motors of similar weight, produces 33% more torque, 18% more thrust, and is 4% more efficient. That’s not speculation. It’s a fact.
The main innovation of the AOS Supernova is a semi-hollow stator. Chris found that the magnetic flux was weak near the center of the stator, and didn’t contribute much to the motor’s performance. By removing this material, he was able to make a bigger motor without increasing its weight.
You see, this isn’t really a 2207 motor. It’s actually closer to a 2308. And, compared to other 2308 motors, its performance isn’t as remarkable. But those motors are all 10-ish percent heavier! So what you’ve got here is the performance of a 2308-ish motor, for the weight of a 2207 motor.
The big question is, do you need it? Because these are some of the most expensive motors in this class. And if anybody would benefit from increased performance, you’d think it would be racers, but none of them seem to have picked up this motor. Maybe the message is that such a perfect motor will never be truly appreciated in its time. Or maybe the message is that a “typical” 2207 motor for $22 is enough to satisfy most people.
RaceDayQuads
GetFPV
Best Value
Emax Eco II 2306 / 2207
When the Emax Eco II first came out, I couldn’t figure out why Emax was selling such a good motor for such a low price. Years later, I still can’t figure it out — but I don’t care! I’m just glad they’re doing it. These are not ultra-premium motors with one-piece, CNC-milled bells; titanium shafts; and other top-end features. They’re just basic, durable, reasonably-performing motors at a price that won’t make you cry when you inevitably break one.
The 2306 and 2207 size are ideal for 5″ or maybe 6″ props. The 2807 is ideal for 7″ props. For 5″ props, choose 1700kv for longer flight time on 6S batteries, 1900 kv for more power on 6S batteries, or 2400 kv for 4S batteries. For the 2807, choose 1300 kv for long-range cruising on 6S batteries, 1500 kv for a bit more power on 6S, and 1700 kv for 4S, or for 6S builds intended for aggressive freestyle.
If the Eco II is available in a size that you want, from a store that you want, it’s hard to argue that you should buy anything else. Motors that cost twice as much may be better, but are they twice as good? Especially if you’re just going to destroy them in a crash.
RaceDayQuads
GetFPV
NewBeeDrone
Amazon
Emax-USA
Also Best Value
T-Motor Velox 2207
Here’s another great budget motor choice from one of the most respected and prominent motor manufacutrers in the world of FPV. This is one of the only motors in this price range to use arc magnets instead of flat magnets, which is supposed to make the motor run smoother and allow for a tighter arc gap. Assuming you’re using 6S batteries, we recommend 1750 kv for cruising and flowy style with longer battery life and 1950 kv if you want more top-end power.
GetFPV
RaceDayQuads
Premium Choice
Xing2 2207
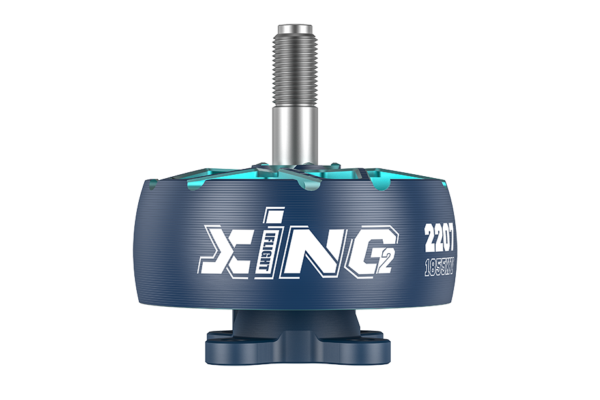
Everything about Xing2 motors is top of the line: single-piece curved bell in 7075 aluminum for maximum durability; center-slotted N52H curved magnets for maximum responsiveness; NSK bearings; titanium alloy shaft; and a proprietary o-ring between the bearing and the bell to help protect the bearing from impacts and smooth out vibrations.
This is a top-of-the-line motor in every way. So why isn’t it more expensive? My theory is that iFlight manufactures these motors in huge quantities for their bind-n-fly drones and that brings the price down.
The Xing2 2207 is a great all-round choice for freestyle.
Choose 1855 kv for 6S batteries, which is what we recommend for 5″ freestyle.
GetFPV
RaceDayQuads
NewBeeDrone
iFLight Store
Weird size. For a reason!
SpeedX2 2107.5
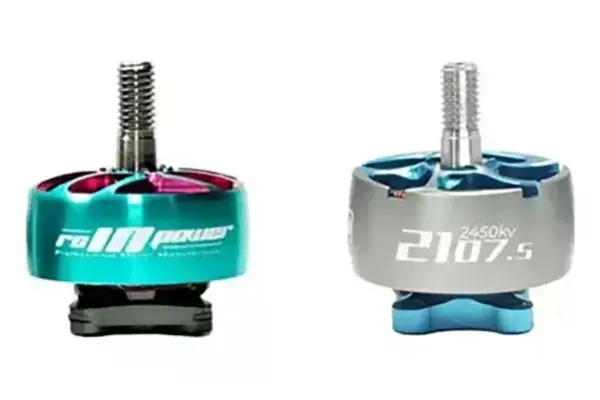
When I first saw this motor’s odd size, I thought it was just a marketing gimmick. 2207 is so played out! Let’s make a 2107! No wait! 2107.5! That’ll really stand out! But I was wrong. This motor is made by RCinpower, and they don’t play around when it comes to making great motors. So I went back and thought about the effect of a motor’s shape on its performance.
Wider motors have more surface area for better cooling. Taller motors are more responsive because their mass is closer to their axis of rotation. The volume of this motor is about the same as a 2207, but it’s narrower and taller. In other words, this is a slightly more responsive motor than a 2207, with slightly worse cooling.
And you know what? That’s actually a pretty good idea. Because freestyle pilots are seldom at full throttle for long periods of time, so the motors won’t tend to get very hot; and the additional responsiveness makes for better flight characteristics.
If you live somewhere with very hot temperatures, or if you spend a LOT of time at high throttle, then this isn’t the motor for you. If your current 2207 motors come down smoking, this isn’t the motor for you. But if you’re like most freestyle pilots, you should think about giving the RCInpower 2107.5 a try. (Or buy the GEPRC SpeedX2, which is basically the exact same motor, just with different branding.)
RaceDayQuads
NewBeeDrone
GEPRC
Budget Go-To
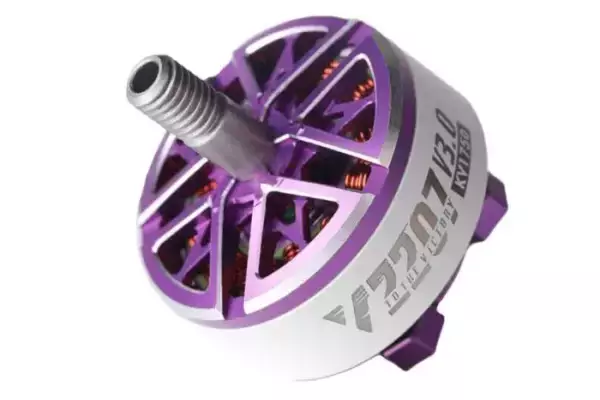
Xing-E 2207

Xing-E is iFlight’s budget line of motors. Xing-E Pro motors have hollow steel shaft instead of titanium alloy shaft, so they might be slightly less durable. They’re still a one-piece milled aliuminum “uni-bell” just like the premium Xing motor. I don’t think the steel shaft by itself should make up the price difference, but I can’t really figure out where else they cut corners to make the price lower. The one thing I do note is that the Xing motors are advertised as using stornger 7075 aluminum, whereas the alloy for the Xing-E motors is never mentioned. If the Xing-E motors use softer, cheaper aluminum, that could also affect their durability. But anecdotal reports from the field are that they’re pretty durable. And spare bells are widely avilalbe to make repairs. The Xing-E Pro is the budget choice of many pilots.
The motor is available in several kv. Choose 1800 kv for 6S batteries. 2400 and 2700 kv are for 4S batteries, which we don’t recommend for 5″ freestyle any more.
GetFPV
RaceDayQuads
iFlight Store
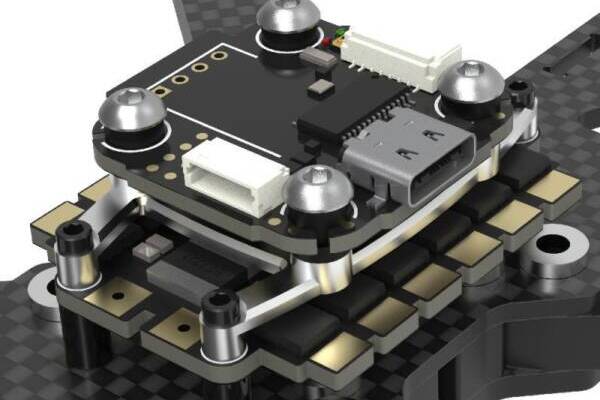
The flight controller (FC) is the brain of the quadcopter. It receives your commands from the receiver and translates that into motor outputs that make the quadcopter fly. The electronic speed controller (ESC) takes the motor signals from the FC and does the actual work of making the motors spin.
When selecting a FC, one of the main considerations is which processor it has. F4 processors are slower and less expensive. Realistically, their slower speed doesn’t have a noticeable effect on how your drone flies, but if you want to turn all the knobs to 11, don’t get an F4. F7 and H7 processors are faster and more expensive. FC with H743 processors are the cutting edge for FPV drones. They also can usually run iNav and Ardupilot firmware, in addition to Betaflight, if you care about that.
FC come in several sizes. For 5″ drones, 20mm and 30mm are most common. 20mm FC are smaller and a tiny bit lighter, but are more restrictive to build, since their smaller size doesn’t allow for as many plugs and solder-pads. 20mm ESC are usually, but not always, less durable than 30mm. Our opinion is that, for 5″ freestyle builds, you almost always have enough room for a 30mm FC, so that’s what you should use.
For ESC, the main specification to check is the amp rating. Pretty much all of the 30mm ESC’s on the market have enough amp rating for the motors of a 5″ drone. Buying an ESC with a higher amp rating can, in theory, increase durability. But the reality is that the design of the ESC has more to do with the durabiilty than the amp rating on paper. So don’t stress too much about the amp rating.
ESC’s can be either 8-bit or 32-bit. 32-bit are more expensive, but their more powerful processors allow configuration of more parameters. 8-bit are less expensive and still support pretty much all the same features as 32-bit, but changing some parameters requires re-flashing the ESC instead of just moving a slider in an app. Under most conditions, 8-bit ESC’s perform as well (or sometimes even beter) than 32-bit. The main reason to choose 32-bit is if you want to experiment with ESC performance settingsl ike PWM frequency, or if you have money to spend and just want the best.
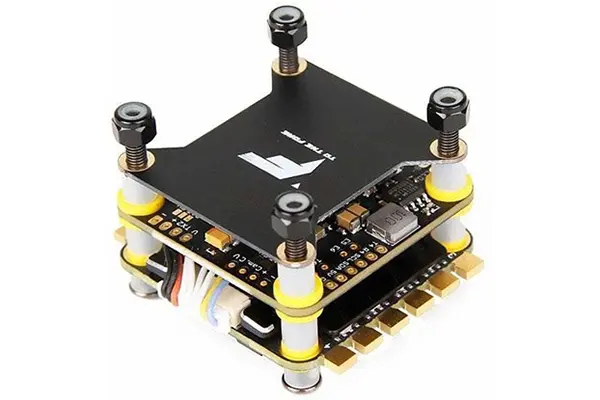
Innovative! To a fault?
TBS Lucid Stack
TBS makes damn good hardware. When TBS says the ESC is rated for 70 amps, I believe they actually tested it at 70 amps instead of just pulling that number out of their butt like most manufacturers would. The FC is only 20mm in size, but has solder pads and plugs for six full UARTs. And it’s one of the few FC you can still buy with an MPU6000 gyro — widely considered the cleanest and most durable for FPV drone use. (You can save a little money by buying the ICM-42688P gyro version.)
But there’s this thing that happens in FPV, where a manufacturer comes out with a new design that has some advantage, and nobody uses it because it’s not compatible with all the hardware made for the old design. And I fear that’s what’s going to happen with the Lucid Pro stack. In order to optimize the layout of the FETs on the ESC, they’ve moved the mounting holes to a new pattern that doesn’t fit the 20mm or 30mm holes on existing frames. They call it “Gorilla Mount”. So you either buy one of the few frames with Gorilla Mount , or you use an adapter plate that adds weight and bulk.
Is it worth it? The new ESC has some advantages, but it’s not clear to me whether those advantages will outweigh people’s desire to stick with what’s familiar. Likewise, I’m a little annoyed at the insistence on making the FC 20mm in size. In every situation I’ve encountered, 20mm FC are more annoying to work with than 30mm, so I only use them on smaller, more compact builds.
The Lucid ESC is available in both a 6S and an 8S version. If you’re planning to experiment with higher-voltage batteries, make sure to get the right one.
Team Blacksheep -
FC&ESC Stack / Mounting Adapters
GetFPV -
FC&ESC Stack / Mounting Adapters
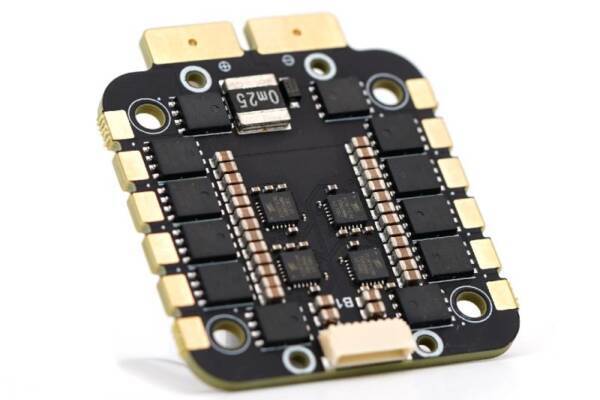
"Indestructible" ESC
T-Motor F7 HD + F55A Pro-II ESC
The T-Motor F7 is a high-quality flight controller with all the features you might expect. But what really stands out in this combo is the F55A ESC. This is one of the most durable, reliable ESC’s you can buy today. I won’t go so far as to say it’s indestructible, but it’s about as close as you can get in this hobby.
This FC does not support analog vTX and camera. It is only for HD (digital) video systems like Walksnail, DJI, and HDZero. This can be a little confusing because there is an identically-named T-Motor FC that does have analog support.
If you hate soldering, Rotor Riot has a solder-free version of this stack, which comes with XT60 pre-soldered and plugs soldered to the ESC. You can buy Rotor Riot motors with plugs-pre-soldered and just plug it all together.
As of February, 2025, I am hearing reports that the legendary reliability of theF55 ESC may be no more. Some people on my Discord server say they’re burning up the F55 and no longer use it. On the other hand, I know of several commercial operations that, together, use 30-50 of these ESC’s a year, and have had no issues with them. One says the reliability used to be bulletproof, and now is “just normal.” For now, I’m keeping them on the list, but I thought you should know.

RaceDayQuads
GetFPV
FlyFIve33
Rotor Riot (solder-free version)
"Indestructible" ESC
Hobbywing Xrotor F7 w/ 65A ESC
Hobbywing has always made some of the most reliable ESC’s in the FPV market. Lately, they’ve started stepping up their FC game as well. This stack starts with a 32-bit ESC, so you’ll get all the latest features like variable PWM frequency and startup music. The 60-amp rating is far more than most will need, up to about 7″ props. It has a 12v regulator to power your video transmitter (whether analog or DJI), including an onboard pit switch, which allows you to switch the vTX off remotely if you want to power it up without interfering with your friends. It’s even got a built-in camera switcher, so you can view two different cameras (analog only) such as one forward and one rear or downward facing.
One drawback of this FC is its compact size. It’s designed with both 30mm and 20mm mounting holes. The 30mm holes are on break-off tabs. This means that the FC is basically 20mm in size, which severely limits the available space on the board. As a result, there are small and limited solder pads, and some resources are only available in plugs. This approach is confusing since the ESC has only 30mm mounting holes, so if you’re buying the FC and ESC together, you’ll never use the 20mm holes.
Despite this quirk, the Hobbywing Xrotor Micro F7 is a great FC at a decent price, paired with an exceptionally good ESC.
RaceDayQuads
GetFPV
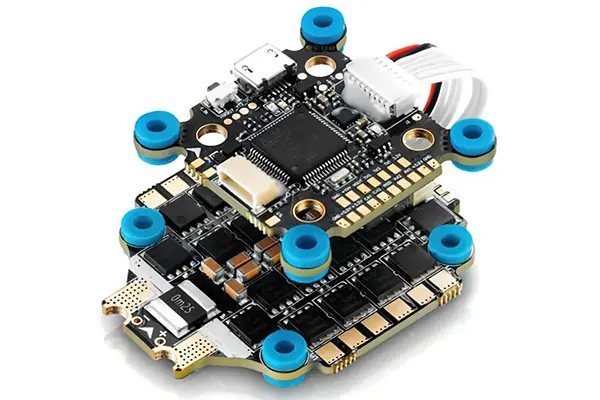
It Does Everything!
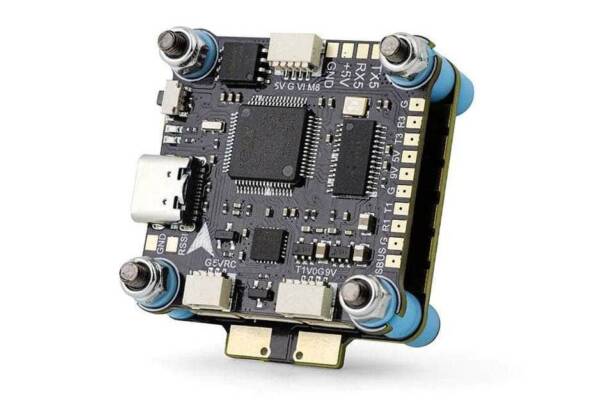
TBS Lucid H7 FC
This is an absolute beast of a FC. I can’t believe how much functionality is packed in here. Dual gyros. Barometer (with foam cover already installed). 13 motor outputs! 7 UARTs. 2 i2c busses. CANBUS support. 2 camera inputs with built in switcher. 8S support. Enough analog inputs for 2 separate vBat sensors, RSSI sensor, airspeed sensor, and more. Built in pit-switch to power vTX on and off. SD card slot for blackbox logging. Support for Betaflight, iNav, and (soon) Ardupilot.
With all that functionality, you’d expect it to cost a lot, but it doesn’t. It’s not the cheapest out there, but it’s very reasonable. Is it overkill for most builds? Yes. But it’s really nice to know that, whatever I want to do, my FC can do it.
Frankly, there’s very little this FC can’t do. It’s become my go-to FC for most builds, especially because it pairs beautifully with the TBS Lucid ESC.
Team Blacksheep
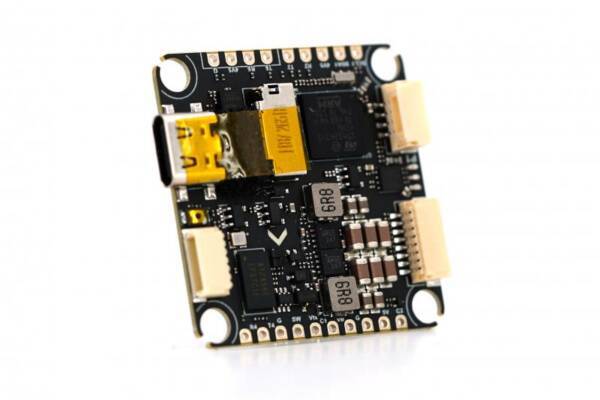
Specs You Can Believe!
TBS Lucid 8S 60A ESC
This ESC ticks all the boxes. 60 amp rating. Supports up to 8s voltage. Runs AM32 firmware. And here’s what I love the most about it: it’s made by TBS, so you know when they say it’s rated for 60 amps, it means they put it on a test stand an pumped 60 amps through it for hours just to see if it would melt. Okay — I don’t know for a fact that they did that, but the point stands. TBS makes solid gear and stands behind it. And that’s what you want from an ESC.
Oh. And it’s pretty inexpensive too.
Team Blacksheep
Budget Choice
HGLRC Specter F460 w/ 60A ESC
Here’s another extremely affordable FC/ESC stack for builders on a budget. Let’s be clear: the Speedybee F405 beats this stack in almost every way. It’s got more UARTs. It’s got Bluetooth built in. Just about the only way the HGLRC Specter beats the Speedybee is in its ESC amp rating — and let’s be honest, who knows how accurate that amp rating really is? The Specter also has two ESC plugs for up to 8 motor outputs, whereas the Speedybee would require you to solder on motors 5-8 if you were building an octo-copter.
So why’s the Specter here? Because the world needs more affordable FC’s and ESC’s. And you never know … maybe the Speedybee is out of stock!
With a product like this, you always wonder if it’s inexpensive because it’s bad quality. I asked a couple of stores that sell the Specter and they said their return rate was not very high. So until I hear otherwise, this product gets to be on the list.
RaceDayQuads
Every FPV aircraft has a camera and a video transmitter to send the camera feedback to the pilot. Which camera and video transmitter you choose depends on which video system you’re using. Video systems are divided into two categories–digital and analog–and we have a page with recommendations for both.
If you’re using a digital video system (DJI, Walksnail, or HDZero), CLICK HERE.
If you’re using an analog video system for freestyle or cruising, CLICK HERE.
And if you’re still not sure which is best for you, here’s a video to help you decide:
Batteries for 5″ freestyle will almost always be 6S voltage. There was a time when 4S was king, and then a transition period where there was a question of which was better. The question is settled. The only remaining debate is whether a beginner should save a little money by starting off on 4S, then switch to 6S later. To which we say, no. Don’t do it. You’ll outgrow 4S far faster than you’ll outgrow your 4S batteries. If you really want, you can use a throttle limit to make your 6S batteries feel less powerful.
Capacity is measured in milliamp-hours (mAh). Higher mAh packs give longer flight times, but are heavier, so the quad isn’t as nimble. Recommended 6S battery size for a 5″ freestyle drone is a weight of about 180 to 220 grams, and a capacity of about 1100 to 1400 mAh.
C-Rating refers to the battery’s ability to deliver current (power). Higher C-rating batteries give more power but cost more. Batteries below about 100C should not be considered for 5″ freestyle drones. Keep in mind that C-rating numbers contain a lot of marketing. A good quality 120C battery might trounce a mid-tier 130C battery. Don’t put too much stock into marketing numbers.

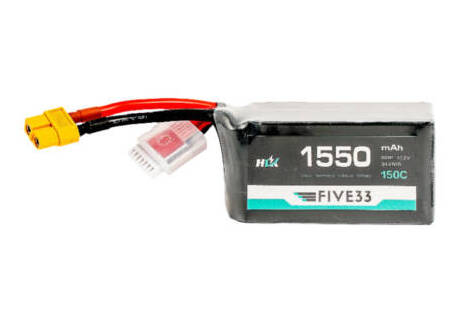
Premium
Tattu R-Line V4 6S 130C
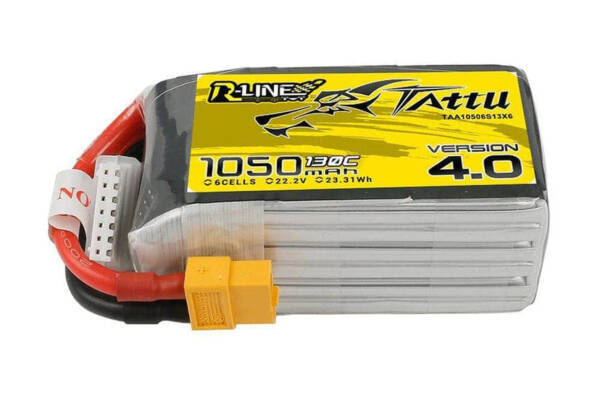
RaceDayQuads (1050 mAh)
NewBeeDrone (1050 mAh)
Five33 (1050 mAh)
Five33 (1300 mAh)
NewBeeDrone (1400 mAh)
GetFPV (1550 mAh)
The best. By a WIDE margin.
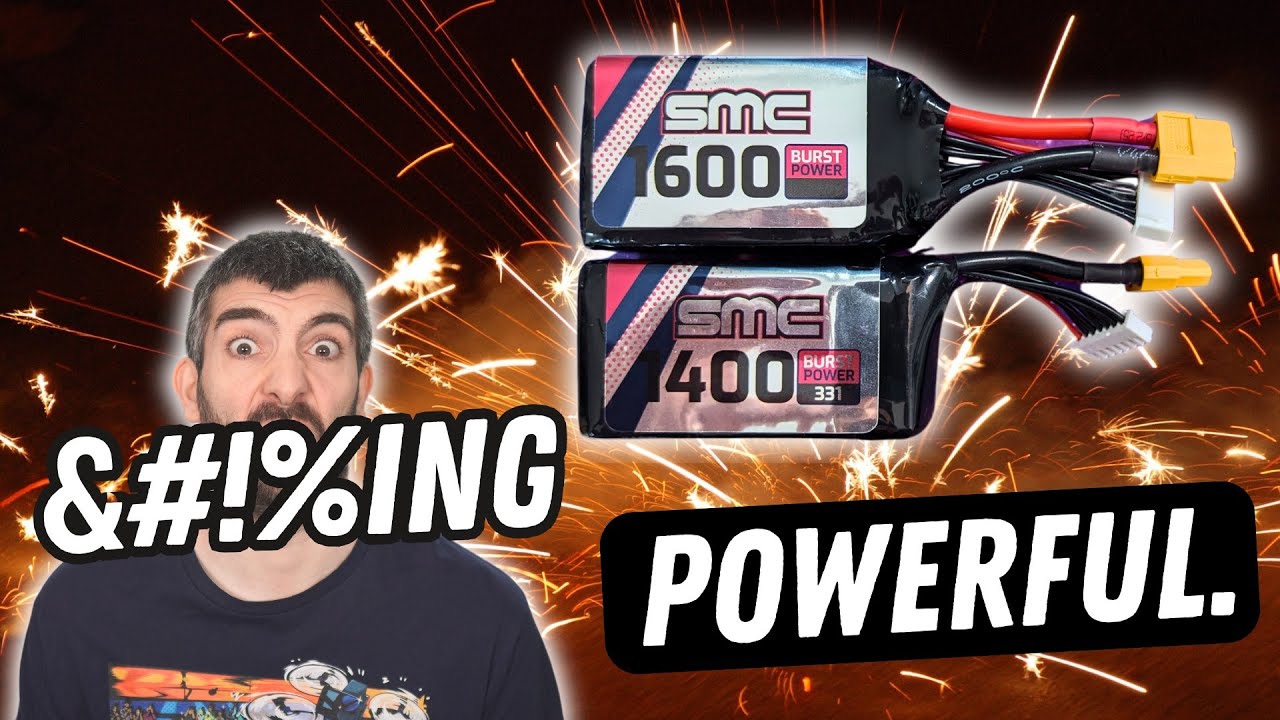
SMC HLC-RS
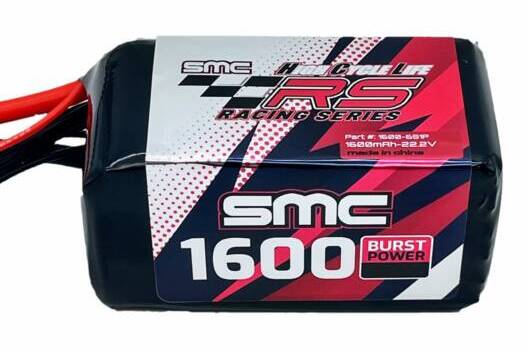
These are, hands down, the best, highest-performance lipo packs can buy in this class today. I feel so weird saying that because usually there’s some back-and-forth when comparing products. It’s so unusual to have one that is just … the clear winner … in everything! These SMC packs have the highest energy density, lowest voltage sag under load, best peak power, best continuous power… you name it.
The 1400 mAh version weighs 208 grams and performs closer to a typical 1650 mAh pack weighing around 260 grams. The 1600 mAh version weighs 240 grams and performs closer to an 1800 mAh pack weighing around 290 grams. And the pricing of the SMC is the same or lower than other ultra-premium brands!
Just to be clear, if you are looking for an ultra high-density, low-discharge pack for long range flying, this isn’t it. But as long as you are looking for a high power pack for racing or freestyle, this is the one to buy. How is it possible? SMC is working with the best cell manufacturer in the world and then selling packs at a lower margin than their competitors, to keep them affordable. That’s the short version. If you need to hear the gritty details, watch Chris Rosser’s testing video below.
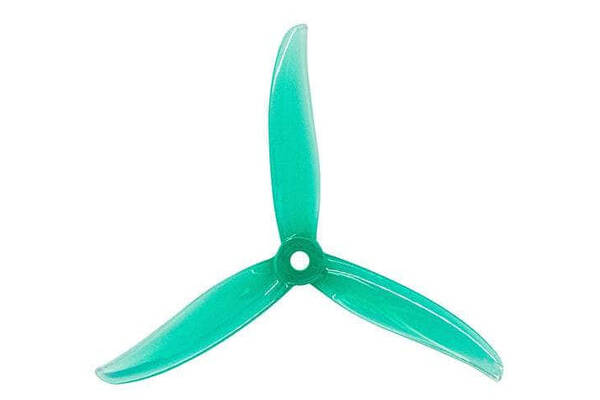
Choosing a propeller can be so confusing! There are so many options! Which is best! The good news is that a pack of props is not too expensive, so it’s not too difficult for you to try out a bunch of them. And that’s what we recommend you do!
The basic specs of a prop are its diameter and its pitch. Pitch is the steepness of the angle of the blades. Larger diameter props make more thrust and are more efficient. Higher pitch props make more thrust, but are less responsive. By definition, we are looking at 5″ props, however the actual diameter can vary from about 4.9″ to 5.2″. For freestyle, most pilots will choose a lower-pitch, smoother, more responsive prop. But depending on your flight style, and especially if you are flying at higher altitude with thinner air, higher pitch might be appropriate.
Props also come in different blade counts. 2-blade up to 4-blad have been tried, but for 5″ freestyle and racing, 3-blade is almost universally considered the best.
Prop durability also should be considered. If the prop explodes the minute you touch a tree branch, it’s probably not very good for freestyle. We love props that bounce back from a crash. Props you can just bend back to level and go fly again!
We recommend starting with a middle-of-the-road prop like 5.1″ diameter and pitch around 3.5″. But don’t be afraid to experiment. Spend $40 or $50 on 8 or 10 bags of props and spend the afternoon trying them all out to see which one you like the best!
Gemfan Hurricane
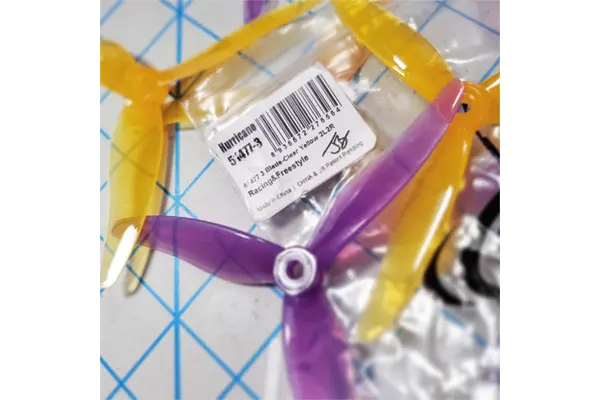
The Gemfan Hurricane line has a prop for almost anybody. It’s a great all-round combination of thrust, efficiency, responsiveness, and durability. I like the 51477 version so much, I even have a JB-branded one in my signature purple and yellow colors!
Choose the 4937 if you want a little more responsiveness at the cost of flight time and max power. The 51XX are the middle ground. 51433 is a great, smooth freestyle prop. 51466 and 51477 give a little more thrust at the cost of smoothness (also good for higher altitudes where air is thinner). The 51499 goes significantly further in this direction, and may be more appropriate for racing than freestyle — but that’s up to you! Finally, the 5236 is even larger in diameter, for increased flight time at the expense of responsiveness.
One annoying thing about the Hurricane line: the last two numbers do NOT indicate the prop pitch. The 51499 is NOT 4.9″ pitch. It’s 4.2″. This is especially frustrating because many stores list the pitch as the designated number (e.g. 4.7″ for the 51477). I have no idea why Gemfan decided to buck the normal naming convention this way. When you’re comparing Hurricane props to other props, be sure you know the ACTUAL pitch of the Hurricane prop, not the number in the name.
51433 pitch is 3.5″
51466 pitch is 3.6″
51477 pitch is 3.7″
51499 pitch is 4.2″
GetFPV -
4934 / 4937 / 51433 / 51466 / 51477 / 51499 / 5236
RaceDayQuads
NewBeeDrone
Rotor Riot
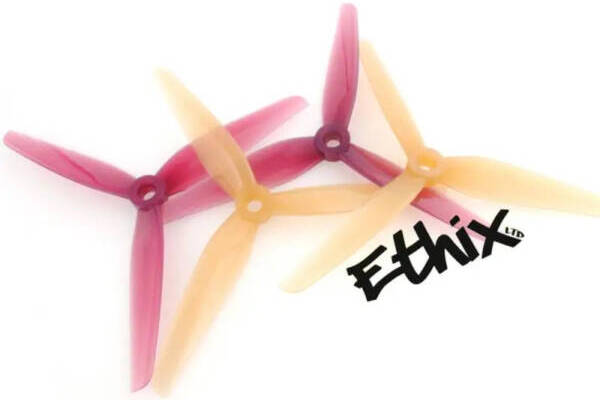
Ethix Series
I always thought these props were overrated until I tried them on Mr. Steele’s actual quad. Then I got it. These props are terrible on heavier freestyle builds. That’s not what they’re made for. But on lightweight freestyle builds (5″ quads under 650 grams All Up Weight) they come alive.
Have you ever dove over an obstacle and then needed to catch yourself precisely at the bottom to fly through a gap? That’s where these props excel. You can find the exact throttle position you need quickly and precisely, without over-shooting or pulsing the throttle. They’re also easy on the battery for extended flight time. The tradeoff is that they lack the razor-sharp cornering and neck-snapping acceleration you get with higher-pitch props.
The S line are 5.0″ in diameter, in increasing pitch. Steele recommends the S3 for quads between 500-650g, up to about 3000′ above sea level. The S4 gives a little more thrust, especially suited for altitudes up to 10,000′. The S5 has the highest pitch and is for heavier quads up to 750g (such as carrying a GoPro). The S5 is also 18% gray to make it less visible if it’s in the camera’s view.
The P line are 5.1″ in diameter, for slightly more efficiency and thrust, with slightly less responsiveness. They may be more suited to slightly heavier builds.
The K line are 6″ props and probably won’t fit on your 5″ freestyle build, but they might show up in some of the linked search results.
GetFPV
RaceDayQuads
NewBeeDrone
Gemfan Sbang 4934
This prop is designed to be lightweight and responsive. The name suggests it’s ideal for the snappy flips and abrupt stops of “sbang” style freestyle, as popularized by Marius FPV, Farouk FPV, and others. It achieves its responsiveness via a smaller diameter and low pitch. This means it won’t make as much thrust as heavier, higher-pitch props. It’s also less durable.
This prop is sold in packs of all CW or all CCW. Make sure to buy both directions!
RaceDayQuads
GetFPV
NewBeeDrone
Rotor Riot
More FPV accessories can be found on our HD Cameras, Backpacks & Other Accessories page.
Prevent Lost Drones
Vifly Finder 2 and Finder Mini
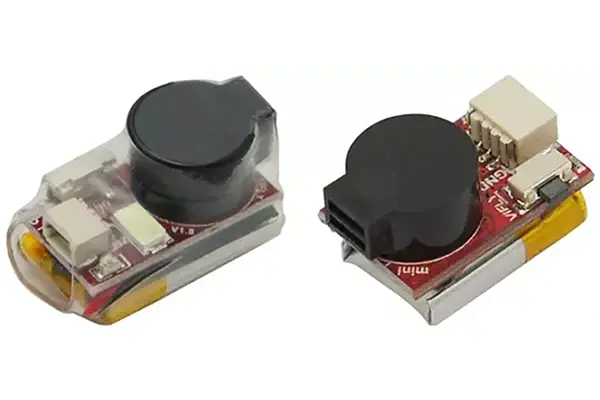
Let’s say you crash your quad somewhere and can’t find it. What do you do? Try to “home in” on the video signal? Beep the beeper? Maybe even arm the quad and listen for the sound of the props thrashing around in the brush. But none of that will help if your battery ejected in the crash and your quad is powered down.
That’s where the ViFly Finder comes in. It’s a super loud (up to 105 dB!) beeper with a tiny 1S lipo cell connected to it. A short while after the quad loses power, it begins beeping, and it doesn’t stop until you find it and disable it (or until the battery runs down). The Finder also acts as a normal beeper that you can activate with a switch on your controller whenever you want.
There are two versions of the Finder: the Mini and the Normal. The Mini is about 3g and its battery lasts about 7 hours. The Normal is about 5g and its battery lasts about 30 hours. In addition, the Normal has a light sensor that turns off the beeper at night. This avoids annoying your neighbors and wasting battery during time when you might not be looking for the quad.