
WHAT’S NEW ON THE SHOPPING LIST
Here’s everything we’ve added to or removed from the shopping list in the last 90 days, newest first.
Basically, all of the links on this page are affiliate links. I receive a commission (at no extra cost to you) if you make a purchase after clicking one of the affiliate links below. Read our Affiliate Link Policy for more information.
November 12, 2026
Show product
Orqa FPV.One 533 Edition
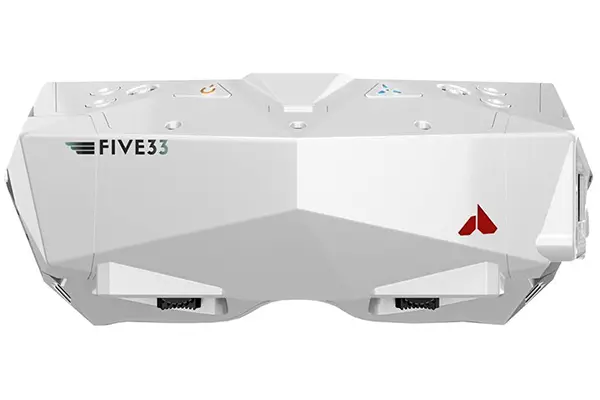
The FPV.One Pilot has a 38 degree field of view (how big the screens appear inside the goggles). Some racing pilots feel that even this is too big, because they like to see the whole screen without moving their eyes around too much. To address this, the FPV.One Pilot has a Racing Mode that uses only the center of the screen to display a smaller image, with 33 degrees FOV.
But you’re still paying for the whole screen, even if you’re not using all of it.
The 533 Edition of the FPV.One uses smaller, lower-resolution screens, to give a native 33 degree FOV. It’s also a fair whack cheaper than the FPV.One Pilot. That’s the difference. (Ok, it’s also a cool color.)
The 38-degree FPV of the Pilot was already a little controversial, since the V1 Orqa goggle had a much larger FOV. But 38 degrees is big enough and I never feel like I’m missing out on much when I fly with my Orqas. But the 33 degree FOV of the 533 edition is a LOT smaller, and normally I would say this is way too much to pay for a goggle with such a small screen. But I full expect to see Evan Turner flying these goggles at every race he goes to. And if 33 degrees FOV is good enough for him, I guess it’s probably good enough for other people too.
Show product
Avatar HD Nano Kit

The idea behind the Nano kit is that you want a video transmitter and camera that are a little bit lighter and smaller than the full size vTX, but not as small (and, let’s face it, fragile) as the 1S vTX. The Lite kit comes in around 11 grams; the Pro kit comes in around 30 grams; the Nano is closer to 20 grams.
If you look closely at the specs of the Nano kit, you’ll see they’re exactly the same as the 1S Lite kit. In fact, the Nano looks an awful lot like somebody took a 1S Lite Kit and put a metal case on the vTX. This should improve durability and heat dissipation, but otherwise the Nano and the Lite vTX should be pretty much the same. And for that reason, we kind of don’t see the point of this vTX. If you’re going to put a 20 gram Nano vTX on your drone, you can probably afford a 30 gram Pro vTX, which will come with a much superior camera, better durability, and more output power for better range and penetration. If you want a lightweight vTX, shouldn’t you just go all the way down to the Lite Kit? Just about the only person who needs the Nano is someone who wants to save 10 grams by not using the Pro, but is willing to spend 10 grams to increase durability by not using the Lite either. And we just don’t think there are very many of those people.
But if you’re one of them, more power to you!

RaceDayQuads
Caddx
Rotor Riot
NewBeeDrone
Flywoo
Show product
T-Motor Mini F7 HD FC / T-Motor 60A 8S ESC

If you look closely at this flight controller, you might guess that it’s actually made by Aikon and sold under T-Motor’s branding. The layout is very similar and the features are nearly identical. No matter who makes it, T-Motor has a great reputation for quality and performance. But mostly, I’m including it as an alternative in case the Aikon is out of stock.
If you go with this FC, the recommended ESC is the F60A 8S. Just like with the FC, we suspect this is actually designed and/or manufactured by Aikon, and that’s a good thing. This is as close to bulletproof as a racing ESC can get.
RaceDayQuads
November 11, 2026
Show product
Skyzone SKY04X Pro
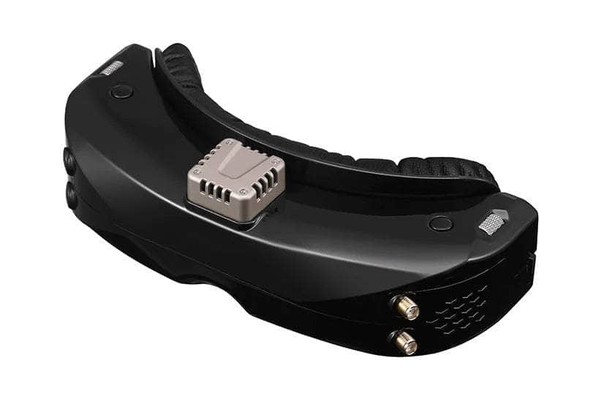
The SKY04X Pro is Skyzone’s top analog goggle. It’s basically the SKY04X with new 1080p OLED screens and an HDMI input that can show Walksnail’s 100 fps mode. It’s for pilots who fly analog first and want to dip a toe into Walksnail or HDZero via a standalone vRX.
Plug in the Walksnail standalone receiver and you get basically the full Walksnail experience without buying Walksnail goggles. Everything works except 1080p at 100 fps. HDZero works through its standalone receiver too, but only at 60 fps.
The screens have a huge 52° field of view. Honestly, that’s a little too much of a good thing — if the goggles aren’t sitting just right on your face, the corners of the screen get cut off. The receiver held a stable picture even in weak signal: no rolling, no flashing. Skyzone goggles have always fit my face really well, and these come with two face plates. Budget for circular-polarized antennas — the stock ones are linear rubber duckies.
With its original firmware, the SKY04X Pro had disappointing latency — about 16 ms in diversity mode and 19 ms in mix mode — in nils vo’s tests. Skyzone fixed that with firmware V4.2.1, which brought it down to about 12 ms in every mode. It also fixed stuttery video. Check your version under System > Firmware version, and update if it’s older than V4.2.1.
The HDZero Goggle 2 is still my personal favorite for analog, but many people prefer the smaller size and slightly lower cost of the Skyzone SKY04X Pro. They’re a very capable goggle and I wouldn’t disagree if you ranked them at the top.
RaceDayQuads
GetFPV
NewBeeDrone
Skyzone
Show product
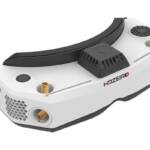
HDZero Goggle 2
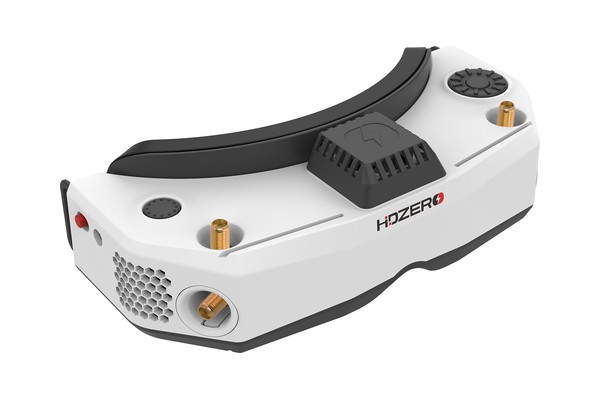
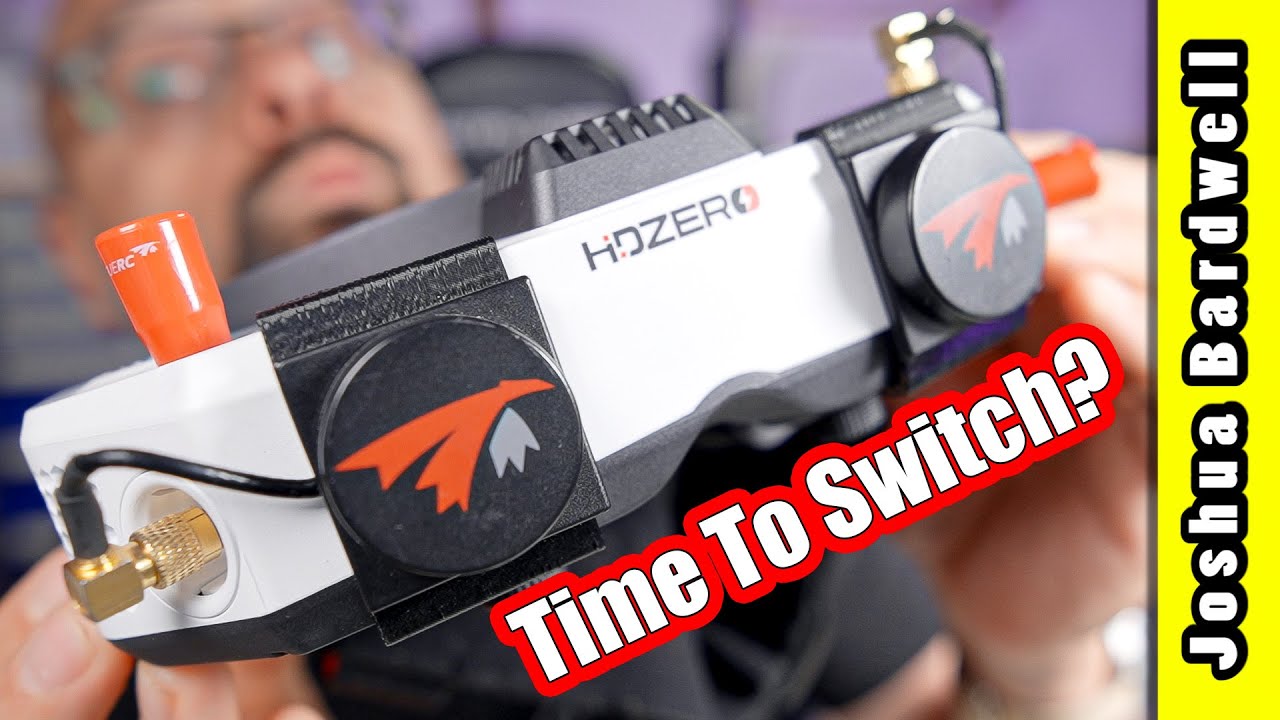
The HDZero Goggle 2 is made for the HDZero digital system. They’re also one of the best analog goggles you can buy. They’re my favorite FPV goggles I’ve ever used, and I fly them all the time, even though HDZero isn’t my main video system.
The big change from the original HDZero goggles is that the analog receiver is built in. They still support the external module bay from the v1 if you prefer a specific module, but you don’t HAVE to use it. The other upgrades are minor — sealed optics and nicer focus knobs.
This goggle is a Swiss Army knife. It’s got HDMI in and HDMI out. The DVR records whatever you feed it — including the HDMI and AV inputs — with audio from a built-in microphone if you want it. It’s the only goggle I know of that actually records exactly what you see in the goggles. And the analog DVR doesn’t drop frames when the signal gets weak, so it stays in sync with real time. As a content creator, that’s massive for me.
Here’s what the haters will say: the analog receiver has no diversity. You get one antenna, so you’ll be turning your head toward the drone when it flies around behind you. Guess what? I DON’T CARE. In exchange for having to turn your head to face the drone, you get a super-stable image with no flashing, rolling, or scrolling. But not everyone will feel that way. If you absolutely insist on having diversity, you’ll use the external module bay (or a different goggle entirely).
The other weakness of the goggle is that some people report worse performance in indoor environments with lots of multipath. They say that “fusion style” receivers like RapidFire, TBS Fusion, or SpeedyBee give a clearer image. I haven’t decided whether I agree or not.
If you already own the original HDZero goggles, we’d only upgrade if you fly a lot of analog. If you’re buying HDZero goggles today, these are the ones.
Early units had a scroll wheel that skipped several clicks at a time. A firmware update fixes it, and HDZero support will fix it for free if the firmware update doesn’t.
HDZero (US)
HDZero (Intl)
Show product
Divimath SMA Bandpass Filter (4-Pack)
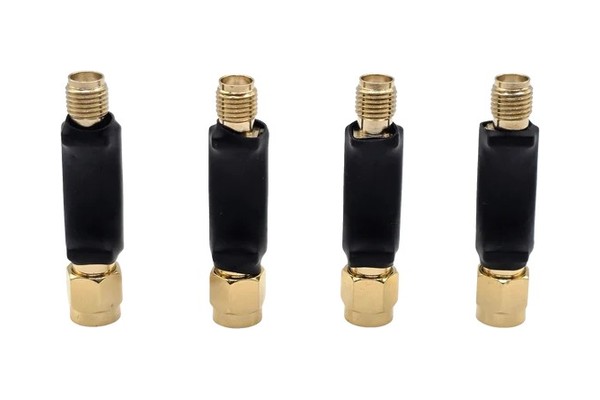
These little filters screw onto your goggles’ antenna jacks and only let 5-6 GHz through. Your radio’s control link — ExpressLRS at 2.4 GHz or 900 MHz — can swamp a 5.8 GHz video receiver, especially at full power and close to your goggles. The filters block it.
I’m completely sold on them. In my Divimath vTX test flights, adding one cleaned the breakup right up: full-screen dropouts turned into plain, normal static. And that was on a receiver with no fusion at all.
Two gotchas. First, they’re tall. On many goggles, there’s no room for one behind a patch antenna. Second, they really OUGHT to be built into the goggles themselves. If you don’t see interference, you might not need them. BUT HOW ARE YOU GOING TO KNOW???? Go to my video and look at the before and after!
Divimath
Show product
Skyzone M5 Monitor
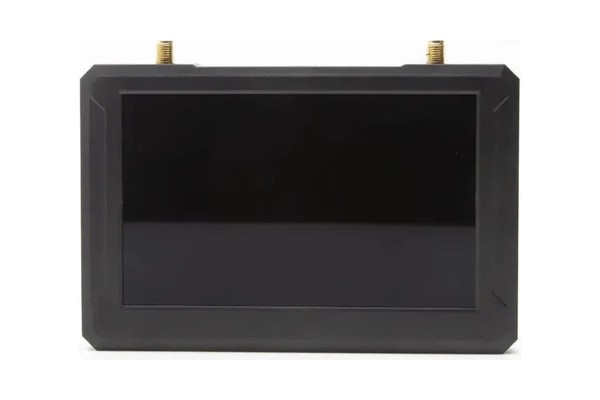
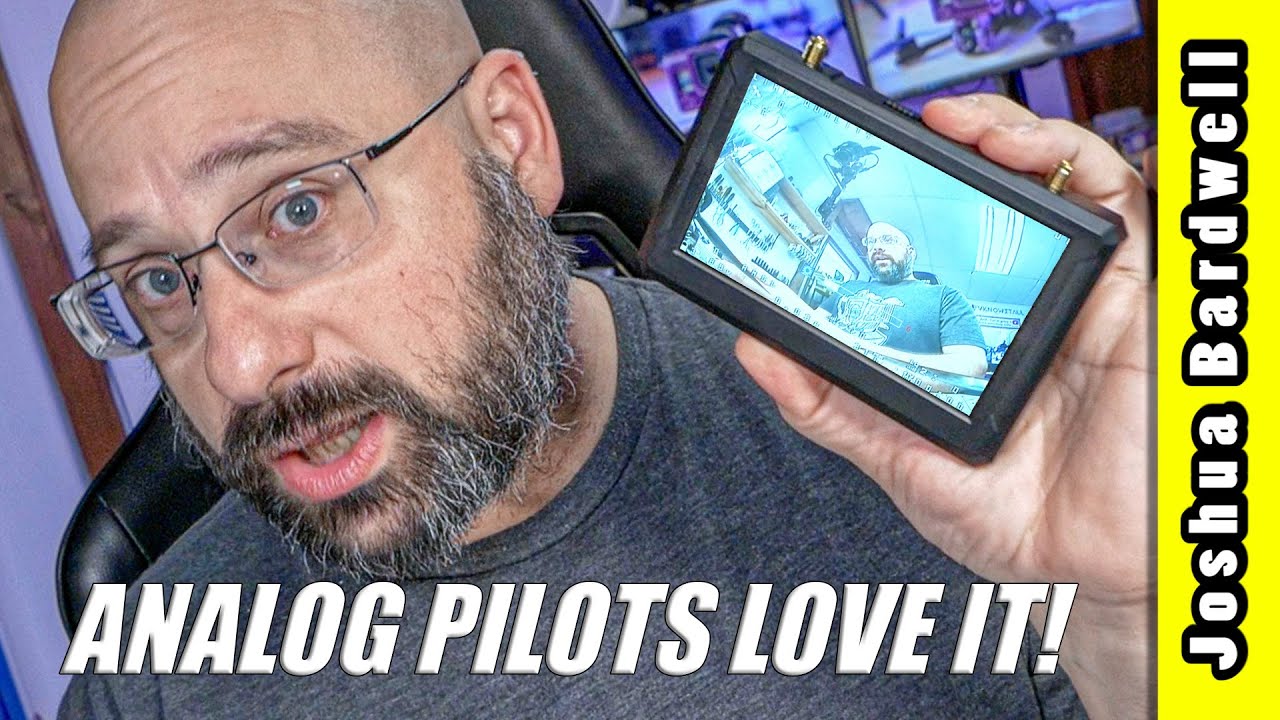
The Skyzone M5 is a 5″ handheld monitor with a built-in analog receiver. And not just any receiver: it’s a SteadyView mixing receiver — the same kind of tech as RapidFire and Fusion. Every portable screen before this had a cheap diversity receiver with poor range. I waited years for someone to make this.
It’s for the bench and for spectating. When you’re building or troubleshooting a quad, you can see your camera and OSD and go through your menus without strapping goggles to your face. At the field, you can tune in to your buddy’s feed and watch.
It runs on a standard 18650 cell for a few hours, and charges over USB-C. It has a DVR and the same menus as Skyzone’s goggles. It’s an LCD, not OLED, but it gets bright enough to see in the sun. Plan on buying a pair of antennas.
It’s analog only, so if all you fly is digital, there’s no point. And it’s a luxury — if you have analog goggles, you can always just put them on. But if you fly a lot of analog, it’s the best screen of its kind.
NewBeeDrone
Skyzone
Show product
Divimath GroundLink VRX
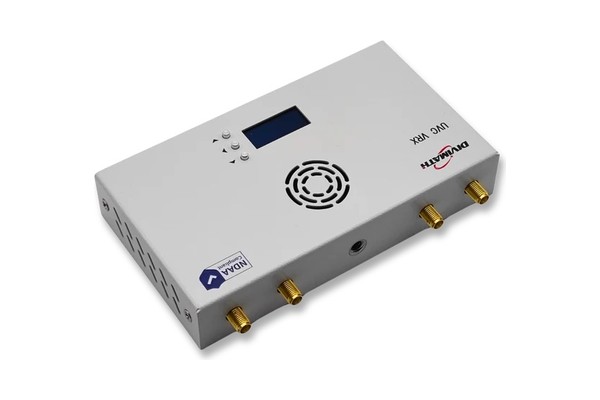
The Divimath GroundLink is a ground station receiver. It picks up 5.8 GHz analog video (and Divimath’s own digital video) and sends it out over HDMI and USB-C at once. Over USB-C, it shows up as a plain webcam. So you can plug it into a laptop, an Android phone or a tablet and get your FPV feed with no capture card and no drivers. Over HDMI, this is one of the only ways to translate analog to HDMI and see what the signal actually looks like instead of constantly blue-screening.
It’s built to go up on a pole. There are tripod mounts on the top and bottom, and a 3-meter USB-C cable comes in the box. It has a built-in ExpressLRS receiver too, so a button on your radio can change its channel along with a Divimath vTX. Divimath says the box itself adds about 2 ms of delay. What you actually see depends on the phone or computer on the other end.
It’s not cheap. It costs several times what a handheld monitor does. And on the analog side it’s one receiver on one antenna — the four-antenna diversity is only for Divimath’s digital video.
If you’re building a real ground station — Mission Planner, a mast-mounted receiver, video for a crew, or a relay — this one box does all of it. If you just want to see your camera on the bench or watch your buddies fly, the Skyzone M5 does that for a fraction of the price.
Divimath
Show product
HDZero Goggle 2
The HDZero Goggle 2 is made for the HDZero digital system. They’re also one of the best analog goggles you can buy. They’re my favorite FPV goggles I’ve ever used, and I fly them all the time, even though HDZero isn’t my main video system.
The big change from the original HDZero goggles is that the analog receiver is built in. They still support the external module bay from the v1 if you prefer a specific module, but you don’t HAVE to use it. The other upgrades are minor — sealed optics and nicer focus knobs.
This goggle is a Swiss Army knife. It’s got HDMI in and HDMI out. The DVR records whatever you feed it — including the HDMI and AV inputs — with audio from a built-in microphone if you want it. It’s the only goggle I know of that actually records exactly what you see in the goggles. And the analog DVR doesn’t drop frames when the signal gets weak, so it stays in sync with real time. As a content creator, that’s massive for me.
Here’s what the haters will say: the analog receiver has no diversity. You get one antenna, so you’ll be turning your head toward the drone when it flies around behind you. Guess what? I DON’T CARE. In exchange for having to turn your head to face the drone, you get a super-stable image with no flashing, rolling, or scrolling. But not everyone will feel that way. If you absolutely insist on having diversity, you’ll use the external module bay (or a different goggle entirely).
The other weakness of the goggle is that some people report worse performance in indoor environments with lots of multipath. They say that “fusion style” receivers like RapidFire, TBS Fusion, or SpeedyBee give a clearer image. I haven’t decided whether I agree or not.
If you already own the original HDZero goggles, we’d only upgrade if you fly a lot of analog. If you’re buying HDZero goggles today, these are the ones.
Early units had a scroll wheel that skipped several clicks at a time. A firmware update fixes it, and HDZero support will fix it for free if the firmware update doesn’t.
HDZero (US)
HDZero (Intl)
Show product
HDZero Goggles
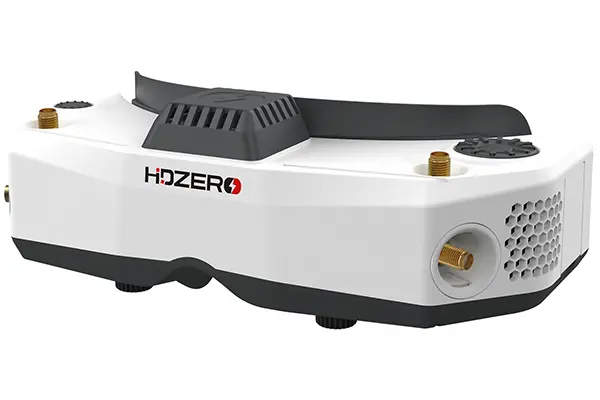
It shouldn’t surprise you that the HDZero goggles are the best goggle made for use with HDzero video transmitters. What might surprise you is that they’re competitive for use with Walksnail and analog video transmitters as well!
The HDZero goggles support all of HDZero’s video modes, including the ultra-low-latency 540p90 mode. They’ve got an HDMI input, so they can be connected to a laptop and used as a display for flying simulator, or any other purpose. The screens are the same 1080p, 100 Hz OLED display used in Walksnail Goggles X and DJI Goggles 2 and Goggles 3. They have an HDMI output for convenient mirroring to screen or capture card. They’ve got a built in head tracker if you use a head-tracking gimbal. A built in microphone records audio at the goggles over the DVR, so you can hear your own commentary (very useful for syncing up video if you’re a content creator.) Basically, they’ve got every feature you could ask for.
But HDZero goggles are also ideal for use with Walksnail and analog video systems! They have an external module bay that accepts Fatshark-style analog receiver modules. The HDZero goggles have a comb filter that improves the quality of the analog picture — something no other analog goggle has! Their analog DVR is one of the best on the market. It’s the only one that doesn’t skip frames when signal gets weak or goes to static, meaning the analog DVR stays perfectly in sync with real-time. As a content creator, this is massive for me, and is why I use HDZero for any video where I have to record analog DVR. You should know that the HDZero goggles sometimes glitch out when analog signal is weak or where there is a lot of intereference. For this reason, some racers and long-range pilots have abandoned them. Whether you run into these issues depends a lot on what type of envrionments you fly in.
Regarding Walksnail, the HDZero goggles can work with the Walksnail standalone receiver via the goggles’ HDMI input. The HDZero goggles can work with the Walksnail system’s 720p@100fps signal, and the latency of the HDMI input on the HDZero goggles is very low. You won’t get quite as low latency with the HDZero goggles as if you had a set of Walksnail goggles with built-in receiver, but it’s very close.
In short, the HDZero goggles are hands-down the best goggles for pilots who fly HDZero. They’re arguably the best analog goggles, with the possible exception of racers and long-range pilots. And they’re competent at Walksnail. They’re definitely the best all-round goggle for the pilot who can’t decide which video system they want.
Now if only we could figure out how to get them to work with DJI …

HDZero (Intl)
Show product
HDZero Goggles
It shouldn’t surprise you that the HDZero goggles are the best goggle made for use with HDzero video transmitters. What might surprise you is that they’re competitive for use with Walksnail and analog video transmitters as well!
The HDZero goggles support all of HDZero’s video modes, including the ultra-low-latency 540p90 mode. They’ve got an HDMI input, so they can be connected to a laptop and used as a display for flying simulator, or any other purpose. The screens are the same 1080p, 100 Hz OLED display used in Walksnail Goggles X and DJI Goggles 2 and Goggles 3. They have an HDMI output for convenient mirroring to screen or capture card. They’ve got a built in head tracker if you use a head-tracking gimbal. A built in microphone records audio at the goggles over the DVR, so you can hear your own commentary (very useful for syncing up video if you’re a content creator.) Basically, they’ve got every feature you could ask for.
But HDZero goggles are also ideal for use with Walksnail and analog video systems! They have an external module bay that accepts Fatshark-style analog receiver modules. The HDZero goggles have a comb filter that improves the quality of the analog picture — something no other analog goggle has! Their analog DVR is one of the best on the market. It’s the only one that doesn’t skip frames when signal gets weak or goes to static, meaning the analog DVR stays perfectly in sync with real-time. As a content creator, this is massive for me, and is why I use HDZero for any video where I have to record analog DVR. You should know that the HDZero goggles sometimes glitch out when analog signal is weak or where there is a lot of intereference. For this reason, some racers and long-range pilots have abandoned them. Whether you run into these issues depends a lot on what type of envrionments you fly in.
Regarding Walksnail, the HDZero goggles can work with the Walksnail standalone receiver via the goggles’ HDMI input. The HDZero goggles can work with the Walksnail system’s 720p@100fps signal, and the latency of the HDMI input on the HDZero goggles is very low. You won’t get quite as low latency with the HDZero goggles as if you had a set of Walksnail goggles with built-in receiver, but it’s very close.
In short, the HDZero goggles are hands-down the best goggles for pilots who fly HDZero. They’re arguably the best analog goggles, with the possible exception of racers and long-range pilots. And they’re competent at Walksnail. They’re definitely the best all-round goggle for the pilot who can’t decide which video system they want.
Now if only we could figure out how to get them to work with DJI …
HDZero (Intl)
Show product
Skyzone SKY04X V2
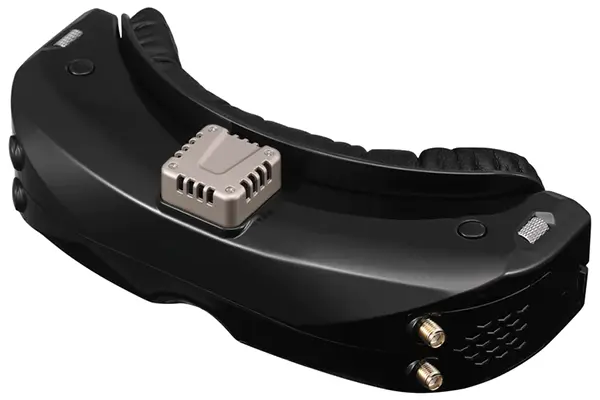
This is the first time I’ve named a Skyzone goggle as “top of the line”, and the 04X absolutely deserves it. It has OLED screens. 1280×960 resolution (same as HDO2 and Orqa). Massive 46° field of view, for total immersion. Great optical quality. Adjustable focus from +6 to -6 diopter. In addition to these specs, it has impeccable build quality and (pay attention Fat Shark) an actual user interface of menus with menu options that is easy to navigate and configure!
Typically, you have to upgrade the receiver module in FPV goggles if you want the best performance. That’s still mostly true for the Sky04X, but the RapidMix module in the 04X is nearly as good as the top-tier RapidFire and Fusion. Personally, I would be okay using it. The Sky04X is about $500 at the time of this writing–same as the HDO2–but the HDO2 doesn’t come with a receiver module.
So the Sky04X is basically equal to the HDO2 in terms of image quality; better in terms of interface; nearly as good in terms of receiver module and range; and significantly less expensive. Honestly, I think the HDO2 is in trouble.
It’s also one of the lowest-latency analog goggles you can buy. In nils vo’s goggle latency tests, it measured about 9 ms with a Rapidfire module — tied with the Orqa.
The initial release of the Sky04X had some rare issues with goggles locking up. Skyzone released an updated firmware to fix this. In addition, Skyzone is working to improve the performance of the RF module in some edge cases. You should flash the goggle and module to the latest firmware upon receipt. The Sky04X ships with a “sleep” function that turns the screens off after several minutes of inactivity. In some cases, this can cause the goggles to turn off while flying. This can be disabled in the goggle setup menu, and I recommend doing so.
GetFPV
NewBeeDrone
Show product
HDZero BoxPro
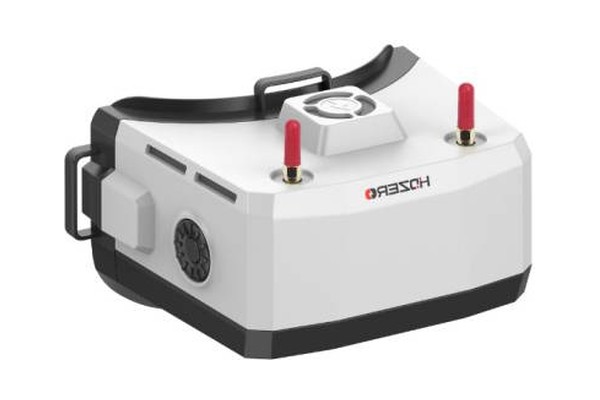
We’ve often said the HDZero goggles are some of the best goggles you can buy, even if you don’t fly HDZero. But they’re SO expensive! The HDZero BoxPro fixes that — it’s about half the price of the HDZero Goggle 2.
It’s a box goggle. That means there’s one big screen in front of your eyes instead of two small ones. But you don’t give up the good stuff. The screen runs at 100 Hz, so you get HDZero’s very low latency. The receiver has four antennas, two of them built-in patches. It’s the full HDZero system, not a cut-down version.
And the feature list is a little crazy. There’s an analog receiver built in. There’s HDMI in and HDMI out; an AV input; and a head-tracker output. The HDMI input takes 720p at 100 fps, so with a Walksnail standalone vRX, it’s a great Walksnail goggle too. Almost every feature you could ask for.
One thing: like the full HDZero goggles, the analog receiver is a single receiver with no diversity. You can watch my review of the HDZero goggles to see my opinion on that (in short: I love it).
The goggle comes in two versions: regular and “Plus”. The BoxPro+ adds WiFi video streaming and an ELRS backpack. Be sure to buy the one you intend!
They’re still box goggles. But if you want the HDZero goggle experience without the HDZero goggle price, they’re mighty tempting.
RaceDayQuads
GetFPV -
BoxPro / BoxPro+
NewBeeDrone
HDZero (US)
HDZero (Intl)
Show product
TBS Unify Pro32 DP
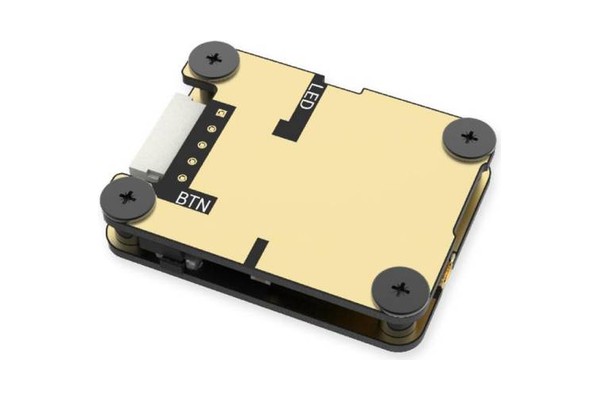
The Unify Pro32 DP is the top-of-the-line TBS Unify vTX. It replaces the Pro32 HV. TBS’s product page calls it a 3-watt vTX. It’s “officially rated” at only 1 Watt for regulatory reasons. Don’t let that fool you.
It keeps the things that made the Unify a favorite: SmartAudio, pit mode, and channel and power control from Betaflight or your Crossfire radio. It also tunes across a much wider range, from 4990 to 6030 MHz. Keep in mind that many of those frequencies aren’t legal for hobbyists to use! Stick to the normal 5.8 GHz channels if you’re not sure.
TBS makes damn good hardware. This is one of the best analog vTX you can buy. And it’s not even THAT much more expensive than other options with similar output power.
RaceDayQuads
GetFPV
NewBeeDrone
Show product
HDZero BoxPro
We’ve often said the HDZero goggles are some of the best goggles you can buy, even if you don’t fly HDZero. But they’re SO expensive! The HDZero BoxPro fixes that — it’s about half the price of the HDZero Goggle 2.
It’s a box goggle. That means there’s one big screen in front of your eyes instead of two small ones. But you don’t give up the good stuff. The screen runs at 100 Hz, so you get HDZero’s very low latency. The receiver has four antennas, two of them built-in patches. It’s the full HDZero system, not a cut-down version.
And the feature list is a little crazy. There’s an analog receiver built in. There’s HDMI in and HDMI out; an AV input; and a head-tracker output. The HDMI input takes 720p at 100 fps, so with a Walksnail standalone vRX, it’s a great Walksnail goggle too. Almost every feature you could ask for.
One thing: like the full HDZero goggles, the analog receiver is a single receiver with no diversity. You can watch my review of the HDZero goggles to see my opinion on that (in short: I love it).
The goggle comes in two versions: regular and “Plus”. The BoxPro+ adds WiFi video streaming and an ELRS backpack. Be sure to buy the one you intend!
They’re still box goggles. But if you want the HDZero goggle experience without the HDZero goggle price, they’re mighty tempting.
RaceDayQuads
GetFPV -
BoxPro / BoxPro+
NewBeeDrone
HDZero (US)
HDZero (Intl)
Show product
Eachine EV200D
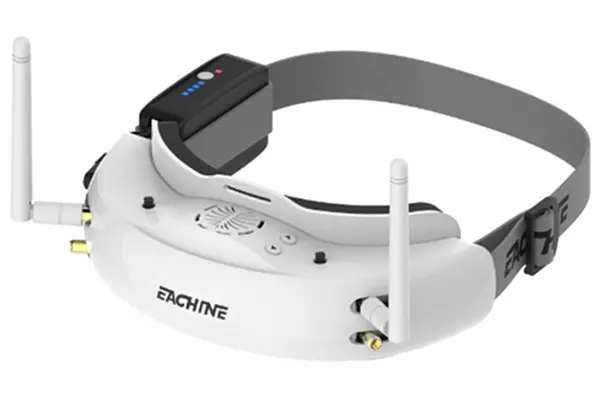
There are a few FPV goggles that are stupidly cheap and total garbage. There are several goggles that are really good and super expensive. And there are only a very few that manage to be somewhat-reasonably priced and still decent quality. The Eachine EV200D is one of these.
The screens on the EV200D are large, high-resolution, and bright. At a price of $300, it comes with not one, but two diversity modules, which work together to balance the signal from up to four antennas at once. It can also be ordered without modules, letting you use whichever 3rd party module you prefer (but only one of them at a time; quad-versity only works with the factory modules). The DVR on the EV200D is one of the best in any FPV goggle.
For me to recommend a goggle, it has to clear two hurdles. First, it has to be good enough in overall design and quality. Second, it has to be reliable enough that most people who buy it feel they got their money’s worth. The EV200D passes this test. The manufacturing quality and durability is not up to Fat Shark standards, and Eachine doesn’t even come close to matching Fat Shark’s after sale support. But you’ll save between $150 and $300 by buying the EV200D over a Fat Shark and a receiver module, and for many people, that’s a welcome trade.
If you have only $300 to spend on an FPV goggle, the EV200D is my recommendation.
GetFPV
Show product
TBS Unify Pro32 HV 25-1000mW, 5.8GHz Analog VTX
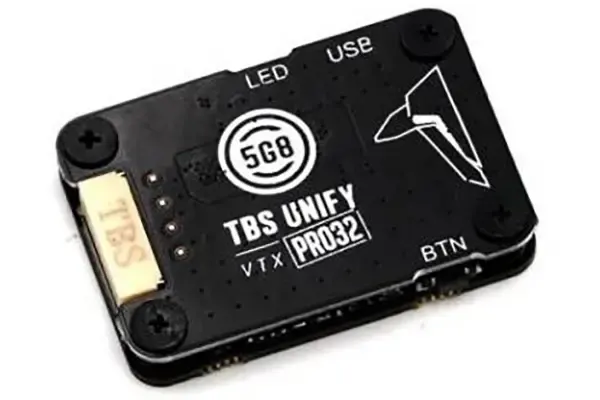
The Unify Pro32 is the latest edition of what many people consider to be the best FPV video transmitter made. It keeps all the standard features that the Unify is known for: clean power transmission, honest output power rating, bulletproof reliability, and support for pit mode and SmartAudio. The Pro32 HV is not quite as thin as the original Unify, but it’s still pretty trim and will easily fit into even tight builds.
The Pro32 ups the output power to 1000 mW “or more”. This is a refreshingly honest approach. Most vTX advertise a nominal output power then output somewhat less. The Pro32 also supports remote control by Crossfire interface. This is useful for fixed-wing pilots flying without a flight controller. You can connect the vTX directly to your Crossfire receiver and adjust the channel and output power via the Crossfire system. This is great because the Unify’s button-press / LED-flash interface is awful to use in the field.
Another feature of the Pro32 is that it has a built-in USB interface which allows firmware updates and configuration via the TBS Agent X software on PC.
GetFPV
NewBeeDrone
Amazon
RaceDayQuads
Show product
TBS Tracer / Crossfire Sixty9
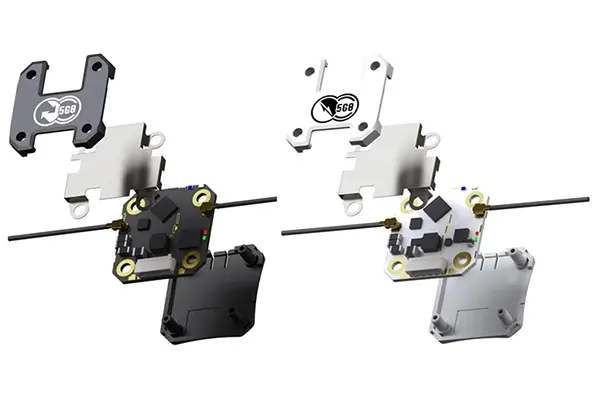
The TBS Sixty9 combines a Unify video transmitter with a Tracer or Crossfire receiver in a single 20mm form factor. The 20mm board is easy to mount above your FC and ESC if your frame has room for a three-high stack; or it can mount on the 20mm space in the rear of most low-profile frames. Integrating the vTX and receiver saves a few steps in wiring and makes mounting simple.
Compared to a Unify Nano, the Sixty9 has higher output power–at least on paper. It starts at 1 watt, but reduces power quickly as heat builds up. Since racers usually run at 25 mW, this isn’t really an issue.
Show product
Fat Shark Diopter Set
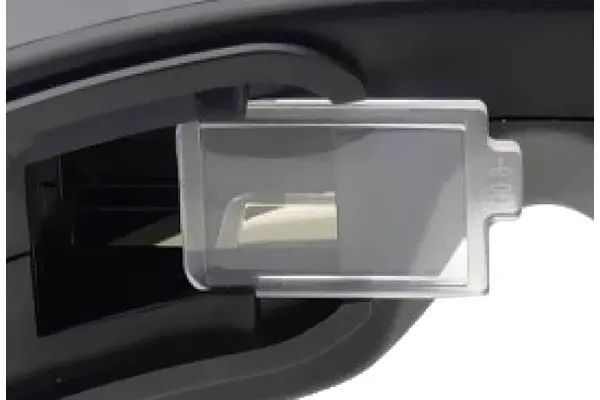
If you are simply near-sighted, then the Fatshark diopter inserts are perfect for you. They come in a single set, with strengths from -2 to -6 diopter (ask your optician if you’re not sure). They’re made of plastic, so the optical quality is “acceptable” but not “fantastic”, and they scratch easily if you’re not careful with them. But they’re pretty inexpensive and to be honest, I used my original set for more than a year before I upgraded to RHO-Lens.
These lenses are referred to as “Fatshark Diopter Set”, but they fit some other major makes of goggles including Skyzone.
GetFPV
Show product
Optik-Fischer
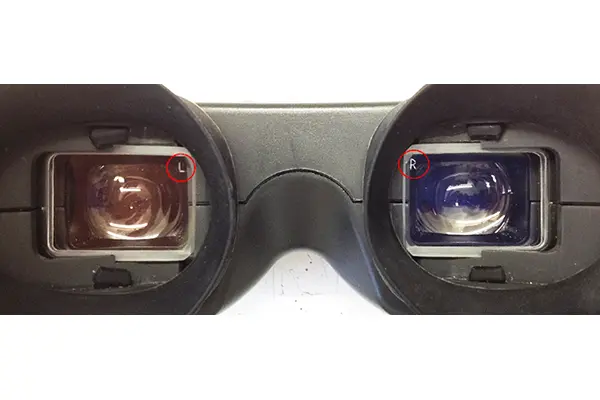
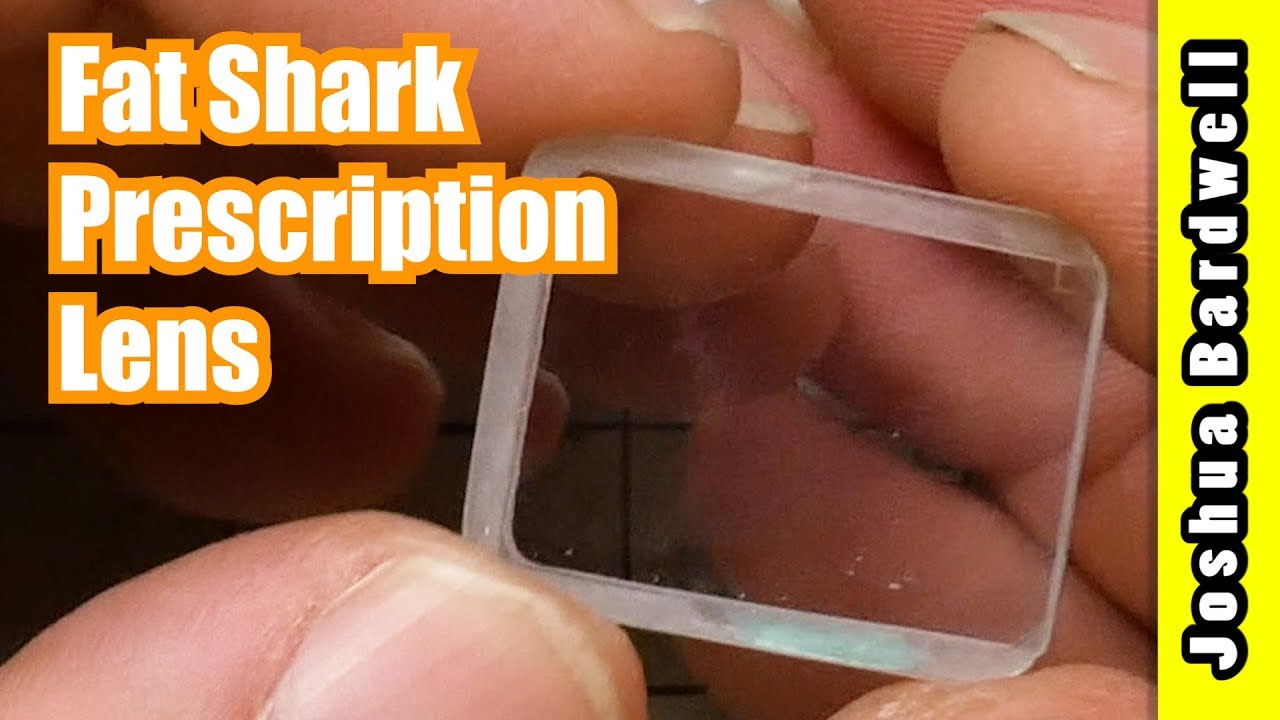
If you’re very near-sighted (more than -6.0 diopter) or if you have any astigmatism or other abnormality, the standard FatShark diopters won’t work well for you.
Wouldn’t it be nice if you could just get your actual eyeglass prescription made into lens inserts? You can! Simply send your eyeglass prescription to Optik-Fischer and they’ll make a custom corrective insert made exactly for your eyes. If you have any questions about whether they can make your prescription, reach out to them and ask!
I have very bad eyesight (-6.75 diopter with astigmatism). I’ve used corrective lenses in my Fat Sharks since September, 2016 and I love them.
In the past, I have recommended RHO-Lens for this slot. RHO recently switched to shipping their lenses in a 3D-printed carrier which I find to be a little more fragile than I prefer. Optik-Fischer hand-bevels each lens, which I prefer.
Optik-Fischer
Show product
RadioMaster
GX10
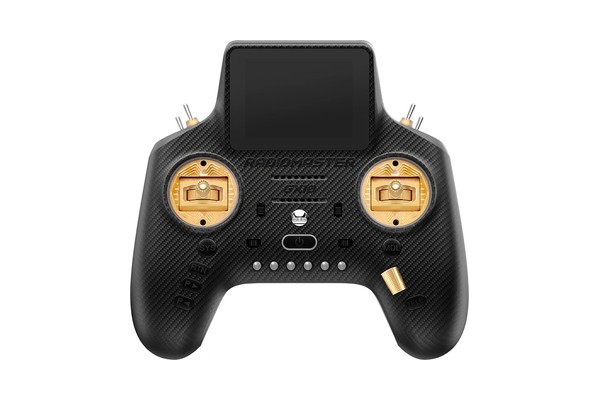
The GX10 is RadioMaster’s answer to everybody who complained about the Zorro. Same game-controller shape, with the screen on top — but a bigger, color screen! And it fixes the Zorro’s deal breaker: it runs on two full-size 18650 cells instead of 18350s. Battery life should finally last a day of flying.
It has a 2.8″ color touchscreen, the bank of six fully programmable buttons, plenty of switches and a nano module bay. The built-in ELRS module goes up to 1W — not the Zorro’s 250 mW. The module supports both 2.4 GHz and 900 MHz. There’s only one radio, so there’s no Gemini support.
If you’re in the USA, there’s a problem. RadioMaster told me they couldn’t get FCC certification for the GX10 under the new US rules on foreign-made drone parts, so it isn’t being sold in or shipped to the USA — at least for now. That’s the official word, anyway. I will say that I was able to place an order for the GX10 on the RadioMaster site with a USA address. That doesn’t mean it would actually be delivered.
The Max version adds AG01 Mini gimbals, metal controls instead of plastic, and extra colors. It’s not much more expensive than the Standard version and we think it’s worth it to most people, even if it won’t make you a better pilot.
If you’re outside the US and you want a game-controller shape, on paper this is the one to get. If you want Gemini, or you live in the US, get the GX12.
Show product
SpeedyBee 5.8GHz Goggles Receiver
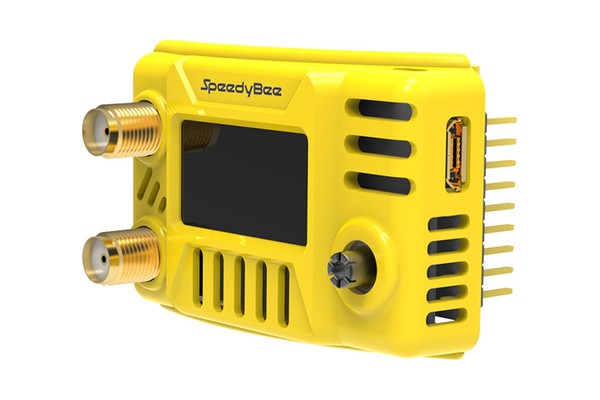
This is SpeedyBee’s analog receiver module. It plugs into the module bay of Fat Shark-style goggles. It takes two antennas. And it costs a good bit less than RapidFire or the TBS Fusion V2. So is it as good? Many have reported that its picture holds up about as well as RapidFire’s when the two are flown side by side. I haven’t tested it myself, but I’m willing to include it here based on the strength of others’ reports.
Check your goggles before you buy. SpeedyBee lists the Fat Shark Dominator series and the HDZero goggles’ module bay. Other goggles might need a 3D printed cover to fit correctly.
If you want the proven top of the line, and you’re willing to pay for it, RapidFire and the TBS Fusion V2 are still the ones. If you want two antennas without the premium price, this is the module we’d look at first.
GetFPV
Show product
O4 Wide Air Unit
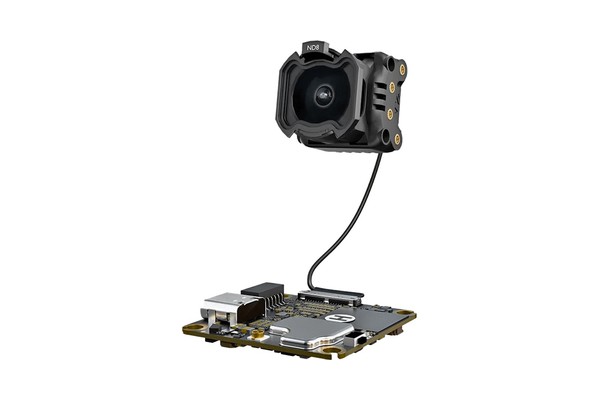
The O4 Wide is DJI’s wide-angle version of the O4 Lite. The air unit is the same — same sensor, same 700 mW single-antenna radio, same 4k60 recording. Only the camera changed. Its new lens goes from 117.6° to 159°. That’s even wider than the O4 Pro.
That fixes the Lite’s biggest problem. The Lite’s stock lens is so narrow that racing and close proximity flying are more difficult than they should be. The tradeoff is weight. DJI says it’s about 13 grams with the camera — about 5 grams more than the Lite. The camera body is also bigger, so make sure your frame fits it.
Now that the FOV has been fixed, the gap between the O4 Lite / Wide and the Pro narrows significantly. Many pilots don’t need the additional capabilities of the Pro and are happy to save a little weight and money by going with the Wide. Keep in mind that the Lite is significantly less durable than the Pro before you choose too quickly.
Flywoo
GetFPV
RaceDayQuads
Amazon
Show product
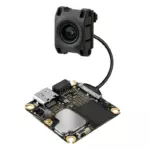
O4 Air Unit Lite
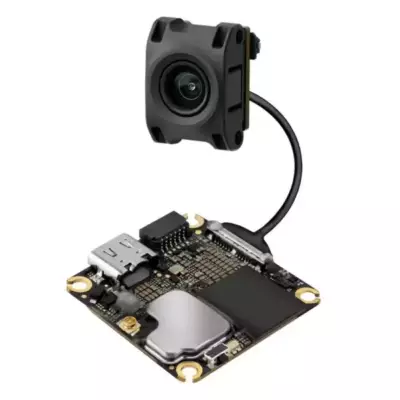
DJI’s official name for this product is the “O4 Air Unit”. That’s to differentiate it from the “Pro” version. We think that’s confusing, so we call this one the “Lite,” to make it clearer which one we’re referring to. As the name suggests, the O4 Lite is smaller and lighter than the Pro. The Lite air unit and its camera together weigh just about 10 grams, which makes them perfect for drones as small as 75mm. Of course, you can use the Lite on larger drones, but once you get to about the 3″ size class, you could (and should) use the Pro instead.
The O4 Lite achieves its small size by cutting out some of the O4 Pro’s capabilities. What’s missing? The Lite only goes up to 700 mW, while the Pro goes to 1200 mW. This means the Pro will get approximately 40% more range, all else being equal. But all else isn’t equal, because the Lite has only one antenna, while the Pro has two, so the Pro will have more stable signal over longer range and through more obstacles. The Lite doesn’t do 4k/100 or 4k/120 resolutions, but can do 4k60, 4k50, and 4k30. The Lite also supports 1080p up to 120fps, but confusingly, completely omits all 2.7k resolutions. (Remember, the goggles always see 1080p; only the on-board recording goes up to 4k.) The Pro lets you use an SD card for on-board recording, while the Lite only records to built-in memory; but it has enough memory for about 45 minutes of 4k footage.
In addition to the differences in specifications, the Lite’s camera uses a smaller sensor and worse lens than the Pro, so image quality is worse. It’s still good, but not “replace your GoPro” good. The stock lens has a disappointingly narrow field of view which makes racing and precise proximity flying difficult. DJI now makes a wide-angle version, the O4 Wide. (There are also aftermarket lens adapters that you can 3D print or buy.)
Although the Lite is nominally rated down to 1S, it actually drops out around 3.8 volts, so it needs a step-up voltage regulator if it’s running on a 1S drone. New flight controllers are being released specifically to meet this need. If you run it off a 1S battery without a regulator, it’ll die out about halfway through the pack.
Even with these drawbacks, the O4 Lite is an amazing accomplishment. It offers the best image quality, range, and penetration of any video transmitter in this size class. Pilots who love micro drones can now finally choose the DJI FPV system without compromise!

RaceDayQuads
GetFPV
NewBeeDrone
Rotor Riot
Flywoo
Show product
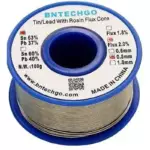
BNTECHGO 63/37 Rosin-Core

This is a fine solder, but it’s neither the highest quality nor the cheapest per gram on this list. So why is it even here? Because sometimes you’d rather pay $10 for a 4 oz roll than $25 for a 1 lb roll, even if the 1 lb roll is a better deal. And hey: it ships with Amazon Prime.
The product listed above contains several different sizes and amounts of solder. The 0.8mm thickness is great for basically everything you would want to do on a quadcopter.
Amazon
Show product
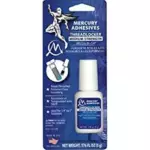
Mercury Adhesives Brush-In-Cap Blue

Thread-locker is an essential part of building a quadcopter. It’s especially important on motor screws, but any screw can back out under the constant vibration of a mini quad’s motors. Mercury Adhesives blue thread-locker is unique because it comes in a bottle with a brush under the cap, so it’s easy to apply.
Amazon
November 3, 2026
Show product
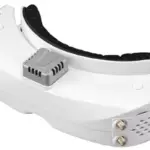
Skyzone SKY04L
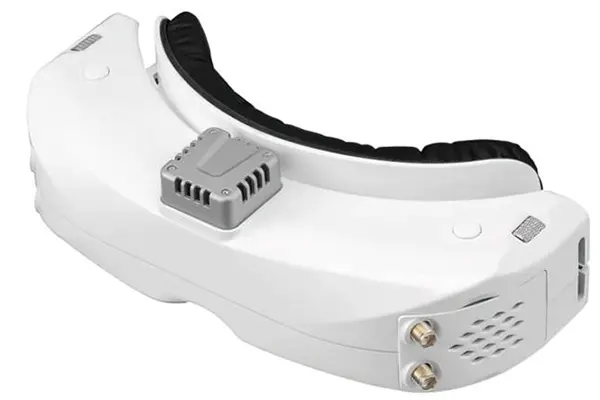
LIKE THE SKY04X, BUT LCOS INSTEAD OF OLED
The SkyZone Sky04L is exactly the same goggle as the Skyzone Sky04X, except it uses the less expensive LCOS screen instead of OLED screens. As a result, it comes in over $100 cheaper. The brightness and saturation of the LCOS screen is less than OLED, but it’s still more than sufficient for many people. And the price difference will be very appealing.
But there’s one big difference. A community-submitted result in nils vo’s goggle latency tests put the SKY04L at about 29 ms, versus about 9 ms for the SKY04X V2.
GetFPV
Show product
JBC-Style
Soldering Tips
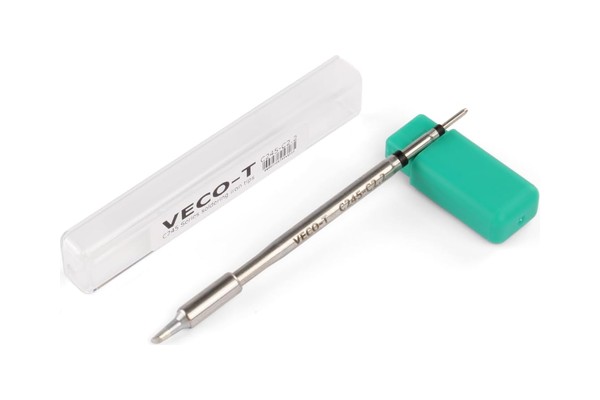
The magic of a JBC-style soldering iron is in its tip design. And if you want the BEST tips, you’ll buy genuine JBC tips. At $50 each, they’re certainly more affordable than the JBC iron itself. But you can have one of these aftermarket tips for 1/5 the price. They work just as well. And if they (theoretically) wear out faster … you can just buy more.
I use two tip-shapes for almost all my work: chisel and bevel. And I use the highest-powered C245 tips for everything. Bear in mind that I mostly solder wires around 26ga to 12ga so if you do a lot of micro-soldering, this advice might not apply.
For tips, my personal preferences are C245-D22 (chisel) or C245-C2.2 (bevel) for all-purpose work. I use C245-C3.8 (a larger, heavy, bevel tip) for bigger wires like XT60 wires. C245-D32 could also be in the mix as a larger, chisel-shaped, all-purpose tip.
Amazon
October 29, 2026
Show product
kWeld Spot Welder
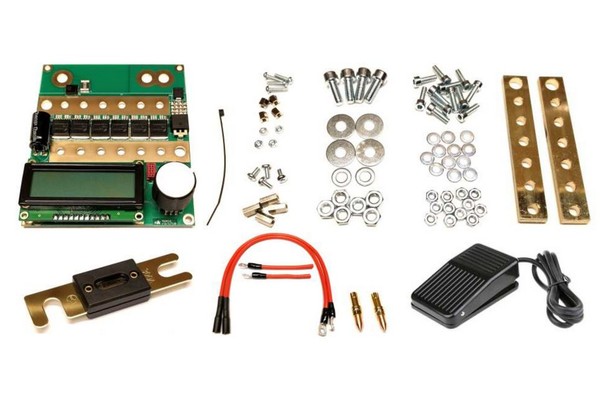
The kWeld spot welder is absolute overkill. I’ve probably got about $450 in mine by now. It’s far more than most hobbyists need.
So why did I buy it? My first spot welder cost less than $100. On 0.15 mm nickel strip, its welds popped right apart. I wasn’t going to keep rolling the dice. The kWeld will blow holes through nickel strip if you let it. It’s a serious piece of machinery.
It’s a kit, not a finished appliance. This kinda made it more appealing to me. Like, I know I’m paying for pure performance. You screw it together yourself. There’s no power supply in the box. You can run it off a LiPo but it pulls a huge amount of current in a very short burst and it can easily ruin even “high performance” lipos. I’ve since upgraded mine to the kCap ultracapacitor module, which is in the links too.
If you build a lot of packs and don’t want to fight a weak welder, this is the one I use. But be prepared to sink some money into it.
Grid Rewired -
kWeld Spot Welder Kit / kCap / kSupply
Keenlab -
kWeld Complete Kit / kCap / kSupply
Show product
Adjustable 12V 50A Power Supply
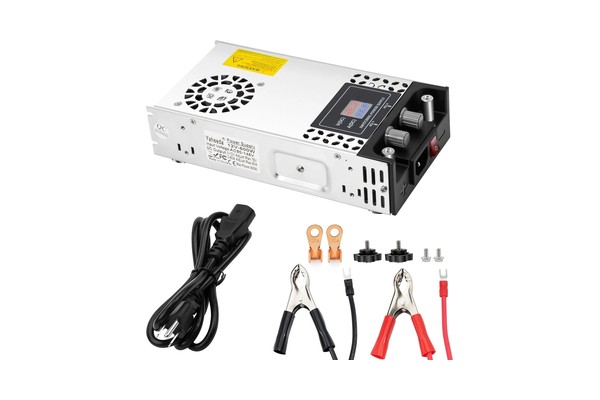
This adjustable bench power supply is here for one job: charging the kCap that powers the kWeld.
You can’t charge a kCap from just any power source. If you connect a kCap to a regular power supply or battery, it will pull too much current and likely damage the power supply or battery. The kCap needs a current-limited power supply. And that’s just what this is! It puts out up to 12V and up to 50A. And it has a knob to set the current limit. The display shows volts and amps, so you can see what it’s doing.
keenlab’s own kSupply (in the kWeld’s links) pushes 70A, so the kCap refills faster between welds. But this costs significantly less than the kSupply kit, at the time we write this. And honestly, I’ve not noticed ANY problem with the recharge rate when working with 0.10 and 0.15mm nickel strips, with welds putting out around 10-13 joules.
The label on this unit says its input is 90-145V AC, so it’s made for 110V countries. If you’re in Europe or anywhere else on 220-240V, this one might not work for you — but you can probably find something similar.
When I first got this, I couldn’t figure out how to set the current limit. The knob just moves EXTREMELY slowly. Turn the knob to the left as far as it will go, like 20 turns. Once it hits the stop, it is at zero amps and you can then turn it up to wherever you want it to be. Or just turn it to the right as far as it will go, and it will limit to 50 amps, which is fine for use with the kCap.
Amazon
Show product
RCinPower EVO
0702, 1MM
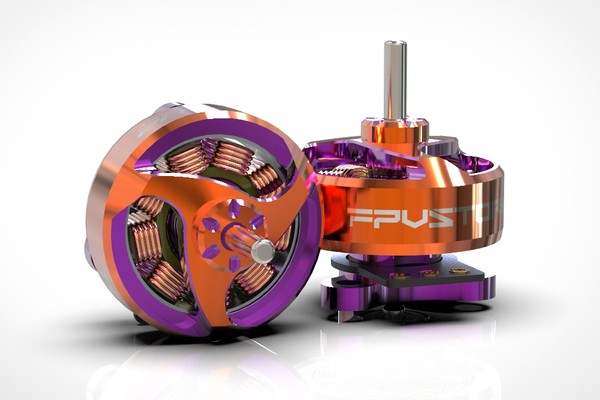
The EVO 0702 is RCinPower’s newest 0702. It comes in 31,800 and 33,800 kV. There’s also an orange-and-purple 33,800 kV edition.
They’re light — about 1.1 grams without wires. They have a 1mm shaft and NMB ball bearings.
Both kVs are on the high side for a 65mm whoop, in the same range as the WeBleedFPV Screamers. So expect a lot of punch and shorter flight times. You can always tame them with throttle scaling.
As with the BetaFPV Champion, keep in mind that tiny ball bearings may wear out faster than bushings. Nobody we know of has bench-tested the EVO yet. We’re mostly including them because RCinPower usually makes banger motors, so we assume these are bangers too.
FPVStoreRC -
31,800 / 33,800 / 33,800 (orange/purple)
Show product
RCinPower EVO Pro
0802, 1MM
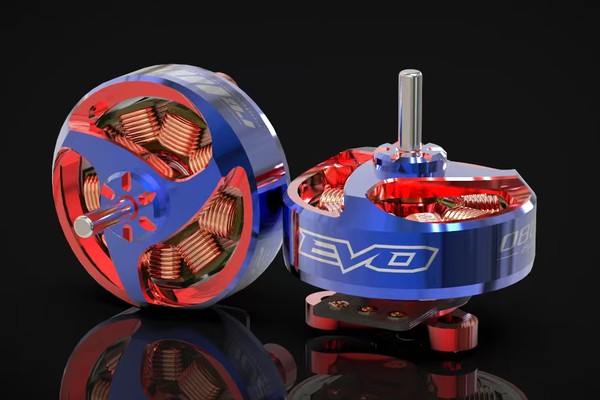
The EVO 0802 Pro is RCinPower’s newest 0802. It comes in one kV, 28,800. It’s sold one motor at a time.
It weighs 1.75 grams with its plug. RCinPower says it’s 6% lighter than its older GTS V3 0802. It has ball bearings. The shaft is 1mm where the prop goes on (1.5mm inside the motor).
This is the only 1mm 0802 in this section above 25,000 kV.
FPVStoreRC
October 27, 2026
Show product
BetaFPV
Air65 II
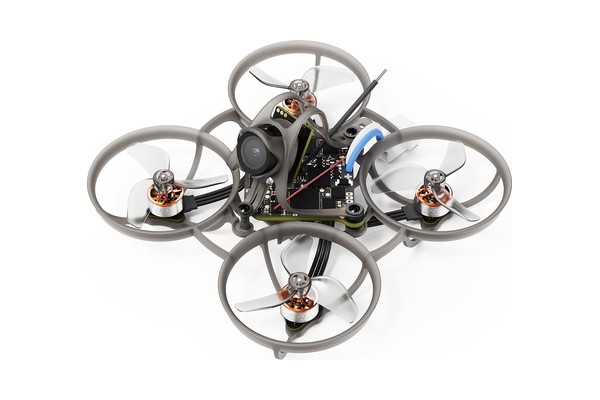
The Air65 II is BetaFPV’s update to the Air65, which was already one of the lightest and best-flying analog whoops you could buy. It comes in three versions: Freestyle (25,000KV), Racing (30,000KV) and Champion (36,000KV, with a lighter frame and ball-bearing motors). All three weigh around 17 grams without a battery. That’s about as light as a 65mm whoop gets before you start giving up durability. All of them have a 400 mW vTX and on-board serial ELRS 2.4 GHz.
Which one? The Freestyle is the easiest to fly, and it’s the best choice for beginners and for flying around the house. The Racing version has more power for racing and flying outdoors. The Champion has even more power — possibly too much for some pilots in some tight environments. Its ball-bearing motors seem like an upgrade, but many pilots report the tiny bearings on this size motors actually wear out faster than bushings. Overall, we’d pass on the Champion unless you NEED the extra motor kv.
This is our first pick for a 65mm analog whoop.
Show product
Emax
Tinyhawk Aero
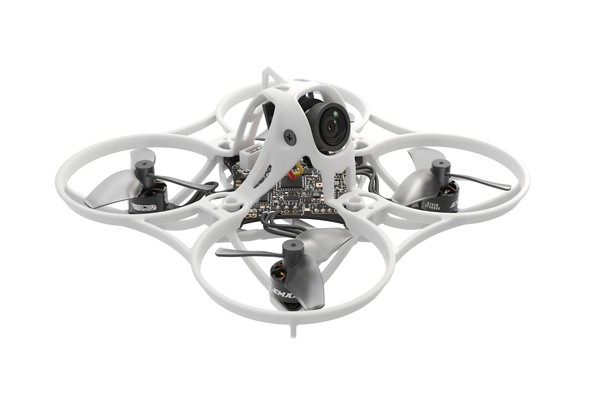
The Tinyhawk Aero is Emax’s new high-performance 65mm whoop. It’s aimed at racing and fast indoor flying. It comes in three motor versions — 27,000KV, 30,000KV and 35,000KV — and each one is available with analog or HDZero video.
It’s light! About 16 grams without a battery, right in Air65 II territory. The canopy is molded into the top of the frame. The motors are soldered straight to the board. And the camera angle is adjustable. That’s all the good stuff.
I hate the battery plug. Emax invented their own EM2.0 connector and it won’t fit the bajillion BT2.0 packs you probably already own. Of course, Emax says just buy their EM2.0 batteries, but that’s dumb. You should swap the battery connector for a BT2.0 pigtail if you buy this. Emax will argue they did this because BetaFPV controls the BT2.0 connector. That’s true. But the GNB A30 connector would have been the superior alternative.
The analog vTX goes up to 400 mW, but some have reported this reduces flight time. The same is true for the HDZero vTX: in Emax’s own hover tests, the HDZero versions last about three minutes against about five for analog.
Our first pick for a light 65mm whoop is still the BetaFPV Air65 II. It’s proven, and it runs the batteries most whoop pilots already have. The Aero is light and powerful, and some would say it’s the better drone. If that’s you, get the 35,000 kv version and then use a throttle scale or motor output limit in Betaflight to bring the power down to something reasonable. You can always turn it up again later if you want to.

Show product
BetaFPV
Meteor75 Pro II
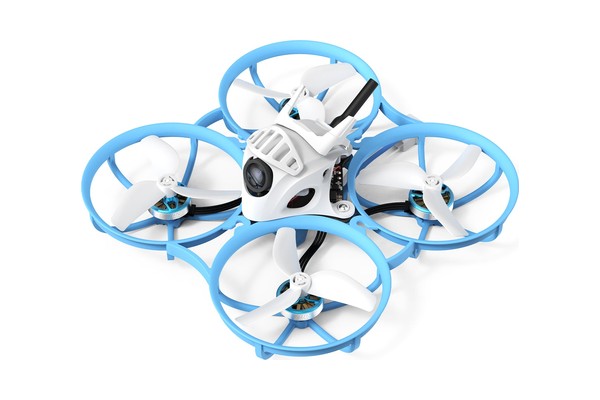
This is the Meteor75 Pro II with analog video. It’s the same frame and 1102 motors as the O4 version, with an analog camera and BetaFPV’s 12A Matrix 5-in-1 II board in place of the DJI air unit. That makes it a lot lighter — about 28 grams without a battery — and it has a LOT of power for a 1S whoop. That power has a cost. Hard punches pull the battery voltage way down, so you need good batteries.
If you fly analog and want a 75mm whoop with real punch for flying outdoors, this is a great choice. For flying indoors, a light 65mm like the Air65 II is the better pick. (Okay Infinity Loops … I see you.)
BetaFPV
Show product
BetaFPV
Meteor75 Pro II O4
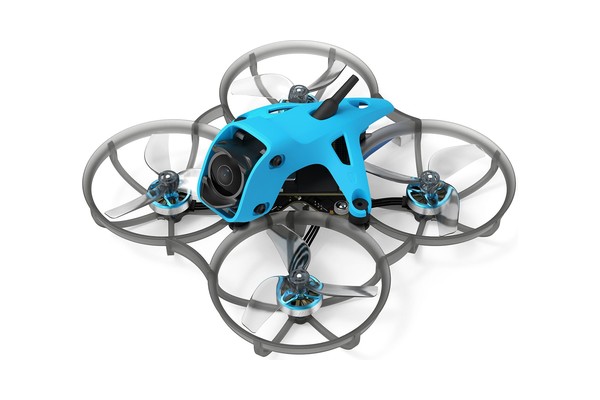
The Meteor75 Pro II is BetaFPV’s 75mm 1S whoop for DJI video, and it’s the first bind-n-fly whoop that comes with the new DJI O4 Wide. The Wide lens is the big deal here. The regular O4’s biggest weakness on small quads is its smaller field of view, and the Wide fixes that.
75mm is fine for the O4 Lite / Wide air unit. But 1S is asking a lot. The Meteor75 Pro is heavy for a 1S whoop — about 42 grams without a battery — but the 1102 motors have plenty of power. It flies more like a tiny freestyle slinger than a micro whoop, so it really shines outdoors.
The whole canopy is soft-mounted, and the footage is clean. But the canopy is held on by four rubber bobbins. It will pop off in a crash, and getting the grommets back in is fiddly. On drones this size, I ask myself … do I really need 100% jello-free footage? What’s my goal here? I might prefer a hard-mounted camera.
If you want DJI video in a whoop, this isn’t a terrible choice. Just be ready to reinstall those damn rubber bobbins. If you’d rather spend less, the Meteor75 Pro P1 gets you HD video for a lot less money, with lower image quality.
Show product
BetaFPV
Meteor65 Pro II O4
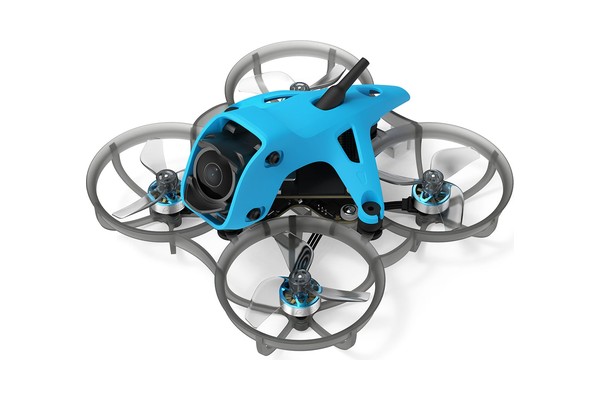
The Meteor65 Pro II is the smaller sibling of the Meteor75 Pro II, also with the DJI O4 Wide. It runs 35mm props, but BetaFPV stretched the frame to a 70mm wheelbase to make room for the air unit. It weighs about 36 grams without a battery. That’s about twice what the lightest 65mm whoops run, and you will feel it the whole time you’re flying. 36 grams is a lot for 0802 motors. The battery is going to sag when you push it, even with good quality square-cell packs. Expect around three and a half minutes on a 480 mAh pack.
I hate soft-mounting bobbins like this and the 75mm use. They’re effective at stopping vibration, but they always rip out in a crash, and putting them back in is fiddly. Especially on a 65mm drone where you’re probably not making a cinematic masterpiece, I’d rather have a hard-mounted camera for the durability.
Frankly, we’re just not fans of DJI on 65mm, even the O4 Lite / Wide air unit. And if you ARE going to do that, you need to work harder to cut weight. The vibration isolation and other “enhancements” aren’t worth it. We’re including it on the list because it’s not objectively bad and it will be right for some people. And if we didn’t include it, you’d wonder if it just got overlooked.
BetaFPV -
O4 Wide / PNP
RaceDayQuads
GetFPV -
O4 Wide / PNP
Show product
Caddx
Curve Micro 16
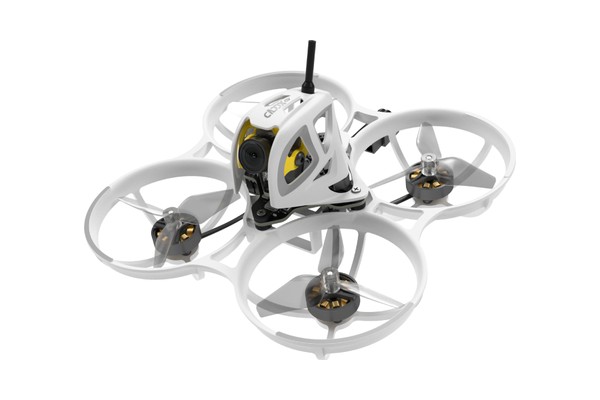
A 75mm BnF whoop with the Ascent Lite+ vTX and camera already installed. If you want to try Ascent without building anything, this is the easy way in. Don’t even take a second glance at the Protos drone that originally introduced the Ascent system. This one beats it in every spec.
It weighs 48 grams and runs on 1S with the A30 plug. It’s bind-and-fly with a built-in ExpressLRS receiver, and it comes with a 6-port charger and a case — but no batteries, so budget for those. Choose the Micro 16 if you want a simple 75mm whoop for indoor flying. If you also want to fly outside, look at the Curve Micro P18.
Caddx
NewBeeDrone
RaceDayQuads
GetFPV
Show product
Caddx
Curve Micro P18
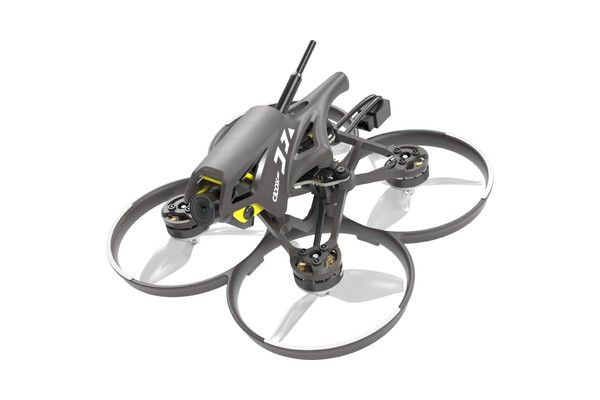
A smaller, lighter Ascent drone: 68mm and about 33 grams, with the Ascent Lite+ vTX installed. Its trick is that it converts between a ducted whoop and an open-prop toothpick, so your drone can get maximum acrobatic maneuverability outdoors, and protected props (and walls and furniture) indoors.
It’s bind-and-fly with ExpressLRS. The vTX is a separate board, so you can replace it on its own if … anything happens. It comes with a charger and a case, but no batteries. Choose the P18 if you want one drone for indoor and outdoor flying. But be aware that the P18 will be more powerful and harder to control in tight indoor environments. Choose the Micro 16 for a more “pure whoop” experience, especially if you intend to fly indoors.
Caddx -
Standard / Black Gold
Show product
BetaFPV
Meteor75 Pro P1
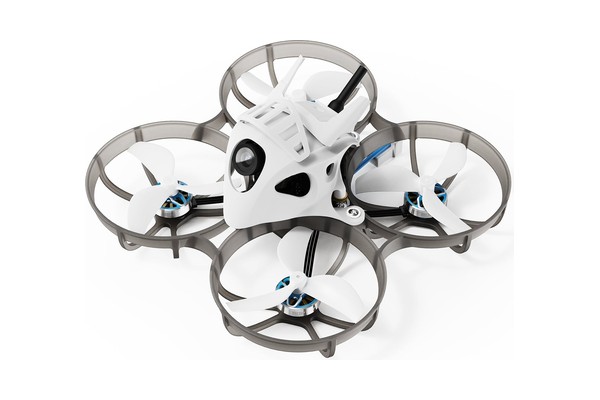
BetaFPV’s Meteor75 Pro whoop with the P1 vTX installed. It’s a 75mm, 1S whoop at 37.5 grams, with a built-in ExpressLRS receiver and digital HD video. You can buy the whoop alone, or a ready-to-fly kit with the VR04 HD goggles, a LiteRadio 4 SE radio, and batteries. We’re NOT fans of the LiteRadio line, so we would steer you away from the kit, although we haven’t had our hands on the LiteRadio 4.
If you already own goggles with an HDMI input, buy the whoop alone plus the P1 HD vRX. If you’re starting from nothing and you’ve settled on P1, the kit is the simple way in. But if you’re choosing between this and the Caddx Curve Micro 16, we’d pick the Curve, because Ascent is the more mature system.
Show product
HappyModel Mobula6 65mm

In our (informal) opinion, the Mobula6 has been the most popular bind-n-fly Whoop since it came out. In a world where new stuff takes over every six months, that’s saying a lot. Whenever you build a quad this small, you make some compromises in terms of range and camera image quality, but the Mobula6 is as good or better than its competition, and its flight performance is spectacular. Notably, its video transmitter is rated up to 200 mW, instead of the 25 mW that most other Whoops have, which gives more than 2x the range.
We recommend the highest-kv motors (25,000 kv 0802 or 26,000 kv 0702 depending which receiver type you buy), even though they might be too powerful for some pilots. If that’s the case, use the Betaflight “motor output scale” function to reduce the output to a value you’re comfortable with. The higher kv will always be waiting for you when you’re ready.
The Mobula6 has traditionally come with a built-in FrSky compatible receiver. There are two problems with this. First, it has poor range. Second, newer FrSky radios with ACCESS protocol won’t bind to it without buying an external transmitter module. Happymodel now sells the Mob6 with a built in ExpressLRS receiver, which has significantly better range. This is the one we recommend, if you’re willing to tackle the learning curve of getting started with ELRS.
Show product
NewBeeDrone AcroBee65 BLV4 65mm

On paper, it’s a little hard to justify choosing the Acrobee over the Mobula6. The Mob6 is significantly less expensive, lighter in weight, and uses standard JST1.25 motor plugs. The reason the Acrobee is here is its quality. Happymodel quality is … acceptable. Newbeedrone’s quality is higher, although nobody’s perfect. In addition, Newbeedrone ships from the USA. Which, if you’re in the USA is great. But if you’re anywhere else, you’ll probably prefer the Happymodel.
All that being said, ELRS on the Acrobee is UART based rather than SPI which is more user-friendly. Also, the antenna setup with both a t antenna up top and a whip antenna out the back is superior to the ceramic tower on the Mobula6 but you’ll lose video long before even beginning to push ELRS’s range.
NewBeeDrone
RaceDayQuads
Show product
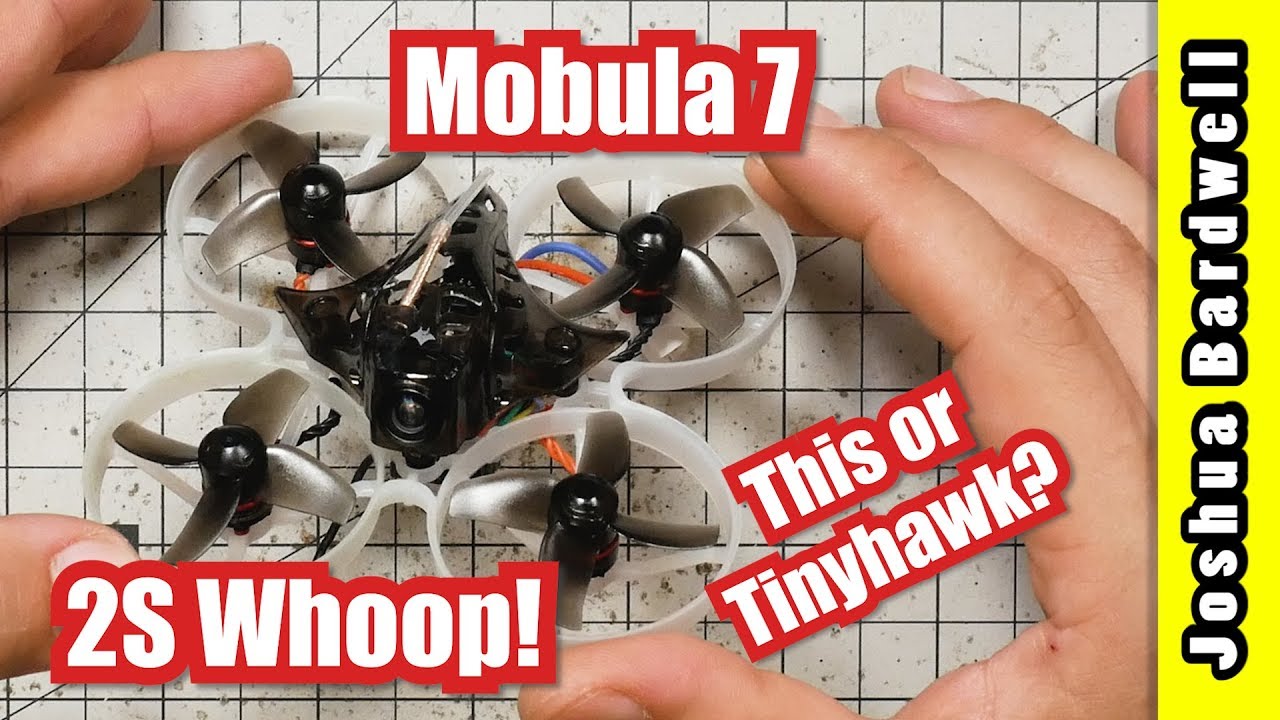
HappyModel Mobula7 75mm / 1S Analog

The Mobula7 takes what’s good about the Mobula6 and scales it up from 65mm motor to motor spacing with 1.2″ props to 75mm and 1.6″ props. This along with bigger motors and battery increases its power, speed, and run time making it a better choice for large indoor spaces like warehouses. The tradeoff is that there’s less of the “turn on a dime” agility that Whoops are known for making it much harder to fly in smaller indoor spaces with much more momentum behind crashes.
The 75mm is still too small to be fully comfortable outdoors in even a little bit of wind, and its size makes it a bit harder to squeeze into tiny gaps and through gates when indoors. So don’t assume that bigger equals better. Some pilots feel that the 75mm fixes everything “wrong” with the “tiny, under-powered” 65mm class. Others feel that 65mm is perfect just as it is, and anything else ruins the delicate balance that makes the formula so fun. You just have to decide which one you are.
RaceDayQuads
GetFPV
Amazon
Show product
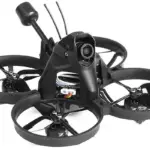
Mobula7 HDZero 75mm

Here’s what makes this quad stand out: it’s got HDZero digital high-definition video instead of standard-definition analog. HDZero is a generational leap forward in image quality and range compared to the analog video transmitters typically used on Whoops. HDZero is particularly appropriate for small quads because its video transmitters are light–not as light as analog vTX, but much lighter than DJI. In short, HDZero is the best video system for ultra-small quads today.
Bear in mind, you won’t be able to use this with your standard analog FPV goggles. You need an HDZero video receiver or goggles with HDZero receiver built in.
The HDZero version of the Mobula7 is a bit heavier than the analog version, so it doesn’t fly quite as well, but it’s still usable indoors, and the improvement in video quality and range will be more than worth it to most people.
HDZero isn’t the only thing that makes this quad stand out. It’s also got a built-in ExpressLRS receiver. For more on ExpressLRS, visit the Controller/Receiver page of this site.
GetFPV
Show product
iFlight Alpha A85 85mm / 4S DJI HD

We almost didn’t include 85mm quads on this page. They’re in an awkward middle ground where you might as well go up to a 95mm, which will fly better and longer, without being too much bigger or heavier. But there’s one specific reason to choose an 85mm Whoop, and that’s if you want the smallest possible quad that carries a DJI FPV video transmitter.
Once people start flying the DJI FPV system, they often don’t want to fly anything else, and they’re willing to make compromises to make it happen. This quad is the perfect example of that. It’s heavy and not that agile. But it’s small, and it does fly, and it works with your DJI FPV goggles. It’s got prop guards so you can fly it indoors, although the weight and power makes it more challenging than a proper 65mm Whoop.
Show product
HappyModel Mobula6 65mm
The ELRS version of the Mob6 will give significantly less latency and much more range, but if you haven’t invested in a module or new transmitter yet you’ll still get a great flight experience from FrSky.
Show product
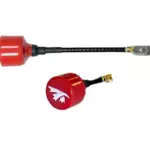
TrueRC Singularity Short / Ultra-Short U.FL Antenna

You have 2 options here, for maximum weight savings the Ultra-Short can actually be tucked up under the canopy for maximum durability. Alternatively you can run the regular Short version of this antenna out the top/rear of the canopy for maximum range. The long version is needlessly heavy/floppy.
RaceDayQuads -
Short
WeBleedFPV -
Ultra-Short
Tiny Whoop -
Short / Ultra-Short
TrueRC -
Short / Ultra-Short
Show product
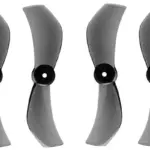
Gemfan 1210-2 31mm Bi-Blade 1mm Shaft

These bi-blades are truly unicorns outperforming most of the tri and quad blade props in response time, efficiency, AND thrust on the high kv motors. For freestyle they give an amount of off-throttle throw that opens up a whole new world of momentum based tricks like power loops and stalls.
RaceDayQuads
GetFPV
NewBeeDrone
WeBleedFPV
Show product
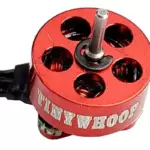
Tiny Whoop Red Rocket Series 0702 30,000KV

The Tiny Whoop 0702 30,000kv motors combine lightweight with a TON of power and pop, unlike any other motor we’ve seen for Tiny Whoops. 30,000kv may seem crazy but if it’s too much power for you to control, use a motor output limit to scale them down in Betaflight’s PID tab.
If you don’t quite feel up to 30,000 kv, there are other kvs to choose from at the link below. Lower kv will give less power and responsiveness, but easier to control for beginners. Also, the higher kv ones are sometimes out of stock because they’re so AWESOME.
Tiny Whoop
Show product
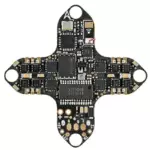
BetaFPV F4 1S 5A Toothpick/Whoop Flight Controller

The BetaFPV F4 FC is the lightest AIO with low latency ELRS on board and has been just as reliable as the other popular options from HappyModel. This new version has a black box chip onboard making tuning MUCH simpler and the motor plugs are removable with pads underneath to save another half gram or so.
RaceDayQuads
BetaFPV
Amazon
Show product
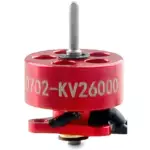
HappyModel SE0702 Brushless Motor / 26000KV

The HappyModel 26,000kv motors are the most widely available and in stock high kv 0702. You’ll want to motor limit down to around %92 in the PID tab or OSD to bring them to roughly 24,000kv which is the sweet spot for power, run time, and throttle resolution on most tracks. Both Tiny Whoop and WeBleedFPV sell their own versions with the motor wires soldered to a PCB and in higher or lower kvs.
RaceDayQuads
GetFPV
Amazon
Show product
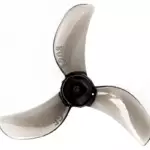
Gemfan 1208-3 31mm Triblade 1mm Shaft

These new Gemfan tri blades are almost as light as the incredible 1210 bi-blade prop but with the extra grip from an entire extra blade making them the favorite for most racers. With a nice low pitch, these also match up well with high kv motors for great run time and PID loop performance. The prop mounting hole is also correctly sized and open on top so getting them on and off your motors will not be a nightmare.
WeBleedFPV
Amazon
Show product
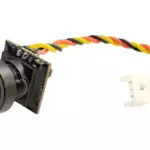
Tiny Whoop Pinch FX965TW Camera

The Tiny Whoop Pinch cam has the better image quality and wider FOV than the Runcam Nano 3 but is a tiny bit heavier which is a sacrifice that most top pilots are willing to make. The Ultra Wide version of it is significantly heavier but has a HUGE FOV.
Tiny Whoop
Show product
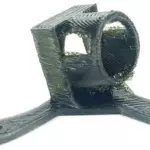
Pound Mount

The Pound mount is incredibly lightweight with many different uptilt options, but you’ll want to put a thin piece of foam between the mount/camera and your AIO to protect it during hard crashes.
Tiny Whoop
Show product
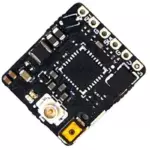
TBS Unify Pro32 Nano 25-500mW, 5.8GHz Analog VTX
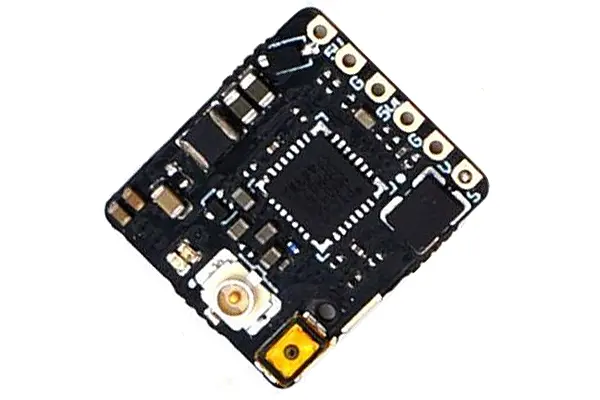
The TBS Unify Nano or Pro32 Nano are the easy choices here, races are strictly limited to 25mW but for an extra $10 having 500mW allows for some fun gorilla whoop missions.
GetFPV
NewBeeDrone
WeBleedFPV
Five33
Amazon
Team BlackSheep
Show product
Tiny Whoop
Smol Antenna

Weighing a mere .25 grams this antenna is one of the easiest ways to save weight, BUT it’s extremely fragile so buy two and maybe save them for the important races/finals.
Tiny Whoop
Show product
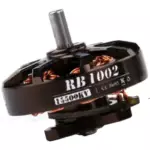
Show product
Flywoo Robo 1002 23500KV

These Flywoo 1002 23,500kv motors are big boys that will provide great thrust and incredible durability with a 1.5mm motor shaft. Yes they are significantly heavier than 0802’s but they handle that weight well with enough stator volume to turn either bi or triblade props without sacrificing response time.
Flywoo
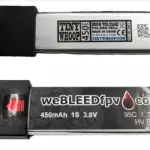
Show product
“Square Cell” 1S 450 mAh LiPo with BT 2.0

For batteries, we strongly recommend the “square cell” style of pack, which is used in the linked Tiny Whoop and WeBleedFPV batteries. We believe these are the same cell being labeled by different brands. If you end up using PH2.0 connector, you can still get decent performance with this style of battery.
WeBleedFPV
Tiny Whoop
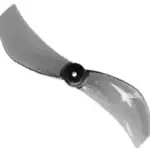

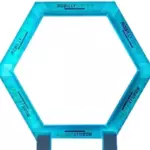
Show product
Mobilly
Whoop Gates

For those after-dark rip sessions, weBLEEDfpv has a few soft material LED gate options but Mobilly is the king of the night with an entire website of hard plastic hexagon gates and flags. These are actually bright enough to be seen during the day indoors as well so you can Tron out your house 24/7.
Mobilly Gates
Show product
ToolkitRC H1 Octa
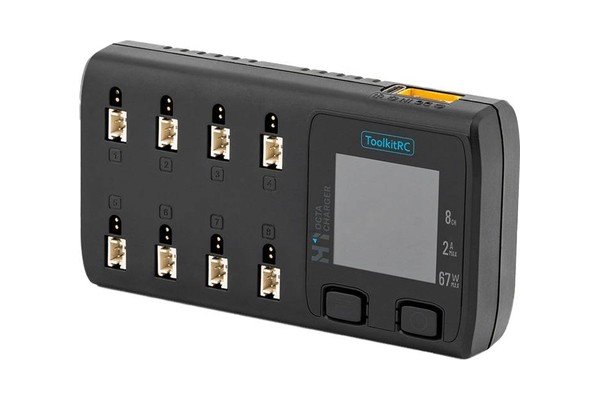
The ToolkitRC H1 Octa is an eight-channel charger for 1S whoop packs. That’s two more packs per cycle than the WhoopStor V3 — and each channel tops out at 2 amps instead of 1.3! That adds up to more packs charged faster.
Like the Whoopstor V3, the H1 Octa has storage mode, so your whoop packs don’t have to sit full between sessions. Power comes from USB-C PD or an XT60 (up to 28v), so a 6S flight pack can run it at the field.
Our first pick is still the Whoopstor, because it’s been around forever and has a solid reputation for reliability. But if you need to cycle packs particularly quickly; if you run larger 1S packs that benefit from the faster charge rate; or if you’re charging packs for more than one pilot at a time, the H1 Octa has solid advantages.
RaceDayQuads
GetFPV
Show product
Tiny Whoop
Whoop Gates

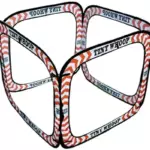
This cube gate is almost as big as the weBLEEDfpv gates but it’s free-standing and you can tie multiples together to make a vertical dive cube which is a personal favorite. You can also zip apart one of the sides to create 4 connected gates in a row to hang down for a ladder type of element.
Tiny Whoop
Show product
Tiny Whoop
Storage Discharger

Leaving packs charged for a long period of time wears them out and makes them perform worse. Plug your whoop packs into this little gadget and it’ll take them down to a safe 3.8v over the course of a couple of hours.
The main drawback of this device is its cost. You’ll want several to bring your packs down to storage in a reasonable amount of time, and by the time you’ve bought four or five, you could pick up the ViFly WhoopStor and have a more functional solution. But the tiny keychain size of this discharger is certainly appealing.
Tiny Whoop
Show product
WeBleedFPV
0702, 1MM
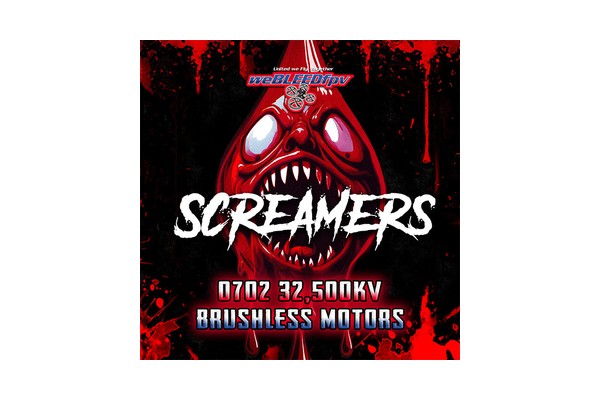
WeBleedFPV’s 0702s come in four kVs: 26,500 (Bleeders), 28,500 (Gore), 32,500 (Screamers) and 40,000 (SKRRRT). They have plugs, so on most whoops they’re a drop-in swap. WeBleedFPV also uses a knurled shaft, to keep the bell from slipping.
I put the Screamers on my Mobula6 HDZero. It felt sharper and a lot less mushy. My lap times only dropped a little, but outdoors and in open spaces it was a huge difference. The cost was flight time. They crush the battery. I also had to turn the PIDs down and set a 75% throttle limit to tame them. I used the Gore on my P1 whoop build.
Chris Rosser bench-tested the Screamers and the SKRRRT. Both were more efficient than you’d expect for their kV. The SKRRRT came third in his weight-adjusted ranking. But he measured it at about 34,000 kV, well under its 40,000 label.
The SKRRRT draws so much current, WeBleedFPV asks you to let the whoop rest 10 minutes between packs to protect the ESC.
WeBleedFPV -
26,500 (Bleeders) / 28,500 (Gore) / 32,500 (Screamers) / 40,000 (SKRRRT)
RaceDayQuads -
26,500 (Bleeders) / 28,500 (Gore) / 32,500 (Screamers) / 40,000 (SKRRRT)
Show product
WeBleedFPV
0702, 1.5MM
These are WeBleedFPV’s Screamers (32,500 kV) and SKRRRT (40,000 kV) with a 1.5mm shaft instead of 1mm. Get these only if your props are made for a 1.5mm shaft. That’s common on 75mm whoops.
Read the description of the 1mm version for how they fly.
Both are high-kV motors. If you want something tamer on a 1.5mm shaft, look at the WeBleedFPV 0802 1.5mm motors.
WeBleedFPV -
32,500 (Screamers) / 40,000 (SKRRRT)
Show product
NewBeeDrone Hummingbird
0702, 1MM
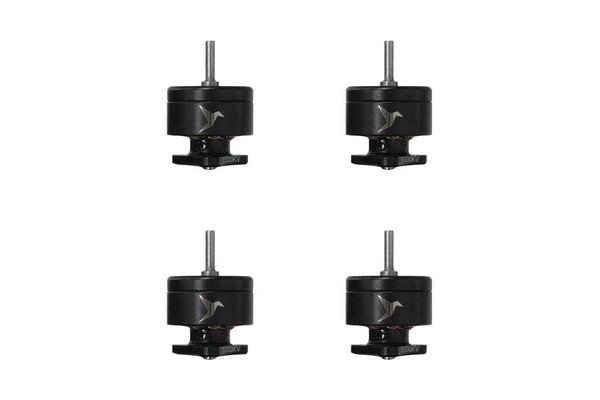
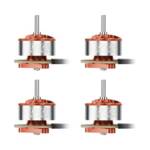
NewBeeDrone’s Hummingbird 0702 comes in one kV, 30,000, in two versions. The Standard has solder pads on the bottom and 25mm wires with a plug. It’s a drop-in replacement for the motors on the Hummingbird V4.
The RaceSpec skips the solder board, the silicone wires and the plug. The winding wire comes straight out of the motor, and you solder it right to the ESC. That gets it down to 1.29 grams! In Chris Rosser’s testing, it was the lightest motor he’d tested. It took first place in his weight-adjusted ranking.
The catch: the RaceSpec is fiddly. Each phase is two enamel wires, and mixing them up can burn out the motor. NewBeeDrone says it’s meant for its own Hummingbird RaceSpec whoop, only recommends it for experienced pilots, and doesn’t take returns on it.
NewBeeDrone uses smaller, JST 1.0mm plugs on their FC and motors. These motors won’t plug into the JST 1.25mm plugs on non-NBD FC. You’ll need to direct-solder.
NewBeeDrone -
30,000 (Standard) / 30,000 (RaceSpec)
RaceDayQuads -
30,000 (Standard)
GetFPV -
30,000 (Standard)
Show product
BetaFPV
0702, 1MM
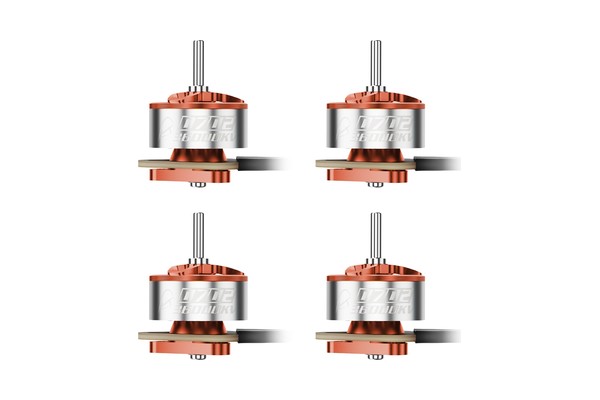
BetaFPV’s 2026 0702 comes in three kVs: 25,000 (Freestyle), 30,000 (Racing) and 36,000 (Champion). These are the motors on BetaFPV’s Air65 II. BetaFPV says a thinner stator lamination makes them more efficient than its older 0702s. The Freestyle and Racing have brass bushings. The Champion has ball bearings. The plugs are JST1.25 — the size most whoop flight controllers use, but not NewBeeDrone’s.
Chris Rosser tested the previous version, the 30,000 kV motor from the Air65 Champion. It came second in his weight-adjusted ranking, and it was his best all-rounder. Nobody we know of has tested the 2026 version yet.
Which one? As with the Air65 II, we’d pass on the Champion unless you NEED the extra kV. Many pilots report that tiny ball bearings on motors this size wear out faster than bushings.
BetaFPV -
25,000 (Freestyle) / 30,000 (Racing) / 36,000 (Champion)
GetFPV -
25,000 (Freestyle) / 30,000 (Racing) / 36,000 (Champion)
Show product
DamagD Nightwing
0702, 1MM
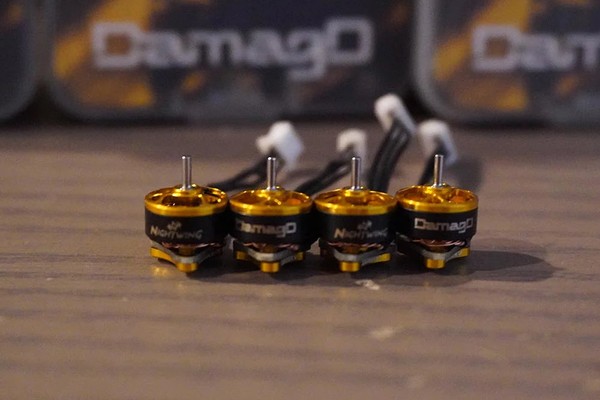
The Nightwing 0702 comes in three kVs: 25,500, 27,500 and 33,000. It was designed by the pilot Nightwing (Peter Rudman) for DamagD, and it’s made by VCI. It’s light — 1.38 grams with wires and a plug. The box includes 12 spare wires, and they solder to pads on the motor, so a torn wire is an easy fix. Frankly, we don’t know a lot about this motor, but the VCI pedigree combined with WeBleedFPV backing it, means you should at least know it exists!
Show product
RCinPower GTS V3
0703, 1MM
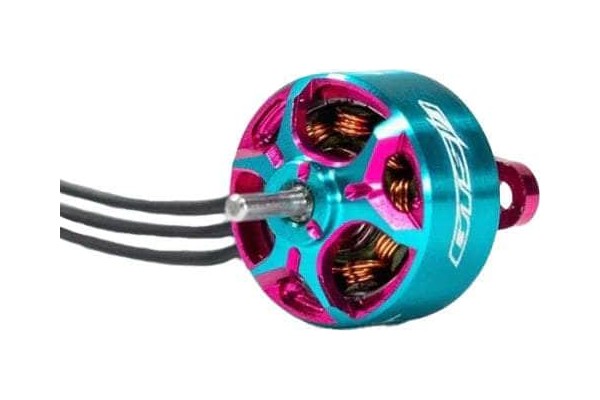
The 0703 is a taller version of RCinPower’s 0702. It comes in 23,000 and 27,000 kV, sold one motor at a time.
It’s heavier, about 1.9 grams with wires. But in Chris Rosser’s testing, the 27,000 kV version made more thrust than any other motor he tested. The 0703s were also some of the quickest to spin up. They make sense for a heavier whoop (like one with a digital vTX) or for bigger props, like 40mm.
Show product
WeBleedFPV
0802, 1MM
This is WeBleedFPV’s 0802 for props with a 1mm shaft. It comes in one kV: 21,500 (the Borgslayer). That’s a low kV for a whoop motor, and it pays off in efficiency. In Chris Rosser’s bench testing, the Borgslayer landed near the top of the chart. So think of it as a flight-time motor, not a race motor.
WeBleedFPV warns that it isn’t suitable for a frame flown tail-backwards.
WeBleedFPV -
21,500 (Borgslayer)

Show product
WeBleedFPV
0802, 1.5MM
These are WeBleedFPV’s 0802s for props with a 1.5mm shaft. They come in two kVs: 25,000 (Skyscrapers) and 32,500 (Treetoppers). Like WeBleedFPV’s other motors, they have plugs and a knurled shaft. Get these only if your props are made for a 1.5mm shaft. That’s common on 75mm whoops.
The 25,000 kV Skyscrapers are the tamer choice, for longer flights. The 32,500 kV Treetoppers are for racing. Nobody we know of has bench-tested either one yet.
If your props are 1mm, see the Borgslayer 0802.
WeBleedFPV -
25,000 (Skyscrapers) / 32,500 (Treetoppers)
Show product
NewBeeDrone Hummingbird
0802, 1MM
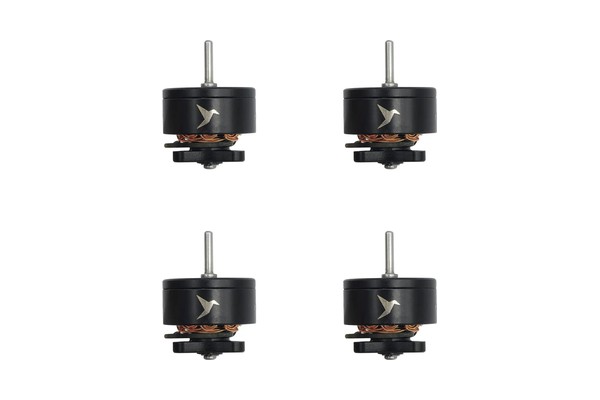
NewBeeDrone’s Hummingbird 0802 comes in one kV, 25,000. It has a 1mm shaft. At the time we write this, it’s the least expensive set of four in this section. In Chris Rosser’s first round of testing, the NewBeeDrone 0802 at 25,000 kV made more thrust than almost anything that wasn’t an RCinPower. Who says higher kv = more power?!
For a 75mm whoop on 1mm props, it’s an inexpensive way to get more torque. If you care more about flight time, the WeBleedFPV Borgslayer is the efficient 0802.
NewBeeDrone uses smaller, JST 1.0mm plugs on their FC and motors. These motors won’t plug into the JST 1.25mm plugs on non-NBD FC. You’ll need to direct-solder.
NewBeeDrone -
25,000
Show product
WeBleedFPV
Square Cell 1S BT2.0
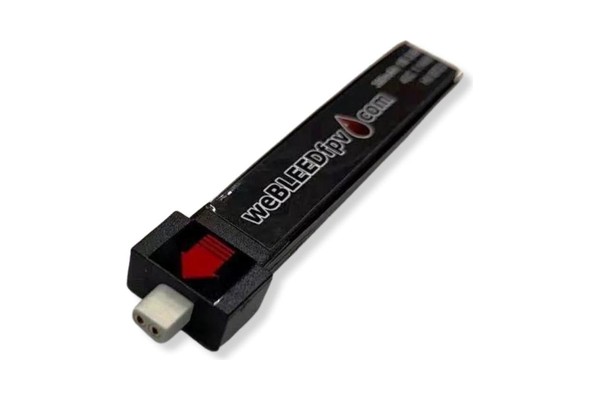
This is WeBleed’s entry in the “square-cell” category. Many square-cell batteries seem to come from the same factory, so they perform the same, and it’s mostly a matter of picking whose sticker you want on the outside. These perform as well or better than any other square-cell available. Available in 300 and 450 mAh.
Show product
BetaFPV
LAVA II 1S
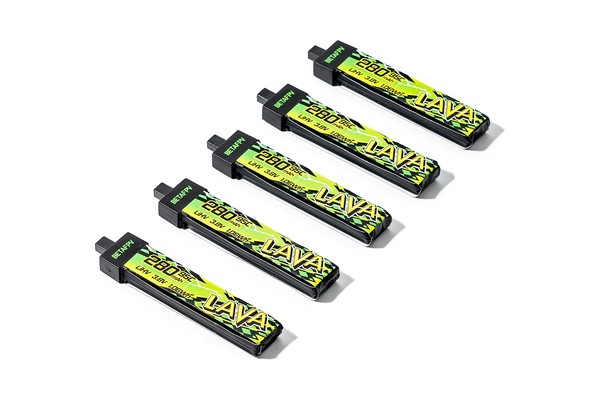
The LAVA II is BetaFPV’s square-cell whoop battery. BetaFPV calls it Z-folding. It comes in five sizes, from 280 to 680 mAh, all with a BT2.0 plug. Per pack, it costs less than the WeBleedFPV at every size, and about half as much as the WeBleedFPV 450. It’s also the only BT2.0 pack here bigger than 450 mAh, for heavier 75mm whoops.
We’re not aware of any empirical testing to verify this, but some have reported that the Lava II batteries don’t perform as well as other, more expensive options. We still think they’re worth including here.
Get the 280 or 320 for 65mm whoops and the 480 or 580 for 75mm. The 680 is for the heaviest 75mm whoops. If you want the best performance, get the WeBleedFPV. If you want to save money, or you need a bigger pack, get these.
BetaFPV
Show product
Tattu
300mAh 1S 75C BT2.0
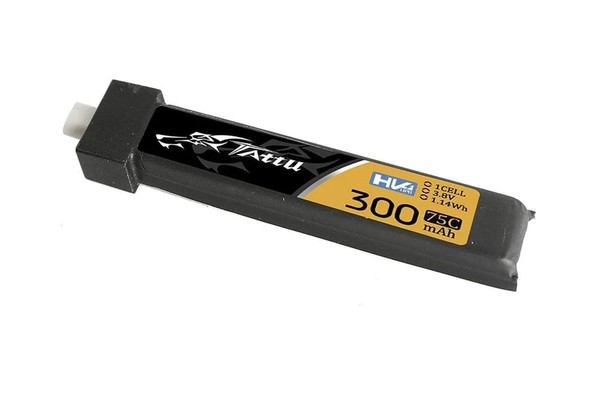
Tattu’s 300 mAh pack is a popular battery for 65mm whoops. It comes with either a BT2.0 or a PH2.0 plug. We’re listing it because people ask about it. But we don’t recommend it over the WeBleedFPV 300, for a couple of reasons.
First, the BT2.0 version is hard to find. At the time we write this, only the PH2.0 version is in stock. Don’t buy PH2.0 batteries.
Second, it costs more. Five Tattu packs cost about what six WeBleedFPV packs do.
Some have reported that it holds its voltage under load as well as the best whoop packs. So if you find the BT2.0 version in stock, or you already own a drawer full of them, it’s a fine battery. Otherwise, get the WeBleedFPV.
RaceDayQuads
GetFPV
Show product
NewBeeDrone
Nitro Nectar Gold NX69 1S
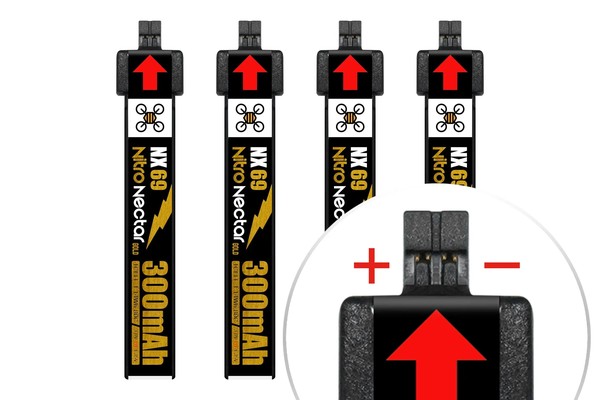
These are NewBeeDrone’s Nitro Nectar Gold packs, with NewBeeDrone’s own NX69 plug. They come in 300 and 550 mAh. We’re listing them because people ask about them. But we don’t recommend them because of their proprietary plug.
The plug, NX69, is NewBeeDrone’s own design. As far as we know, nobody else sells batteries with it. So every pack you buy for that whoop has to come from NewBeeDrone. And you’d need an NX69 plug on your drone as well. We don’t like being locked into one vendor like that.
Also, the gain is small. NewBeeDrone says NX69 delivers about 5% more peak current than BT2.0. To get it, you solder the NX69 pigtail from the box onto your whoop. NewBeeDrone also says the packs plug into PH2.0 whoops — but that defeats the whole purpose of the upgraded connector.
If we bought a drone with an NX69 connector, the first thing we’d do is solder on a BT2.0 plug and never look back.
October 25, 2026
Show product
HOTA F6 Ultra
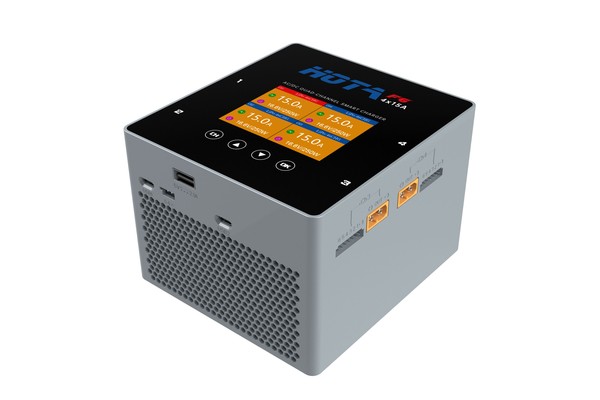
The HOTA F6 Ultra is a four-channel AC/DC charger, so it charges four separate packs at once without a parallel board. It outputs up to 15A per channel. On wall power it shares 500W across the four channels — about 125W each when all four are busy, which is enough to charge four typical 5″ packs at around 3-4C each. On a DC supply, each channel gets up to 250W, for 1000W total. It can also join two channels to charge one big pack at up to 500W, and it can discharge packs back into the supply (250W max on each channel). It achieves these high output powers in a compact size through the use of GaN transistors.
Whether you need this charger depends a lot on how big the batteries you use are, and how fast you’re comfortable charging them. If you only fly 5″ drones and charge at 2C, you don’t need the F6 … but it’s always nice to have headroom, right? And it’s not THAT much more expensive than smaller chargers.
RaceDayQuads
GetFPV
Show product
ToolkitRC H1 Octa
The ToolkitRC H1 Octa is an eight-channel charger for 1S whoop packs. That’s two more packs per cycle than the WhoopStor V3 — and each channel tops out at 2 amps instead of 1.3! That adds up to more packs charged faster.
Like the Whoopstor V3, the H1 Octa has storage mode, so your whoop packs don’t have to sit full between sessions. Power comes from USB-C PD or an XT60 (up to 28v), so a 6S flight pack can run it at the field.
Our first pick is still the Whoopstor, because it’s been around forever and has a solid reputation for reliability. But if you need to cycle packs particularly quickly; if you run larger 1S packs that benefit from the faster charge rate; or if you’re charging packs for more than one pilot at a time, the H1 Octa has solid advantages.
RaceDayQuads
GetFPV
Show product
ISDT BL8 Battery Checker
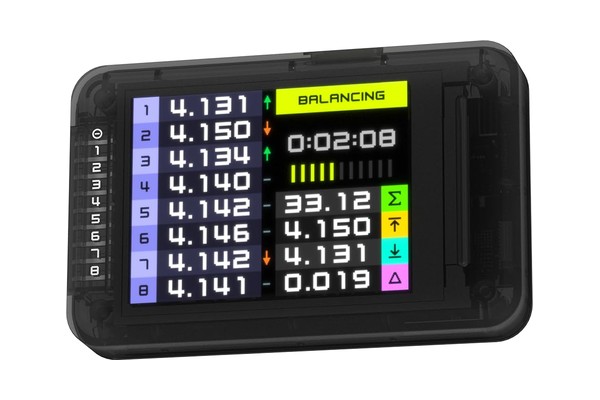
Would you pay $40 for a cell checker? I did, back when I bought a few of the BG-8S. The big screen and accurate voltage calibration were enough to get me to pull out my wallet. Now ISDT is tempting me again with the BL8.
The BL8 is thinner and smaller than the BG-8S and has a color screen. It also supports up to 8S packs (the BG-8S stops at 6S), which might just be the feature that I use to justify buying one (I NEED IT, SEE?). There’s a Bluetooth app, but I kinda cant imagine what I’d need that for.
You need a cell checker. The only question is whether you want to spend this much on a nice-looking fancy one, or get by with something smaller and cheaper.
Amazon
Show product
ToolkitRC B50 Battery Heating Bag
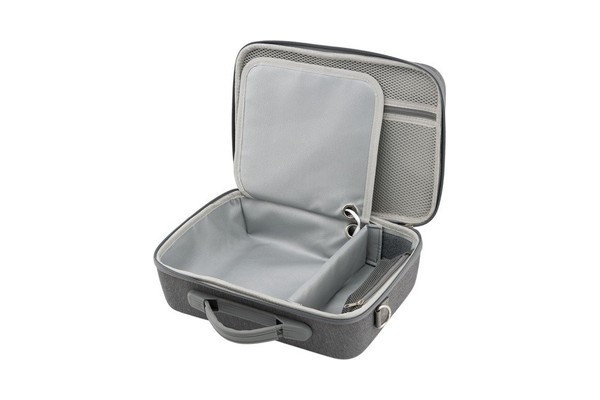
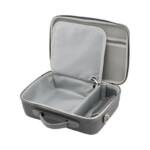
The ToolkitRC B50 is an insulated battery bag with a heater built in. Cold LiPos sag harder and give you less flight time, so keeping your packs warm at the field makes a real difference in winter.
The manufacturer says that it holds up to twenty 6S 1000mAh packs. You set the temperature anywhere from 25 to 55°C. The heater runs off a 2-6S pack plugged into its controller. The controller’s USB-C port can charge your phone, too. At full power it can flatten a 6S 1300mAh pack in about half an hour, so bring one just for the bag. It has a low-voltage cutoff to prevent you from killing the heater battery.
If you fly through real winters with a bag full of 6S packs, this is how you keep them ready. For a few packs on mild days, a warm pocket does the same job for free. Hey — you’re flying from inside the car anyway, right?
RaceDayQuads
GetFPV
October 20, 2026
Show product
Ascent HD Goggles
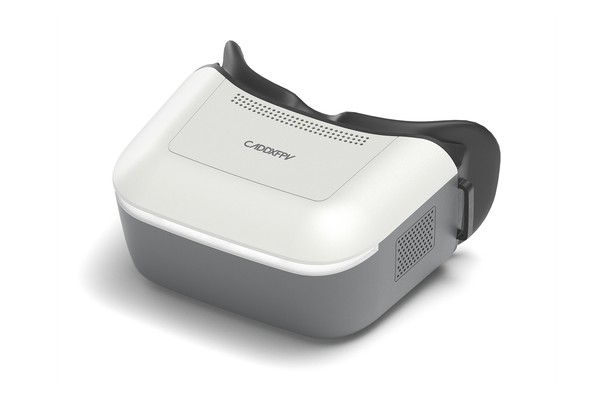
These are box goggles with a built-in Ascent receiver. When Caddx first launched Ascent, these were the only way to fly it. Now that the vRX and vRX Pro exist, you can fly Ascent with any goggles that have an HDMI input, so we’d only buy these if you’re starting from scratch and don’t own goggles yet.
Caddx has promised to release new Ascent goggles that can display 120fps feed and play audio from the vTX. They don’t exist yet, and we never make buying decisions based on promises of future products. For now, this is the only goggle you can buy with built-in Ascent receiver.
The catch is latency. In nils vo’s goggle latency tests, Ascent measured about 54 ms — about double the Walksnail Goggles X.
Caddx
RaceDayQuads
NewBeeDrone
GetFPV
Show product
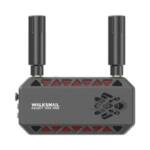
Ascent vRX Pro
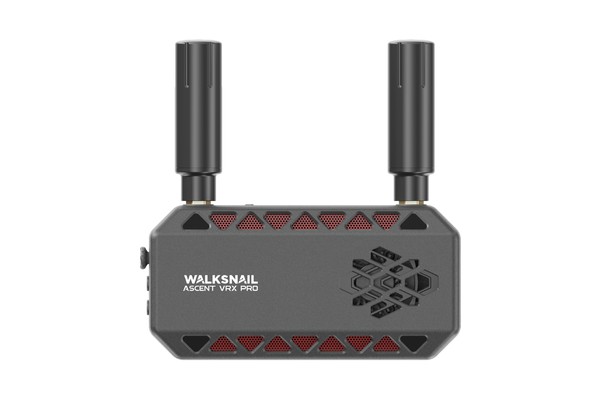
The vRX Pro is a standalone receiver for the Ascent system. Its job is to let you fly Ascent with goggles you already own. It works with any goggles that have an HDMI input — or any other display or screen.
The vRX Pro supports up to 720p and 1080p up to 120 fps. No FPV goggle can display 120 fps today, so most people will be flying at 60 or 100 fps, but Caddx has promised a new goggle that will work with the 120fps feed. Or you can use a gaming monitor that supports 120fps.
There’s a 1/4-20 thread on the bottom for mounting it on a tripod, but more likely you’ll find a way to attach it to your goggles (double-sided tape, a 3D print, whatever works). The DVR records to an SD card, and there’s a USB port for firmware updates and offloading footage.
My one gripe is the HDMI cable. The vRX has a full-size HDMI port, which is what you’d expect. But the cable it comes with is short and full-size on both ends. I can’t think of an FPV goggle with a full-size HDMI port, so that cable is basically useless without a mini adapter. Plan on buying a full-to-mini HDMI cable.
Caddx
Show product
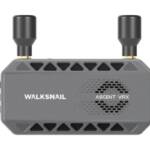
Ascent vRX
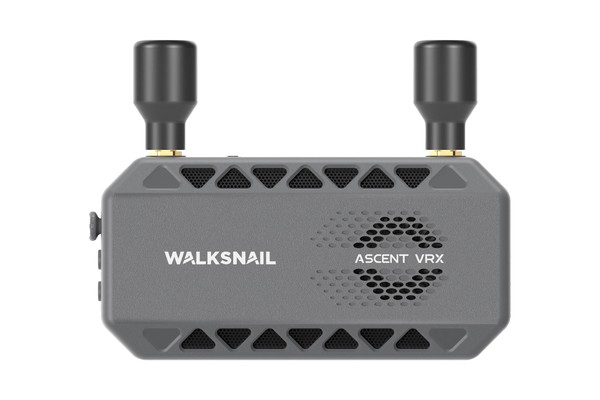
This is the standard version of the Ascent standalone receiver. Like the vRX Pro, its job is to let you fly Ascent with goggles you already own — anything with an HDMI input. The main difference between the standard vRX and the vRX Pro is that the vRX Pro supports up to 1080p120 fps while the standard vRX is capped at 1080p60fps. But the standard vRX can output 720p up to 120fps so the distinction really doesn’t seem to be that significant. Maybe more distinctions will appear in the future but for now, the Standard vRX seems like the value play.
Caddx
Show product
Ascent HD Lite+ Kit
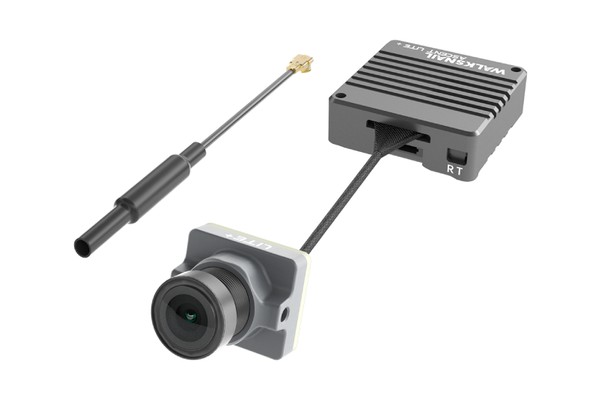
The Ascent Lite+ kit is the lightweight vTX and camera for Walksnail’s Ascent video system. It’s tiny! The vTX and camera together weigh 10.2 grams — light enough to use on a 75mm Whoop, or even a 65mm if you’re willing to compromise handling and flight time a bit.
The Lite+ puts out up to 500 mW. (The original Ascent Lite only does 100 mW and is only about $5 cheaper, so we don’t see a point in buying the original Lite at this point).
Audio! The vTX records audio to the DVR, which a lot of people have been asking digital systems for, but it doesn’t transmit audio to the pilot. However, the as-yet-nonexistent new goggle is promised to have audio transmission to the pilot.
Range and penetration are impressive for 500 mW. It held in behind my house and barn better than I expected. I’d give the image quality somewhere around a 6 to 8 out of 10, where DJI is an 11.
Caddx
NewBeeDrone
Show product
Ascent GT Pro 4W
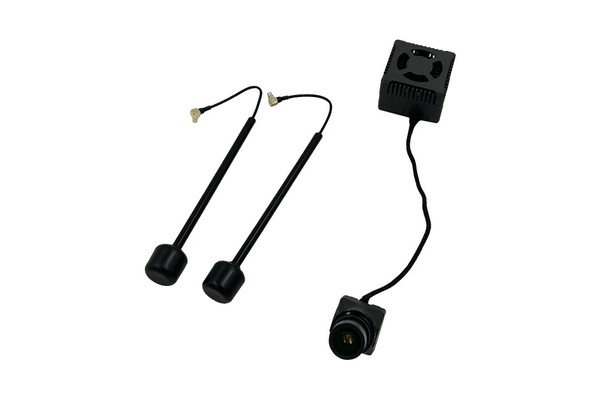
This is what makes Caddx Ascent stand out — even compared to “big brother” systems like Avatar and DJI. 4 WATTS OF POWER! Want the most range and penetration you can get from a digital system? I can’t say for sure the GT Pro will beat a DJI O4, but with this much raw power, it seems like it might.
It’s the same Ascent video link as the Lite+, so it works with the Ascent receivers and goggles above. And it’s got the same issue with latency. But if you’re doing long-range, you probably don’t care about that. And even if you’re doing bando-freestyle, it’s hard to argue with the kind of penetration this much power will give you.
For a Whoop or a small quad, get the Lite+. Choose the GT Pro only if you need the range, and you have the room and the battery to run a 4W vTX.
Amazon
AliExpress
Show product
BetaFPV VR04 HD Goggles
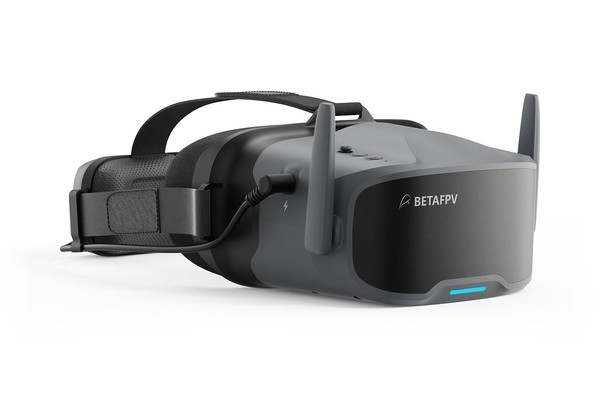
These are BetaFPV’s standalone goggles for the P1 system, with the receiver built in. They’re box goggles. That means there’s one big screen sitting in front of your eyes. As box goggles go, they’re not bad, but box goggles usually don’t fit the face as well as binocular-style.
If you already own goggles with an HDMI input, you don’t need these. The P1 HD vRX will send the P1 signal into the goggles you have.
You should choose these if you’re looking to get into digital FPV as cheaply as possible, and you’ve settled on the P1 system over the Caddx Ascent system.
BetaFPV -
VR04 HD / VR04 HD Pro
RaceDayQuads -
VR04 HD Pro
GetFPV -
VR04 HD / VR04 HD Pro
Show product
BetaFPV P1 HD vRX
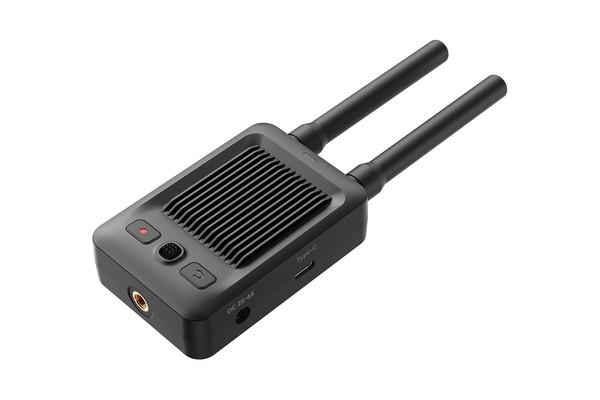
This is the standalone receiver for BetaFPV’s P1 system. Its job is to let you fly P1 with goggles you already own. It works with any goggles that have an HDMI input. It runs on 2S to 6S, and there’s a 1/4-20 thread for a tripod. This is the receiver I flew in my P1 review, and range and penetration were surprisingly good.
If you want to get into the P1 video system and you have an existing set of goggles with HDMI input, I would choose this vRX over the VR04 goggles. The latency may be slightly higher, but the ergonomics of your existing goggles are probably a lot better than the VR04.
BetaFPV
Show product
BetaFPV P1 Air Unit
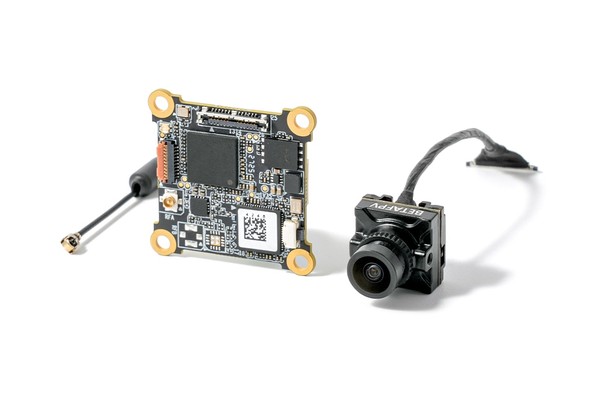
The P1 is the lightweight vTX and camera for BetaFPV’s P1 digital system. It’s sized for Whoops and other micros.
The image looks good. Maybe not quite DJI good, but for the price, I was impressed. Range and penetration were shockingly good — it held in behind the building where my signal usually breaks up, on an omni antenna. As the signal gets weaker, the image gets blocky (like other digital FPV systems) but the framerate held stable until the signal was almost gone, so it remained fairly flyable.
The big limitation is power. This is a low-power vTX, so it’s for micros and cruising, not for pushing range. (In theory, ArtLynk lets you use a higher-powered vTX from HGLRC with the same goggles, but read the section intro above before you count on that.)
BetaFPV
RaceDayQuads
GetFPV
Show product
BetaFPV P1 Monitor
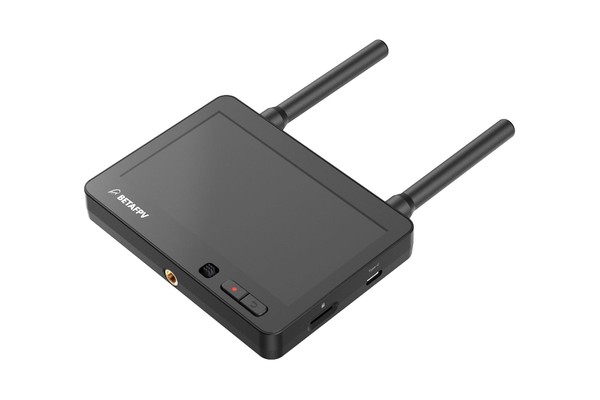
A 4.5-inch screen with a P1 receiver built in. It’s bright (1000 nits), it has a DVR, and it runs on 2S to 6S through an XT30 or a DC plug, so you can power it from a flight battery.
The catch: it has no HDMI output, and the P1 system has no spectator mode. So you can’t use it as a second screen for a friend while you fly off your goggles. You can’t even use it as a temporary screen while you’re working on your drone on the bench unless you re-bind your drone to it — which defeats the whole purpose of a bench screen for taking a quick look without putting on your goggles.
The only thing it’s good for is flying off it as your main screen, and most people won’t want to do that. So basically, you probably don’t want to buy it.
If you already own goggles with an HDMI input, get the P1 HD vRX instead.
BetaFPV
Show product
HGLRC Draco Air Unit
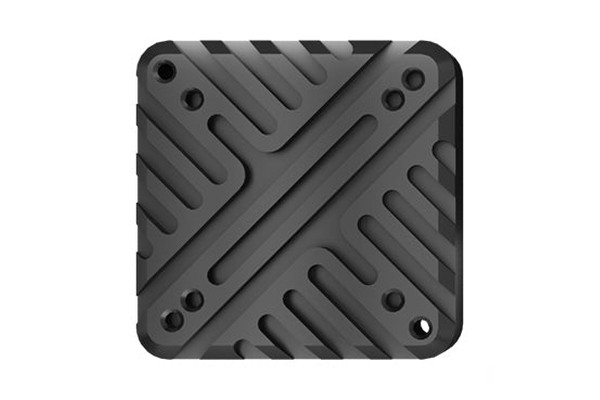
In theory, this is the “big boy vTX” for people who’ve bought into the ArtLynk ecosystem. In reality, it just shows how far behind ArtLynk is compared to Caddx Ascent. The Draco only puts out 1W, compared to 4W for the Ascent GT Pro. And the firmware that’s supposed to guarantee cross-compatibility between ArtLynk vendors (BetaFPV goggles binding to HGLRC vTX) is riddled with issues.
If you want a higher-power vTX on a low-cost system, we’d look at Ascent first. Choose the Draco only if you’re already committed to ArtLynk.
The air unit and the receiver must run matching firmware, and the original V1.0 firmware doesn’t work with other ArtLynk gear. Make sure yours is on V2.0 or newer.
HGLRC -
A1 Lite+ / A1 Pro / A2 Pro
RaceDayQuads -
A1 Pro / A2 Night Vision
GetFPV -
A1 Pro / A2 Night Vision
Show product
HGLRC Draco Ground Unit
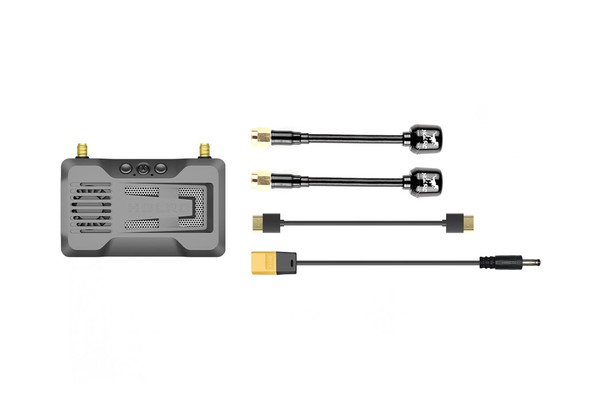
This is HGLRC’s standalone vRX for the ArtLynk system. Like the P1 HD vRX, it sends the picture to any goggles or screen with an HDMI input. It runs on 2S to 8S and records DVR to a microSD card. If you’re going to buy the Draco air unit, you might as well buy the Draco ground station, since it maximizes the chances that they’ll be compatible. But expect to run into issues binding to BetaFPV P1 air units on micro drones.
HGLRC
RaceDayQuads
GetFPV
Show product
Divimath Dual-Band 4W
Divimath 5.8 & 3.3 GHz Analog VTX
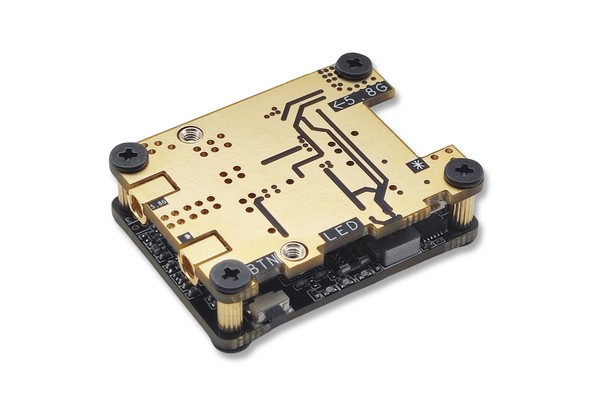
This is an analog vTX from Divimath, HDZero’s sister company. (It’s analog — it doesn’t work with the HDZero digital system.) It puts out up to 4 watts, and it has two outputs: one for 5.8 GHz and one for 3.3 GHz. Yes, 3.3 GHz is legal to use in the USA (for now), but even if you don’t intend to use it, this is still a very reasonably priced 5.8 GHz with a tremendously high output power in a tiny package.
In my testing, it had one of the cleanest and most stable signals I’ve seen.
How can such a powerful vTX be so reasonably priced? Basically every 5.8 GHz analog vTX uses the same RichWave chip, and the price of that chip recently went up about 5x. The days of the $15 analog vTX are gone. The Divimath vTX doesn’t use that chip at all. It uses custom silicon developed by Divimath.
Bonus: you can type in any frequency from about 4900 to 6030 MHz — not just standard ones–and it supports both SmartAudio and Tramp, so it just works with Betaflight.
Divimath -
VTX / Cooling Kit
Show product
LongXL Goggle Power Cable
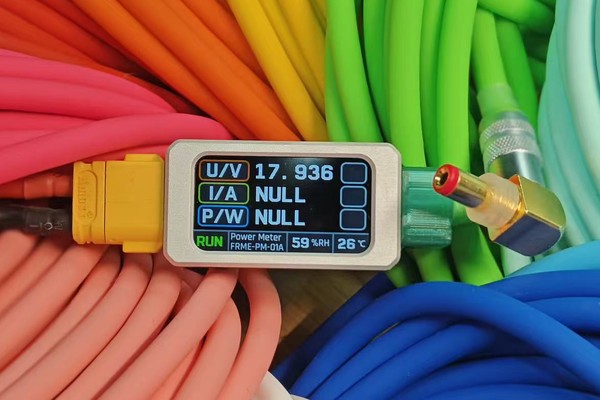
Every time this cable shows up in one of my videos, people ask where I got it. It’s a power cable for your goggles (or anything with this kind of barrel jack), with a little display that shows your battery voltage and how many amps and watts your goggles are pulling. You’ll never plug in a dead battery without noticing.
It’s legitimately well made: a nice metal case, epoxied (not hot-glued!) strain relief, and a braided or smooth silicone wrap in a ton of colors. There’s no voltage regulator inside — it passes battery voltage straight through — so it won’t help if your goggles can’t take your native battery voltage.
The catch is the price: about $60, depending on options, at the time of writing. I bought two. Is it worth it, or is that stupid? You decide.
LongXL
Show product
Alientek T90B
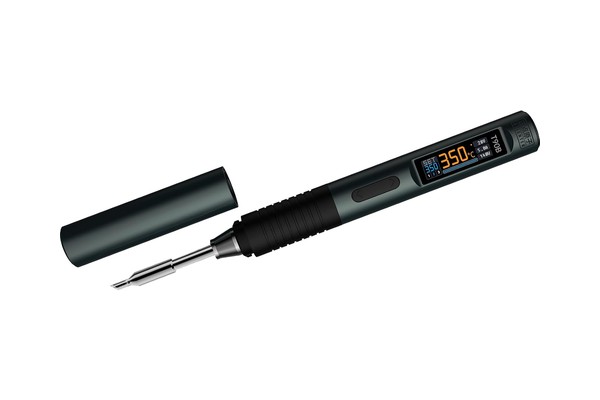
This is my ultimate travel iron. It takes standard JBC C245 tips, which have amazing heat performance, and it runs them at full power (about 140 W) off USB-PD or DC through its USB-C port. I run mine off a 6S LiPo with a USB-C to XT60 cable, and it heats up crazy fast. It’s beautifully built, too.
Two things to know. If you run it off a LiPo, go into the settings and set Work Vol to max — on Auto, mine limited itself to about 68 W. From the wall, you’ll need a 140 W USB-PD charger for full power (but it will still work great on lower-power USB-PD adapters). And the tips my kit came with are tiny, so pick up some beefier C245 tips if you’re going to work on larger wires and pads.
My kit didn’t come with a USB-C to XT60 cable, and I couldn’t easily find one to buy. So I bought a bare-wire USB-C cable and soldered my own XT60 to it. It’s linked below.
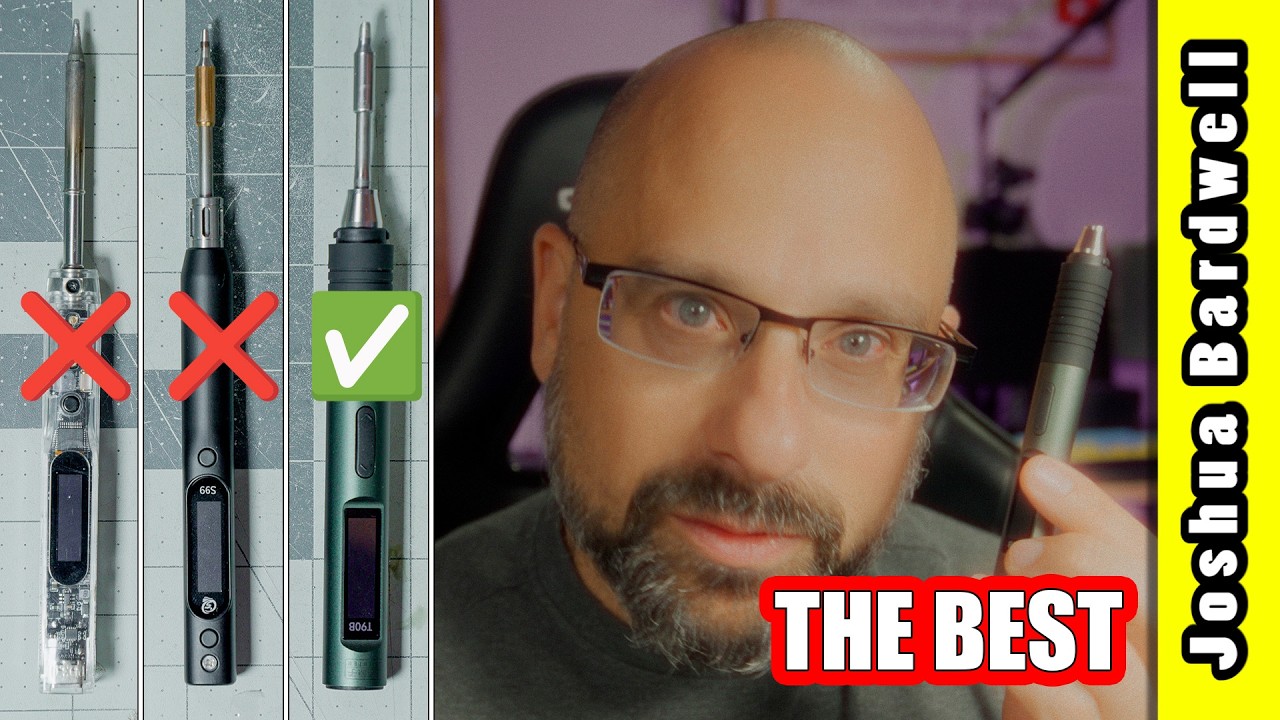
Amazon -
T90B Iron / USB-C cable
Show product
Sugon T21
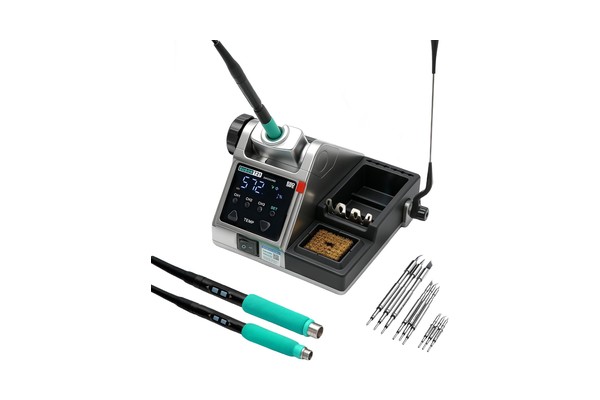
JBC makes some of the best soldering irons you can buy. What makes them so special is their tip design. The heater and temperature sensor are built right into the tip, and the heat delivery is incredible. It wakes from sleep and is back at temperature in about three seconds, and it tins a 12-gauge wire at just 325°C.
Problem is, JBC irons are $600+. But there are a bunch of Chinese irons that use the same tip design — or even authentic JBC tips — and have nearly-equal performance! The Sugon T21 runs about $100 (if you buy it from AliExpress; it’s more on Amazon). Honestly, it made me better at soldering. It’s my new daily driver.
If you work on anything but micro drones, make sure your kit comes with the C245 handle. It has higher wattage and uses larger tips. The tips that came with my T21 kit were too small for my use, so I bought some aftermarket C245 tips. You can spend $50 on authentic JBC tips if you want to. They’ll probably last longer, but oof the price.
The links below are to several irons, not just the T21. They all use JBC-style tips and have equal performance. The T21 is my daily driver, but I don’t like that its brass bristle is permanently affixed to the base. If I were buying today, I’d look hard at the Sugon A9, which is a much more faithful copy of the JBC base design — but I haven’t personally used it.
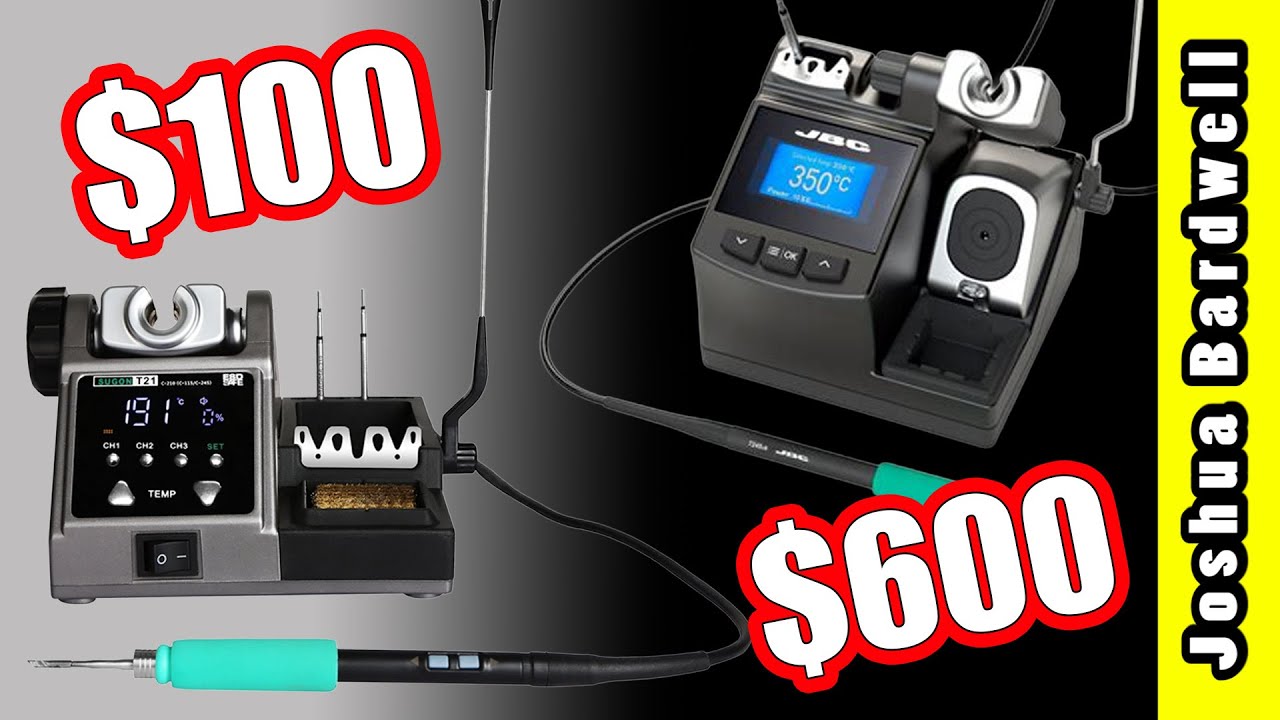
Show product
TS101
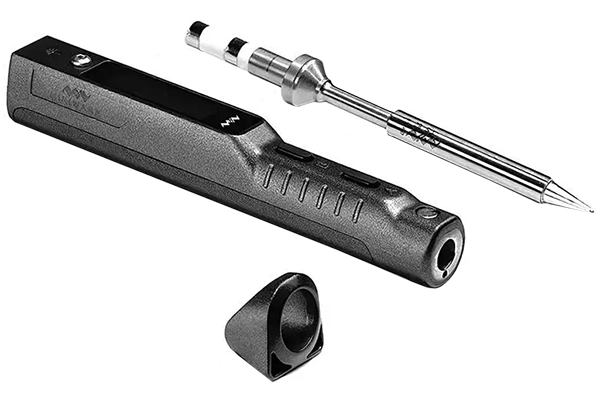
PORTABLE ROCK STAR
If this iron were just a little easier to hold, it’d be my choice for the best iron overall. But if it were easier to hold, it’d be bigger, and then it wouldn’t be so awesomely portable. There simply isn’t anything better for field repairs.
If you want to run this off a LiPo, you’ll need a 2.5mm to XT60 cable. You can make your own, or buy one at GetFPV.
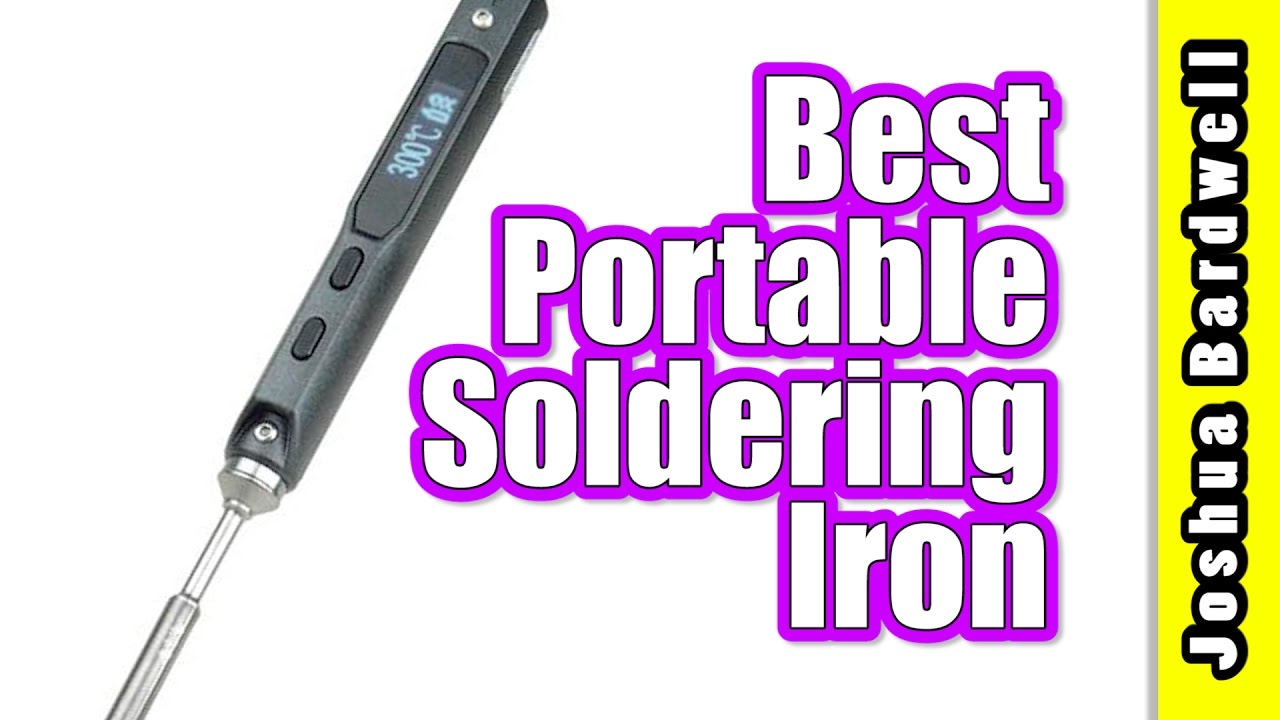
RaceDayQuads
GetFPV
Rotor Riot
Amazon
Show product
Hakko FX-888D
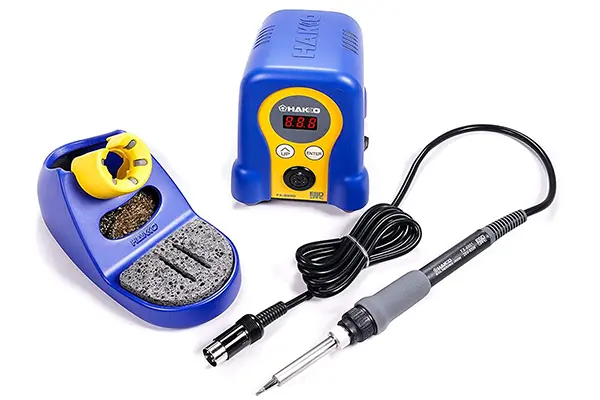
TOP OF THE LINE
This is widely considered to be the best soldering iron a hobbyist can choose. The 888D has digital push-button temperature control with five presets to quickly choose whichever temperature is right for the job. Comes with a sturdy base and sponge holder.
Amazon
Show product
Durability Above All Else
Tanq V2
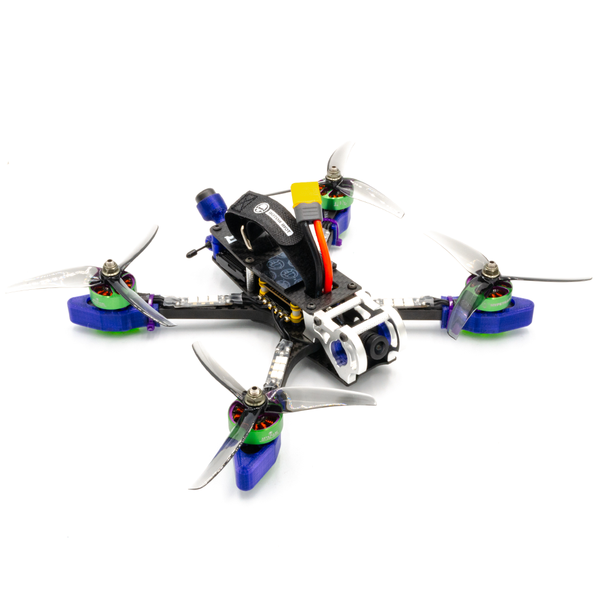
What if you designed a quadcopter for durability above everything else? You’d get the Tanq. The idea behind this quad is that you can’t fly your best if you’re worried about crashing. And you can’t fly at all if your quad is broken. 8mm thick arms promise to bounce back from the worst bashing. A massive assortment of 3D prints provide even more protection.
Is it heavy? Yup. Frankly, my first impression was that it’s too heavy to really be fun. And I passed it over. But people argued that this is the perfect frame for beginners, who benefit more from its durability than they lose in terms of its lack of agility. So let’s not say it flies “worse”. Let’s say it flies “different” than a lighter quad. The Tanq is significantly less nimble than its more delicate brethren. It’s ideal for more smooth, flowy, exploratory freestyle. If you prefer fast, flippy-floppy style with lots of tricks, this may not be the build for you. But if you want to be able to crash without fear and (almost always) bring home the same number of working quads that you showed up with, the Tanq should be near the top of your list.
Rotor Riot Pro-Spec builds are made to your exact specificiations, hand-built in Orlando, USA, and with a custom tune made exactly to a pro pilot’s requirements. Like all Rotor Riot Pro-Spec builds, you should contact Rotor Riot customer service if you have questions or want to customize your build.
Rotor Riot
31 products
- Crux3
- 2S Nano Baby 20
- Tiny Ape 2S 2.5″ ELRS
- FPV Cycle TP3
- AOS TP3
- Flywoo Nin V2 1203 Pro 11500KV
- RCinPower GTS 1204 8000KV
- FPV Cycle Light 13mm 1S Motor
- FPV Cycle Light 13mm 2S Motor
- X12 AIO
- Flywoo Goku GN413S 12A 2-4S AIO
- Eachine Nano V3
- Caddx Ant Lite Nano
- TBS Unify Pro32 Nano 5G8 V1.1
- HDZero Whoop Lite Bundle
- Mini VTX Kit
- NewBeeDrone Beebrain V2 Camera Mount Whoop Canopy
- Crux 3 Canopy
- TrueRC Singularity 5.8GHz Ultra-Short VTX Antenna
- Foxeer Micro Lollipop VTX Antenna
- TBS Crossfire Minimortal T RX Antenna
- TBS Tracer Immortal T RX Antenna
- ImmersionRC Ghost QT RX Antenna
- HappyModel ELRS Omni-Directional RX Antenna
- HappyModel ELRS EP2 RX Antenna
- GNB 530mAh 90C 1S HV Li-Po
- RDQ 350mAh 50/100C 2S LiHV XT30
- GNB 380mAh 2S 90C XT30
- GNB 450mAh 80C 2S XT30 / RDQ 450mAh 70C 2S XT30
- Emax Avia TH1609
- Gemfan Hurricane 3016 1.5mm / 2mm Shaft
16 products
- Le Drib Skylite 3″ Built & Tuned Ducted Drone
- Foxeer Foxwhoop 25
- GEPRC Cinelog 30
- GEPRC Cinelog 35
- iFlight Bumblebee V3
- Shendrone Slammed Squirt V2
- Cinespore Frame
- 3″ Ducted Prop Guards
- T-Motor F2004 3000KV
- Glarks M2 x 10x 3.5mm Female Threaded Knurled Brass Inserts
- Tattu R-Line 1050mAh 95C 4S XT60
- GNB 850mAh 4S 80C/160C – XT30
- Shen Drones Squirt V2.13 Cinewhoop Frame
- Shen Drone Squirt V2 3D Printed TPU Duct Set
- T-Motor 2203.5 3550KV
- Tattu R-Line 4S 1300mAh 120C – XT60
42 products
- GEPRC Smart35 (3.5”)
- Emax Babyhawk II HD (3.5”)
- Ummagawd 2Fiddy HD (5”)
- Avanquads Avio 3
- Quadmula Siren F3 Split
- QAV-S Mini 3”
- GEPRC ST35 (3.5”)
- Ummagawd 2Fiddy (5”)
- AOS 3.5
- F1404 4600KV
- AF144 1404 4510KV
- TC 1404 4600KV
- T-Motor P1604 2850KV / 3800KV
- Xnova 1804 2400KV / 3100KV / 3500KV
- T-Motor Pacer P1804 2400KV / 3400KV
- Axis Flying AF204 1810 KV / 2910 KV / 3710 KV
- Ummagawd Aerolight 2004 2400KV (4S) / 1600KV (6S)
- NewBeeDrone Flow 2004 1750 KV / 2000 KV / 2450 KV / 3100 KV
- iFlight Blitz AIO F745 FC / 45A ESC
- GEPRC F411 35A ESC
- Flywoo Goku GN745 w/ 40A BLHeli32 ESC
- F722 DM Mini HD FC 35A 2-6S ESC
- Foxeer Toothless 2 Nano Starlight Analog Camera
- Foxeer T-Rex Micro Camera
- Caddx Baby Ratel 2 Nano Camera
- RDQ 4S 850mAh 75C / GNB 4S 850mAh 80C
- CNHL 4S 850 mAh 70C
- Tattu R-Line 4S 850 mAh 95C
- Tattu R-Line 1.0 4S 550 mAh 95C – XT-30
- CNHL Ministar 4S 650 mAh 70C
- GNB 4S HV 650 mAh 60C
- GNB 6S 380 mAh 90C
- GNB 6S 550 mAh 80C
- Tattu R-Line 6S 650 mAh 95C
- RDQ 6S 650 mAh 70C
- Gemfan Flash 3052-3
- DAL Cyclone
- T3X2.5X3
- Gemfan Hurricane 3520
- T3.5X2.5X3
- Emax Scimitar 3.5″
- HQ T5x3x2

Show product
Gemfan
1608 Props

These brand new Gemfan 1608 props really come to life on high kv 1002 motors with great grunt and grip. They need more stator volume than you get with 0802’s but they also need more than 20,000kv on 1s making our suggested Flywoo 1002 23,500kv motor a great match.
Banggood
Show product
RadioMaster
TX16S Mk3
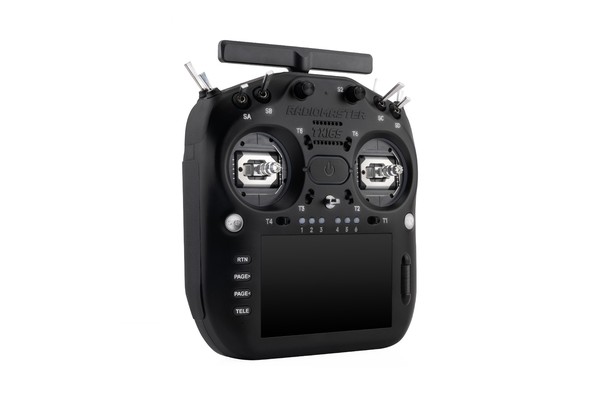
The TX16S Mk3 is RadioMaster’s flagship, and the biggest radio they make. It’s the most like a “traditional” RC controller. It has more switches, knobs, and sliders than any of RadioMaster’s other radios. If you fly planes with retracts, flaps, and lights, it has enough controls to do it. For FPV drones, it may be overkill, depending on how complicated your setup is.
The big 5″ color touchscreen makes configuring the radio faster and more convenient, and you can set up your own screens of widgets. On the flip-side, lots of people get on just fine with the smaller black and white displays on other radios. And the larger screen runs the battery down faster.
The Mk3 has a built in ExpressLRS module. For any other protocol, you’ll need to use its external module bay. Its built-in module is dual-band — 2.4 GHz and 900 MHz — with Gemini-X up to 1W. It’s also got dual cross-polarized antennas (one is in the handle!). It’ll give as much range and penetration as almost any ELRS radio made today.
The standard Mk3 has Hall effect gimbals. They’re “fine” but not “premium”. The Max upgrades to AG02 gimbals, with a CNC metal frame, so they feel weighty and have zero play at the end points. My opinion is that premium gimbals are like leather upholstery in a car. They don’t make you a better pilot, but it sure feels nice every time you interact with them. If you can’t afford them, you’ll still be able to do everything you want with the standard gimbals.
If you don’t need all those controls, we think the GX15 or the Boxer Crush will serve most pilots better, in a smaller package and at a lower price.
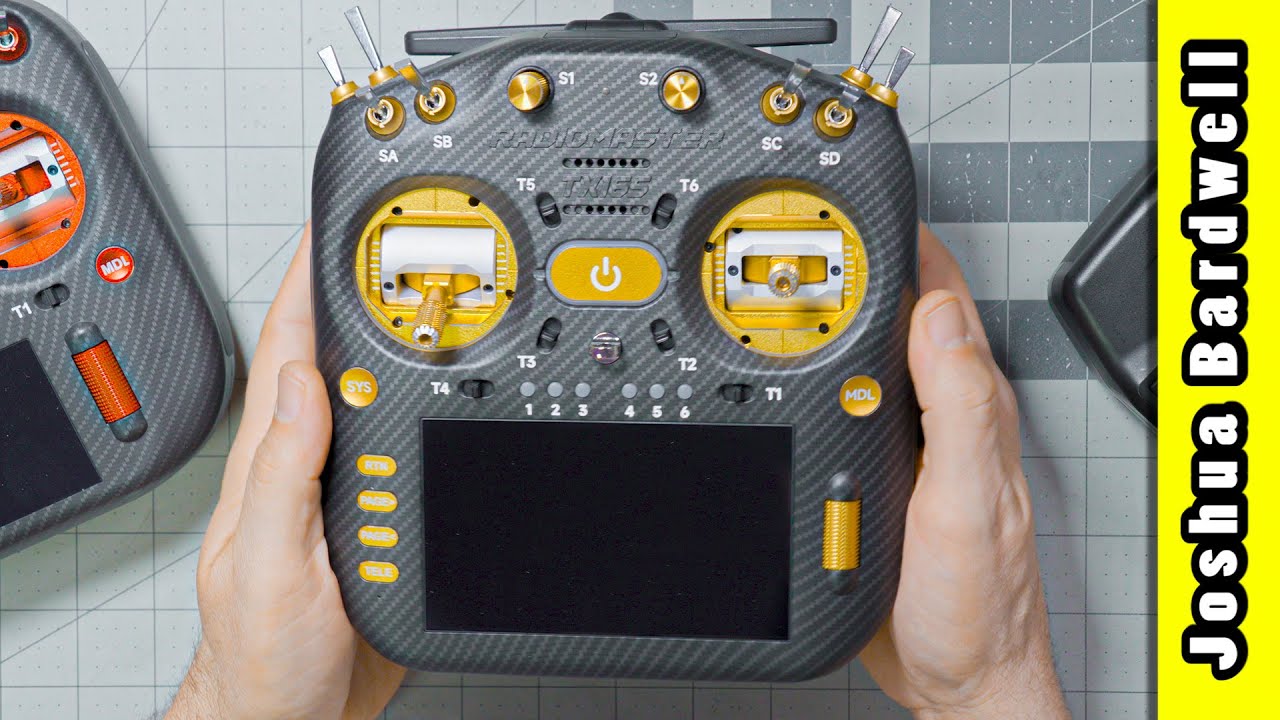
Show product
RadioMaster
GX12
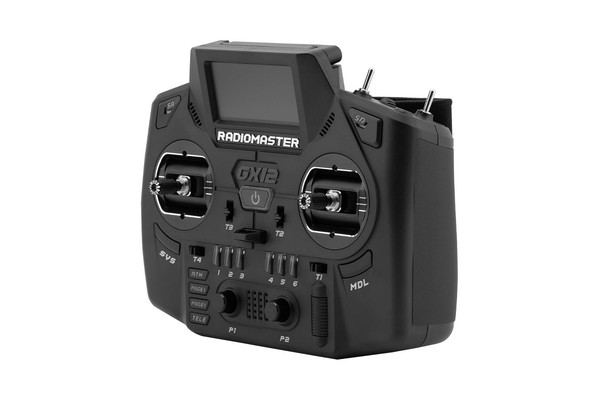
The GX12 is my daily driver. But it might not be yours. One reason I love it is its size. The gimbals and antenna fold, and it’s short enough to slide into a standard backpack without a dedicated compartment. But it doesn’t give up controls to get there. It has plenty of switches, sliders you can reach while flying, a 6-position button bank, and extra momentary switches that I use a lot. The catch: to make it compact, the switches are micro-size, and the screen is a small black and white OLED. I’m fine with these tradeoffs to clear up a bunch of space in my backpack.
The built-in ELRS module has two dual-band, 1W radios with Gemini. It can run on 900 MHz and 2.4 GHz. The built-in, foldable antennas give up performance for size, and I’ve noticed some reduction in range compared to radios with a full size antenna.
The GX12 has its own CNC metal Hall effect gimbals, and they’re okay, but you can’t get AG01 or AG02 gimbals for it.
If you want one radio that does everything and still fits in your bag, this is the one we recommend. If you want a color touchscreen, look at the TX15 or the TX16S.
RadioMaster
RaceDayQuads
GetFPV
NewBeeDrone
Five33
Rotor Riot
Show product
RadioMaster
Boxer Crush
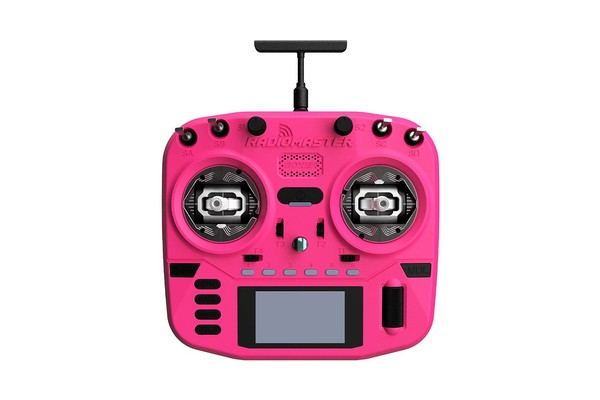
The Boxer is one of my favorite radios. It was my daily driver for about 2 years. It’s much more compact than the TX16S, while still being big enough to not feel like a “game controller” style radio in the hand. It feels solid, especially when combined with the AG01 gimbals. It has a mid-sized B&W screen–much smaller than the TX16S, but larger than the tiny screen on radios like the GX12. The battery bay is big enough to hold a 5000 mAh LiPo (sold by RadioMaster) so it lasts for a LONG time. And it can be purchased with a 1W built-in 2.4 GHz ELRS module, so you can get just about the most range you can possibly get on ELRS, without having to put an external module into your module bay.
What’s to dislike? The radio has four toggle switches on the front face, but the two shoulder switches are flat and press into the body of the controller. To me, this makes the left shoulder switch unsuitable for use as an arming switch, because to disarm, you have to push in, then release. In my opinion, arming and disarming should always be a single movement, so you can disarm as quickly as possible. On top of this, I find it difficult to press the shoulder switch without repositioning my hand off the gimbal.
Speaking of missing controls, the Boxer has no sliders that are accessible during flight. There are two potentiometer knobs on the face of the radio, but you can’t easily access them without taking your hand of the stick. So if you wanted to adjust a camera gimbal while flying you’d have a difficult time.
I’m also frustrated by the Boxer’s antenna. It comes with a very high-quality antenna that screws onto an plug on top of the radio. But the antenna eventually got damaged because every time I put the radio in my backpack, it bent over. I ended up using a 3D print to put the Pocket’s folding antenna onto my Boxer and, although I did see some reduction in range, the convenience was more than worth it.
The Boxer Crush adds AG01 gimbals and, somehow, lowers the price compared to the original Boxer. So umm. Yeah. Buy that instead. But carefully compare vs. the TX15 first!

RadioMaster
RaceDayQuads
GetFPV
NewBeeDrone
Five33
Show product
RadioMaster
TX15
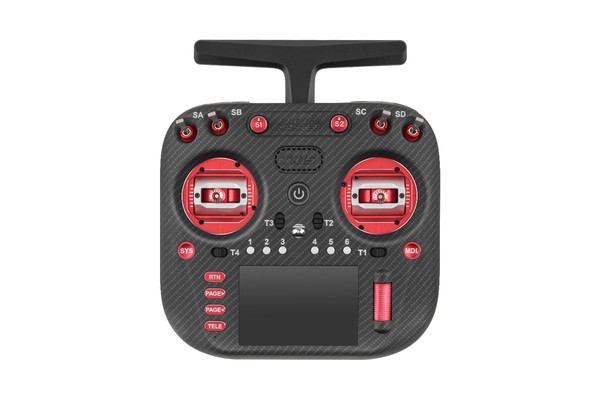
The TX15 is about the size of the Boxer Crush, but with a big color touchscreen instead of the Crush’s small black-and-white screen. The TX15’s ergonomics are damn near perfect. It’s more rounded, while the Crush is more angular. I love how the TX15 fits my hand.
The built-in ELRS module does both 2.4 GHz and 900 MHz, so it’ll bind with basically any ELRS receiver. It’s only got one radio though, so it can’t do Gemini. We don’t think that’s a big deal for most hobbyists. It has the same 1W max power as most other ELRS radios. The antenna folds, making it easier to pack.
The TX15 is missing some controls. There are no sliders and only one momentary switch, so if you run a complicated setup, you may run out. The shoulder switches are flat, like the Boxer Crush’s, but plates in the box let you swap in standard toggle switches.
Like other RadioMaster radios, the Max version adds AG02 gimbals and metal buttons. The standard version has Hall effect gimbals, which are fine, if a little less premium.
If you want a color touchscreen in a mid-size radio, this is a great choice. If you want more controls in a smaller radio, or Gemini, get the GX12. If you want everything this radio has and MORE, in a larger package, get the TX16S Mk3.
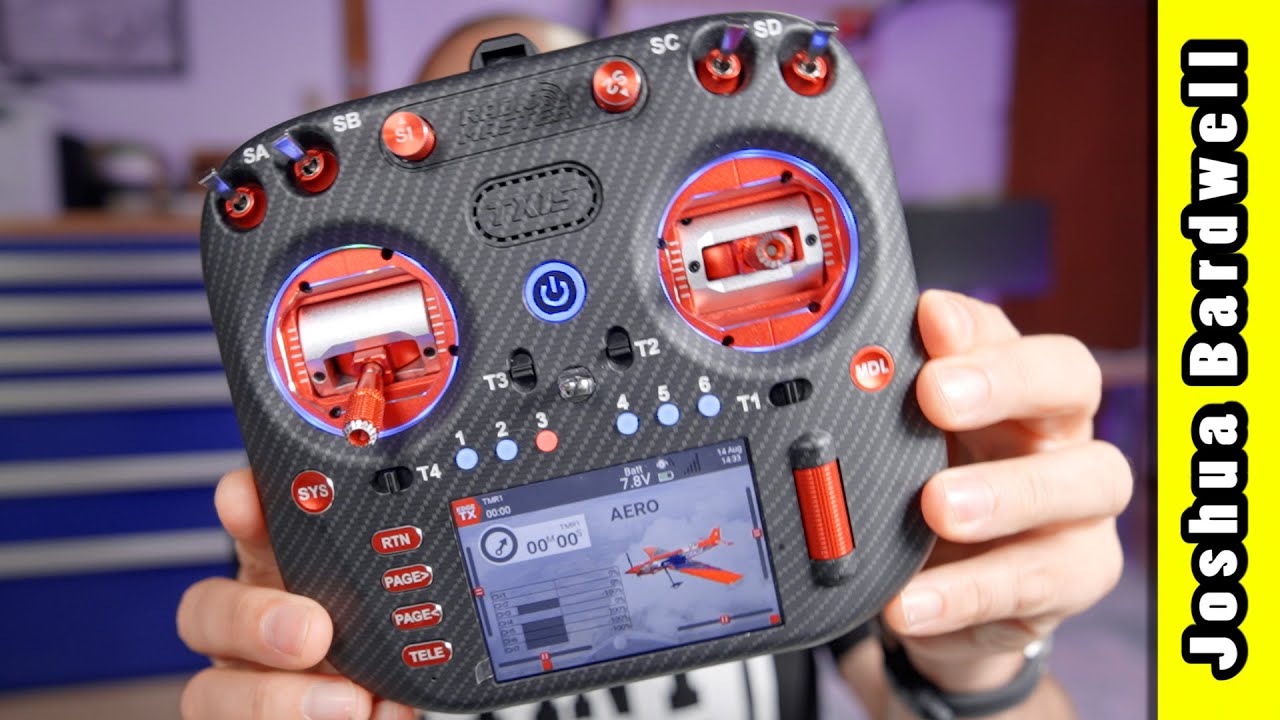
Show product
RadioMaster
GX15
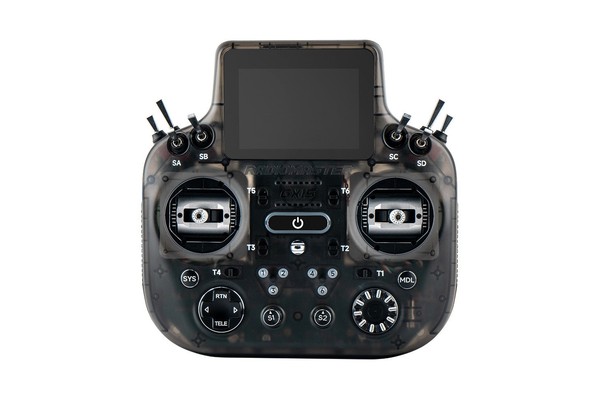
The main selling point of the GX15 is its color touchscreen, located at the top of the radio, where it’s easy to read while you fly. That matters most if you fly line of sight, and RadioMaster built this radio with traditional RC pilots in mind. The other change they made was to limit its ELRS output power to 250 mW, which means you’ll get about half the range of a typical 1W ELRS radio. And it’s 2.4 GHz only. Based on that, we don’t think this radio is ideal for FPV pilots, and it’s certainly not for long-range pilots. But it’ll be fine if you’ve decided you HAVE TO have it.
The GX15 looks like it’s the same size as the GX12, but it isn’t. When you take into account the screen on top, it’s almost the size of the TX16S Mk3. And that determines how much space it’ll take up in your pack. That extra size gets you full-size switches, a two-position switch on the left shoulder for arming, and the option of AG02 gimbals.
The Max has AG02 gimbals and metal buttons and knobs. Like leather upholstery in your car, they’re nice to have, but won’t make you a better pilot. The standard version does exactly the same things for less money.
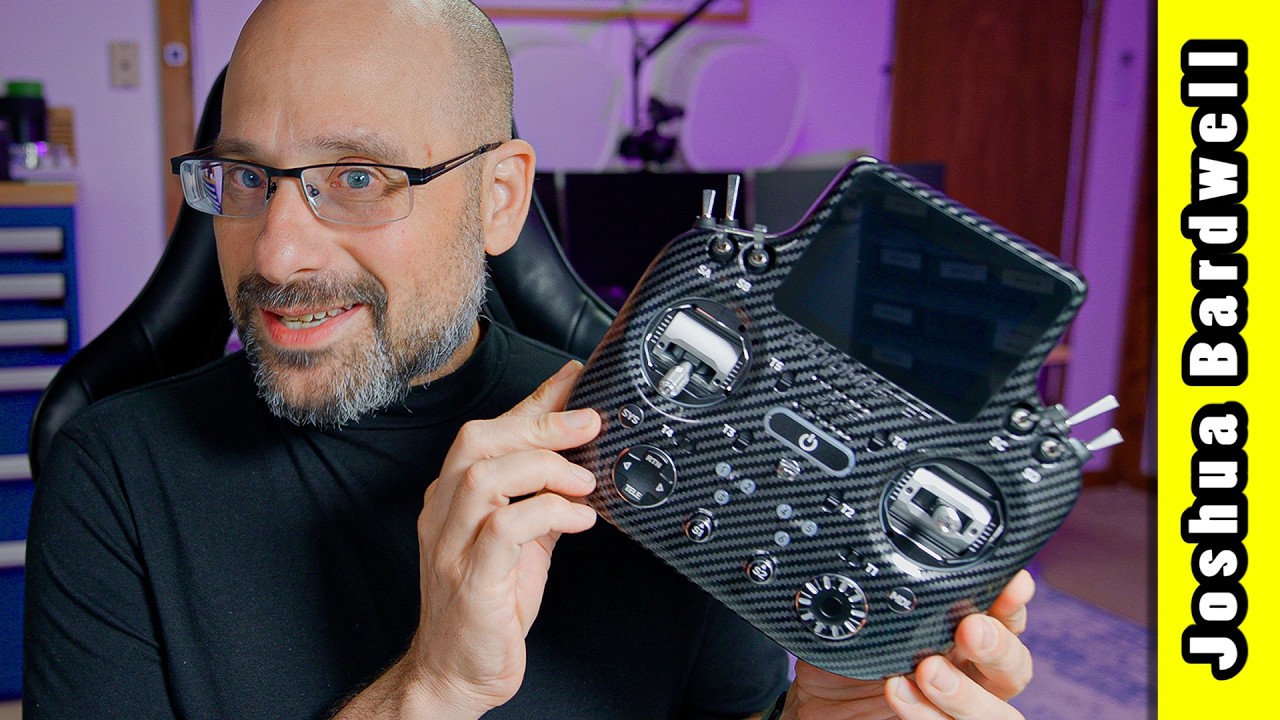
Show product
RadioMaster
TX16S Mk2
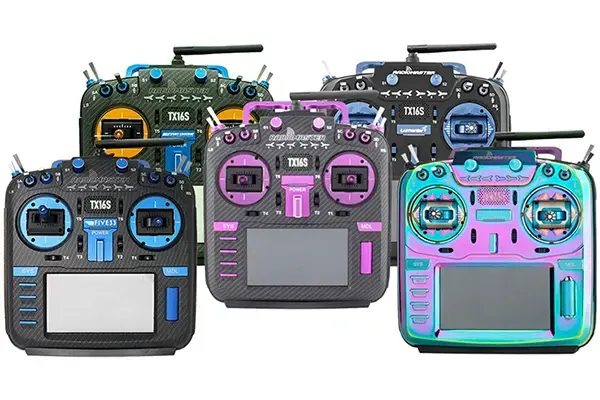
The TX16S is the oldest of RadioMaster’s designs. It’s the most like a “traditional” RC controller. It has more switches, knobs, and controls than any of RadioMaster’s other radios. If you wanted to fly a plane with lots of features like retracts, doors, dropper servo, and so forth, the TX16S has enough controls to do it. Robotics is another discipline where a large number of controls on the radio is desirable. But for FPV multirotors, the TX16S may be overkill. FPV pilots often just need 2 or 3 switches for arm/disarm, angle mode, maybe return to home, and they’re done.
The TX16S has a large color touchscreen. This makes configuring the radio faster and more convenient. The entire interface is redesigned around this touchscreen, with touchable buttons and menus. On the flip-side, there are lots of people who get on just fine with the smaller black and white displays on other radios. There’s no right or wrong answer here. Either this feature calls to you or it doesn’t.
One thing to note about the TX16S is that this radio was designed before ExpressLRS became a Thing. This means it was not designed to cool a high-powered ELRS module. If you buy the ELRS version of this radio, the internal ELRS module will only go to 250 mW. Other radios can do up to 1W, which gives about double the range. 250 mW will still give plenty of range, but maybe not as much as you’d want, esepcially if you are in an environment with a lot of obstacles, or if you want to use higher packet rates for reduced latency.
There are two variants of the TX16S. The base Mk2 has plastic buttons and regular Hall Effect gimbals. These gimbals are “fine” but not “premium”. They have ball bearings and Hall sensors, so they are adequatly precise and will last for a long time. But they also have a plastic frame, so they feel a bit lightweight and cheap. The Max versions of the radio have metal buttons and jog wheel and AG01 gimbals. AG01 gimbals have CNC metal frame, so they feel weighty and premium. They have zero flex at full deflection. My opinion is that AG01 gimbals are like leather upholstery in a car. They don’t make you a better pilot, but it sure feels nice every time you interact with them. If you can afford a radio with the AG01 gimbals, it won’t be money wasted, but if you can’t afford them, you’ll still be able to do everything you want to do with the standard Hall Effect Gimbals.
For what it’s worth, the TX16S is the most expensive of the RadioMaster product line, but it’s not the most capable or the most premium. Its price has a lot to do with its size and the big color screen. Many pilots will be better served by a less expensive radio in a more compact form factor, at a lower price. You should also know that there are some “special edition” versions of this radio, with custom colors and cases, being sold at exorbidant prices. These radios are only cosmetically different from the regular TX16S Mk2. Only buy them if you really, really want that color scheme.

RadioMaster
GetFPV
NewBeeDrone
Five33
Rotor Riot
Show product
Team Blacksheep
Tango 2
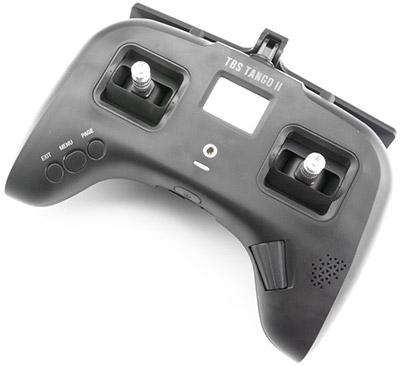
The Tango 2 is the only radio to come from the factory with a Crossfire module built in. Compared to an external Crossfire module, the Tango 2 maxes out at 500 mW, while the Micro module goes to 1W. This amounts to about 40% more range for the Micro module, but Crossfire’s range is very good. You’ll still get excellent range out of the Tango 2, unless you’re pushing really extreme distances. The Tango 2 is very compact, making storage and transportation a breeze. And it’s got great ergonomics for a small radio. A built in 5000 mAh 2S battery will easily make it through a day of flying.
If you run TBS Crossfire as your control link, you might think the Tango 2 is the obvious choice. But it comes with some drawbacks. It’s got relatively few switches (2x three-position, 2x two-position, 2x momentary) and no knobs or sliders. For airplane pilots, the Tango 2 lacks trim switches. There is a trim function but accessing it is cumbersome and difficult to do in flight. The gimbals on the Tango 2 are prone to going out of calibration. Some people seem to avoid this problem while others have to calibrate their gimbals weekly. The screen on the Tango 2 is tiny. It’s usable, but you really have to squint. If you’re older and have trouble with small text, you might want to stay away from it.
The Tango 2 runs a firmware called FreedomTX. Although this is based on the open-source EdgeTX/OpenTX firmware, it’s not compatible with any of the usual tools used to flash, back up, and configure EdgeTX/OpenTX. For example, theree is no desktop-based app for configuring the Tango 2. You have to do everything using the (tiny) screen on the radio.
The Tango 2 doesn’t come with a module bay by default, but TBS sells one that you can add to the radio. This requires opening up the radio. With the module bay, you can add aftermarket modules for ExpressLRS or other protocols.
Is the Tango 2 right for you? If Crossfire isn’t your primary control link, we think the answer is no. If Crossfire is your control link, then ask yourself if you absolutely must have the compact size of the Tango 2. If not, then we think you’ll likely be happier buying another radio with larger screen and more knobs and switches. Just get a Crossfire module to go into the radio’s module bay and you’ll be good to go.
There’s one more reason you might choose the Tango 2. If you care about NDAA compliance, an NDAA-compliant version of the Tango 2 is available. If you know, you know.
The Tango 2 comes in Pro and non-Pro version. The only difference is that the gimbals on the Pro version fold for storage.

Team BlackSheep
RaceDayQuads
GetFPV
NewBeeDrone
Show product
RadioMaster
Boxer
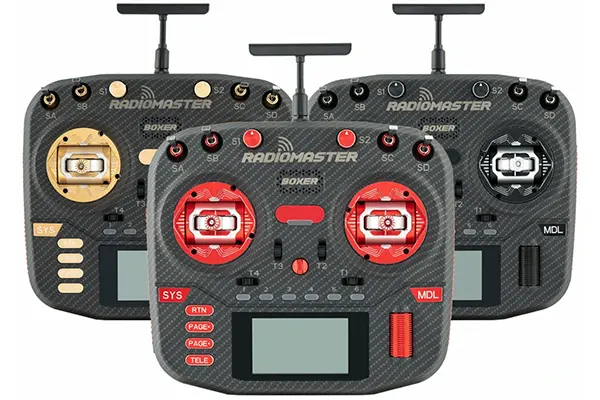
The Boxer is one of my favorite radios. It was my daily driver for about 2 years. It’s much more compact than the TX16S, while still being big enough to not feel like a “game controller” style radio in the hand. It feels solid, especially when combined with the AG01 gimbals. It has a mid-sized B&W screen–much smaller than the TX16S, but larger than the tiny screen on radios like the GX12. The battery bay is big enough to hold a 5000 mAh LiPo (sold by RadioMaster) so it lasts for a LONG time. And it can be purchased with a 1W built-in 2.4 GHz ELRS module, so you can get just about the most range you can possibly get on ELRS, without having to put an external module into your module bay.
What’s to dislike? The radio has four toggle switches on the front face, but the two shoulder switches are flat and press into the body of the controller. To me, this makes the left shoulder switch unsuitable for use as an arming switch, because to disarm, you have to push in, then release. In my opinion, arming and disarming should always be a single movement, so you can disarm as quickly as possible. On top of this, I find it difficult to press the shoulder switch without repositioning my hand off the gimbal.
Speaking of missing controls, the Boxer has no sliders that are accessible during flight. There are two potentiometer knobs on the face of the radio, but you can’t easily access them without taking your hand of the stick. So if you wanted to adjust a camera gimbal while flying you’d have a difficult time.
I’m also frustrated by the Boxer’s antenna. It comes with a very high-quality antenna that screws onto an plug on top of the radio. But the antenna eventually got damaged because every time I put the radio in my backpack, it bent over. I ended up using a 3D print to put the Pocket’s folding antenna onto my Boxer and, although I did see some reduction in range, the convenience was more than worth it.
If you’re looking for a traditional style controller, and you are okay with the selection of switches on the Boxer, I think it’s a better choice for many people than the TX16S. It has a more powerful ELRS module. And it’s way easier to store, transport, and handle than the TX16S.
The Boxer comes in several varients. The standard Boxer comes with plastic buttons and Hall Effect gimbals. Read the TX16S description for details about this. The Boxer Max has metal buttons and knobs and AG01 gimbals. The Boxer Crush has custom-colored casess and AG01 gimbals.