
Basically, all of the links on this page are affiliate links. I receive a commission (at no extra cost to you) if you make a purchase after clicking one of the affiliate links below. Read our Affiliate Link Policy for more information.
Parts I used
- Buy the RateFPV Snap X5 at RateFPV
The RateFPV Snap X5 may look like any other 5-inch freestyle drone at first glance, but it has a feature I literally haven’t seen on any other FPV drone. When people first showed it to me on a livestream, I said it seemed like the kind of thing that feels clever when you design it but is actually fatally flawed. I said I thought it was a big mistake, and that if you took one and really beat on it, you’d find out just how flawed it was.
Well, RateFPV took me up on the challenge. They sent me one and said, “Go ahead, beat on it, Bardwell. We’re up to the task.” So that’s what I did, to find out whether past Bardwell was right or whether I have to eat my words.
Quick-swappable front end
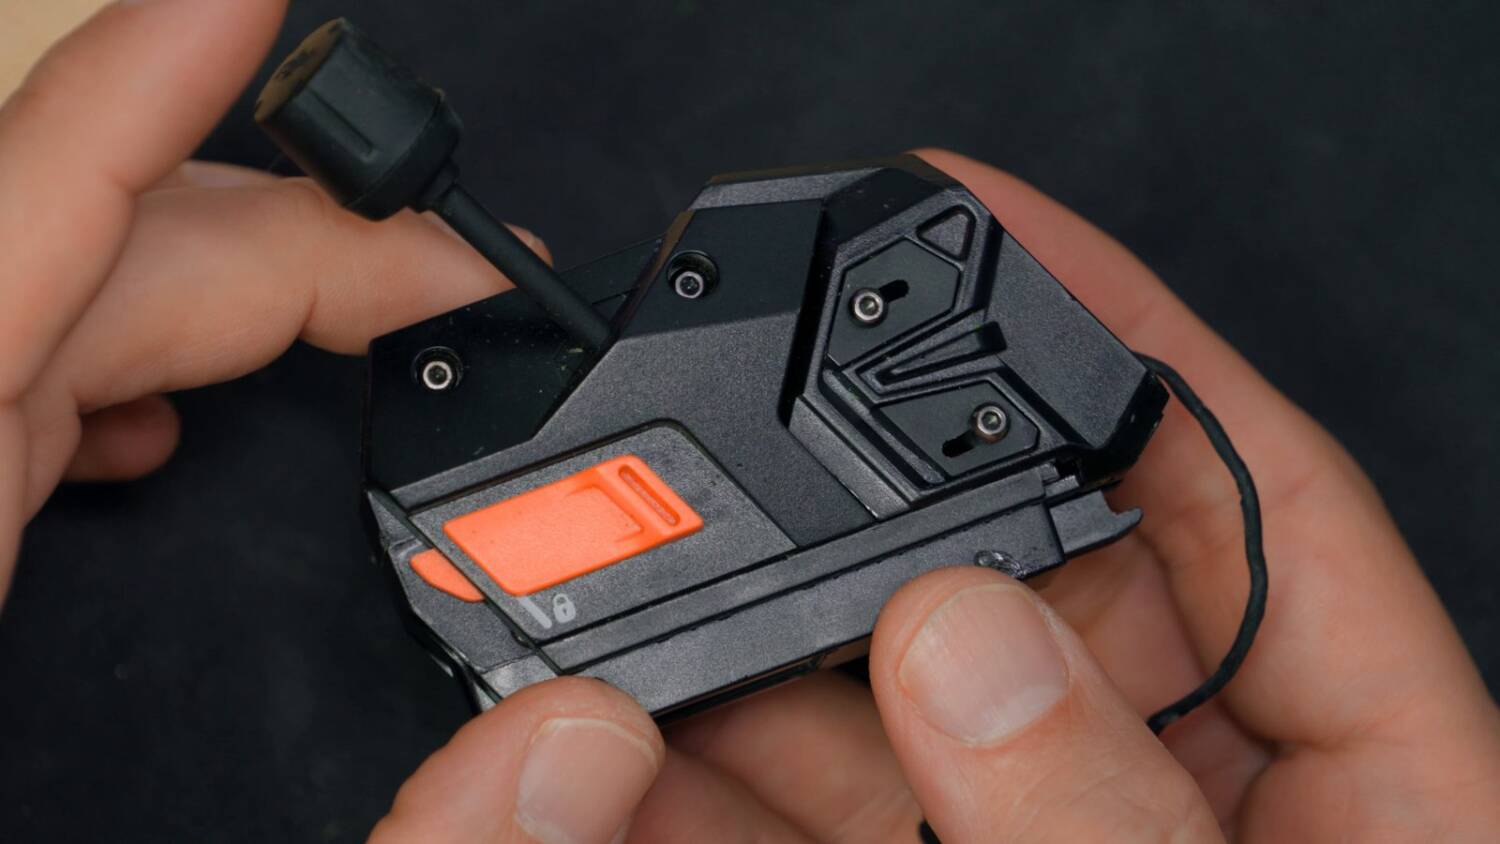
Here’s the special feature, and when you see it, you may say I clickbaited you, because lots of drones have it. The front end is modular: you remove it, take the O4 air unit off with it, and swap it to a different drone. And yes, drones from SpeedyBee and GEPRC both come to mind that have this exact feature.
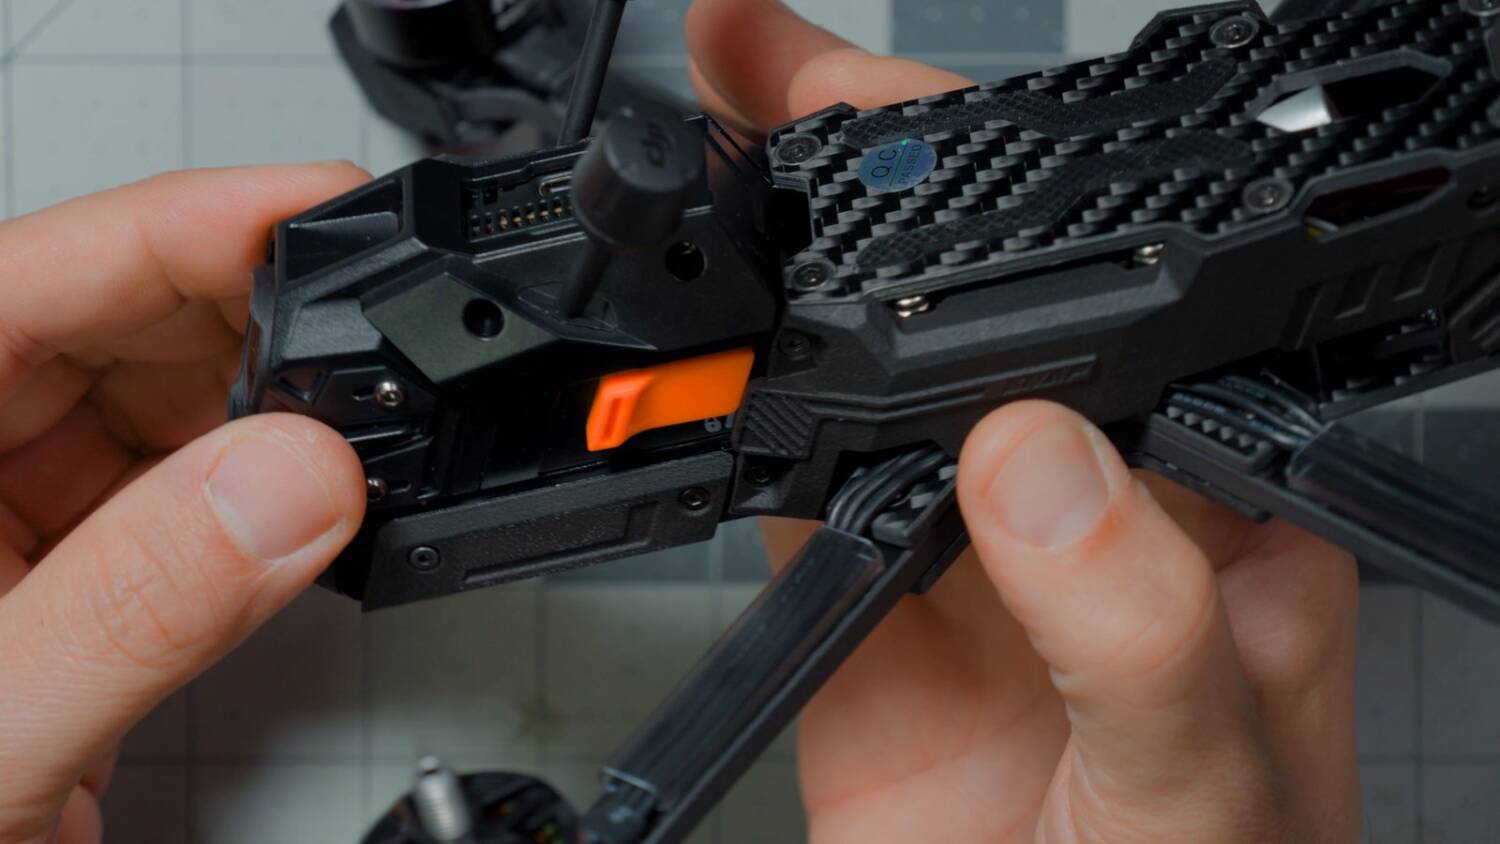
What makes the RateFPV interesting is what I didn’t have to use: tools. It’s fully tool-free. You slide the front end in and press it down, and it locks in. To change it, you pull the little spring-loaded tabs and slide it out. There’s a little more to it than that, because you still have to plug in the air unit with a small adapter. That’s not a big deal. The killer feature of the RateFPV Snap line is the tool-free change of this modular front end.
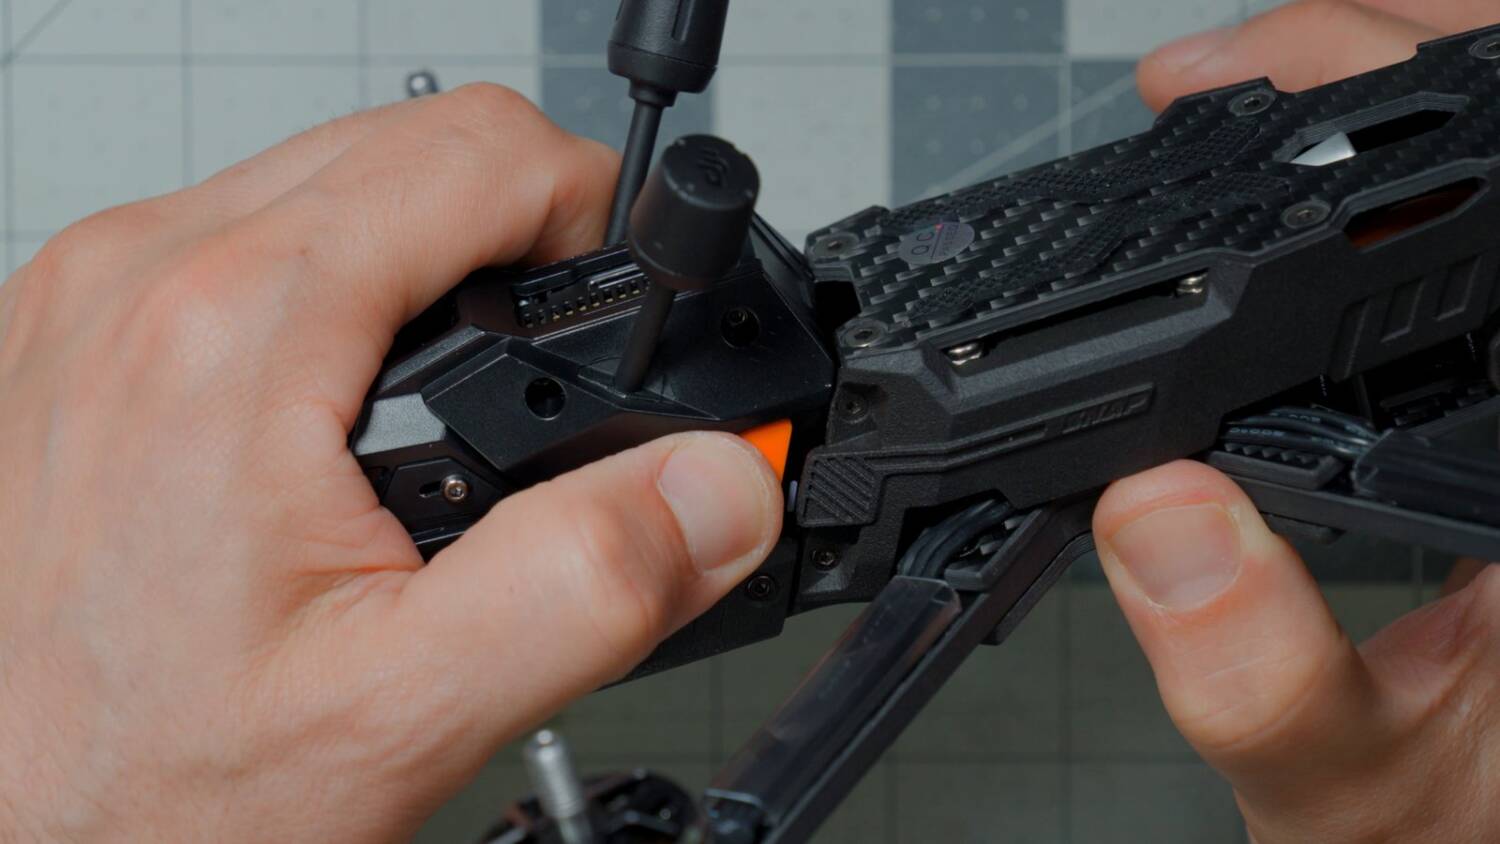
I do have to acknowledge the screws, though. There are screws that come through and literally just dig into the plastic — you can see the little mark where they bite — and help hold the front end in. The case is plastic, not metal. So it sounds like RateFPV is also acknowledging there’s some validity to my suspicion that the clips alone aren’t enough to hold it.
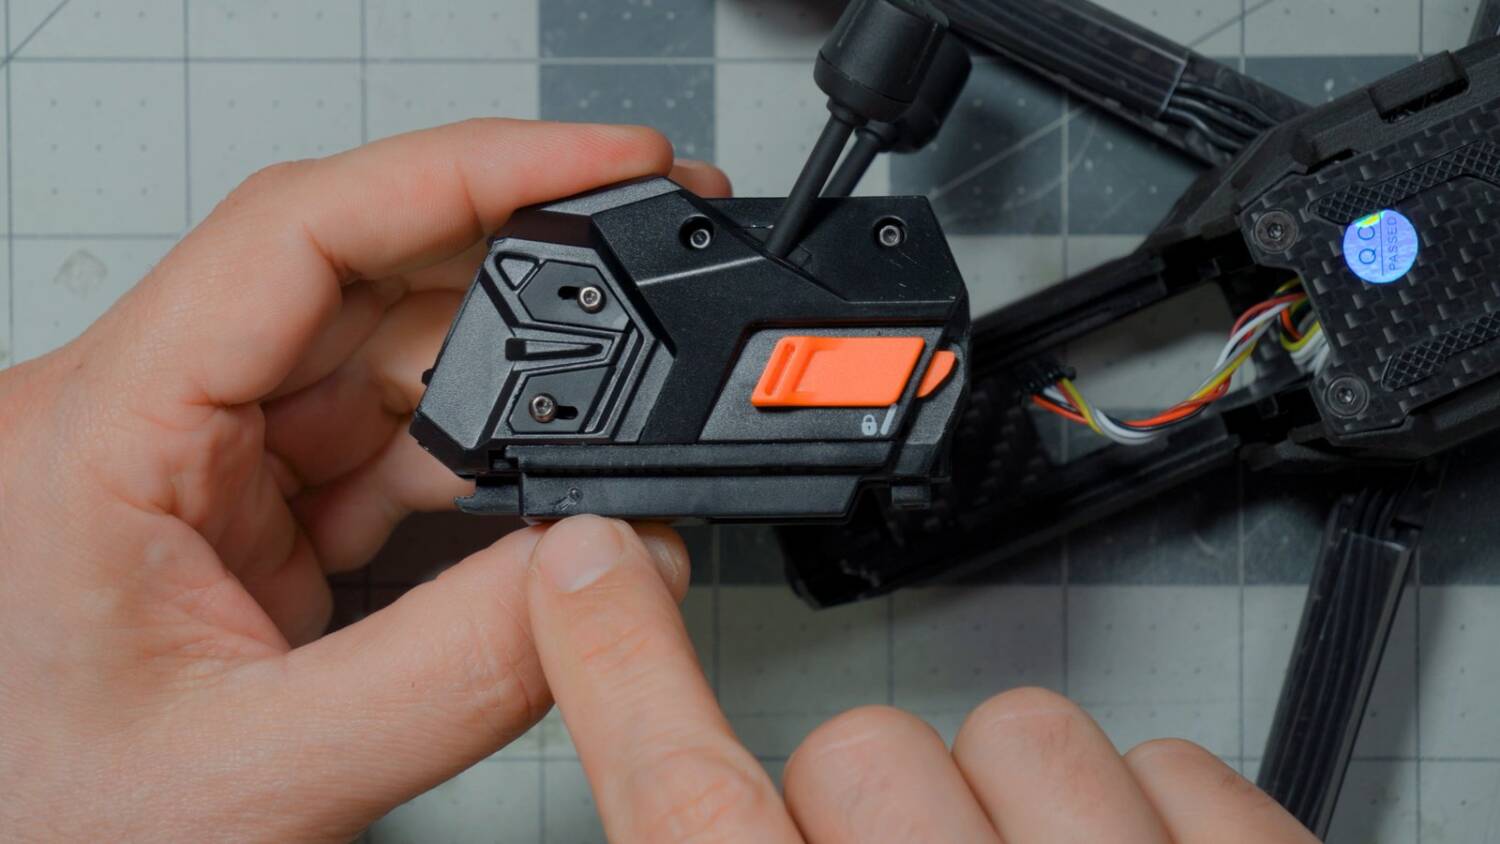
I wasn’t sure at first whether I’d use them. On the one hand, they help it survive my testing. On the other hand, the whole point is that it’s tool-free to change, so if you add a tool, are you really testing the feature everybody is so curious about?
In the end, I flew all the crash tests with those screws out.
Plastic camera cage. Questionable durability.
The camera cage is made entirely of plastic, as far as I can tell. There are no metal pieces in it, and the front part for sure is plastic: you can see it flex when I squeeze it. That does bring into question how it’s going to handle a front-end collision. A lot of the time, a frame’s camera cage is aluminum, to protect the camera, especially an expensive camera like the O4 Pro. That’s $100 to replace, and if you even just break the lens, you basically have to buy a whole new camera. This doesn’t feel like it’s going to be the most durable, most protective frame for the camera. Compare that to something like the ItsFPV Era frame, which has a whole nylon front end that’s really built up and designed to protect.
From the side, the camera is basically flush with the cage, even a little proud of it. Normally I’d like to see the camera sunk back slightly, just enough that you don’t see the cage in the frame. I think they could do that, since the cage is clearly designed for this exact camera. Although if you want to be able to adjust the camera’s uptilt, you’re not going to get it exactly perfect.
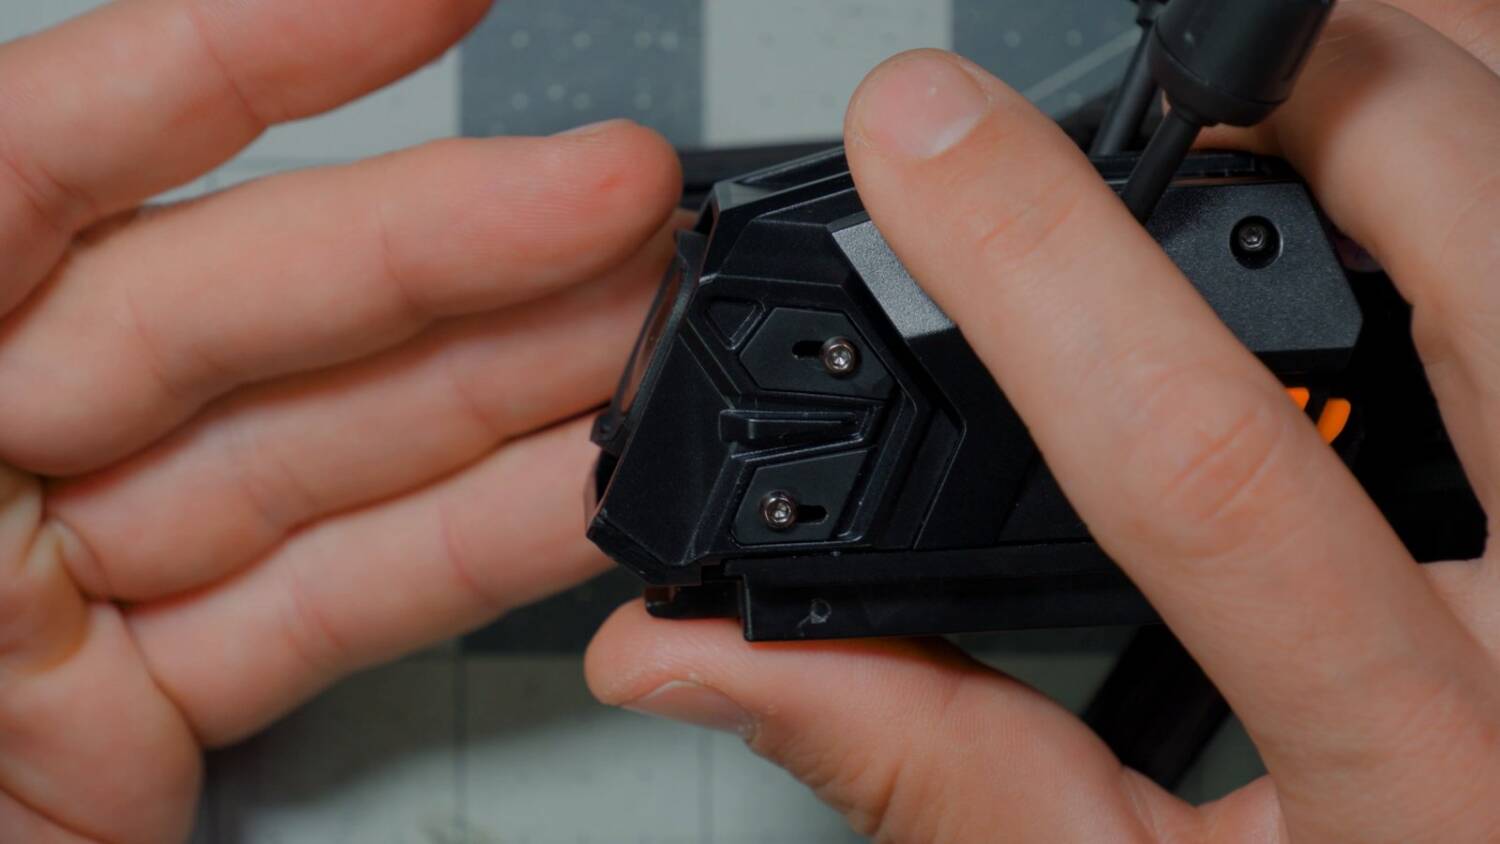
Long story short, you’re definitely going to want to run this with an ND filter or some other protective filter on the lens, just to add a little insurance in a crash.
Plastic side plates, but I don’t hate them
Setting the camera aside, there are plastic parts on the frame itself, too. Some of it is a soft, kind of rubbery plastic. The chin looks like a 3D print, maybe an SLA print. Then there’s carbon fiber, and a couple of metal pieces. The rail the front end slots into is milled metal, and that’s good, because that’s where a lot of the structural integrity comes from. That rail slots back into the frame and is held with frame screws, so the whole front part is really securely fixed to the body of the frame.
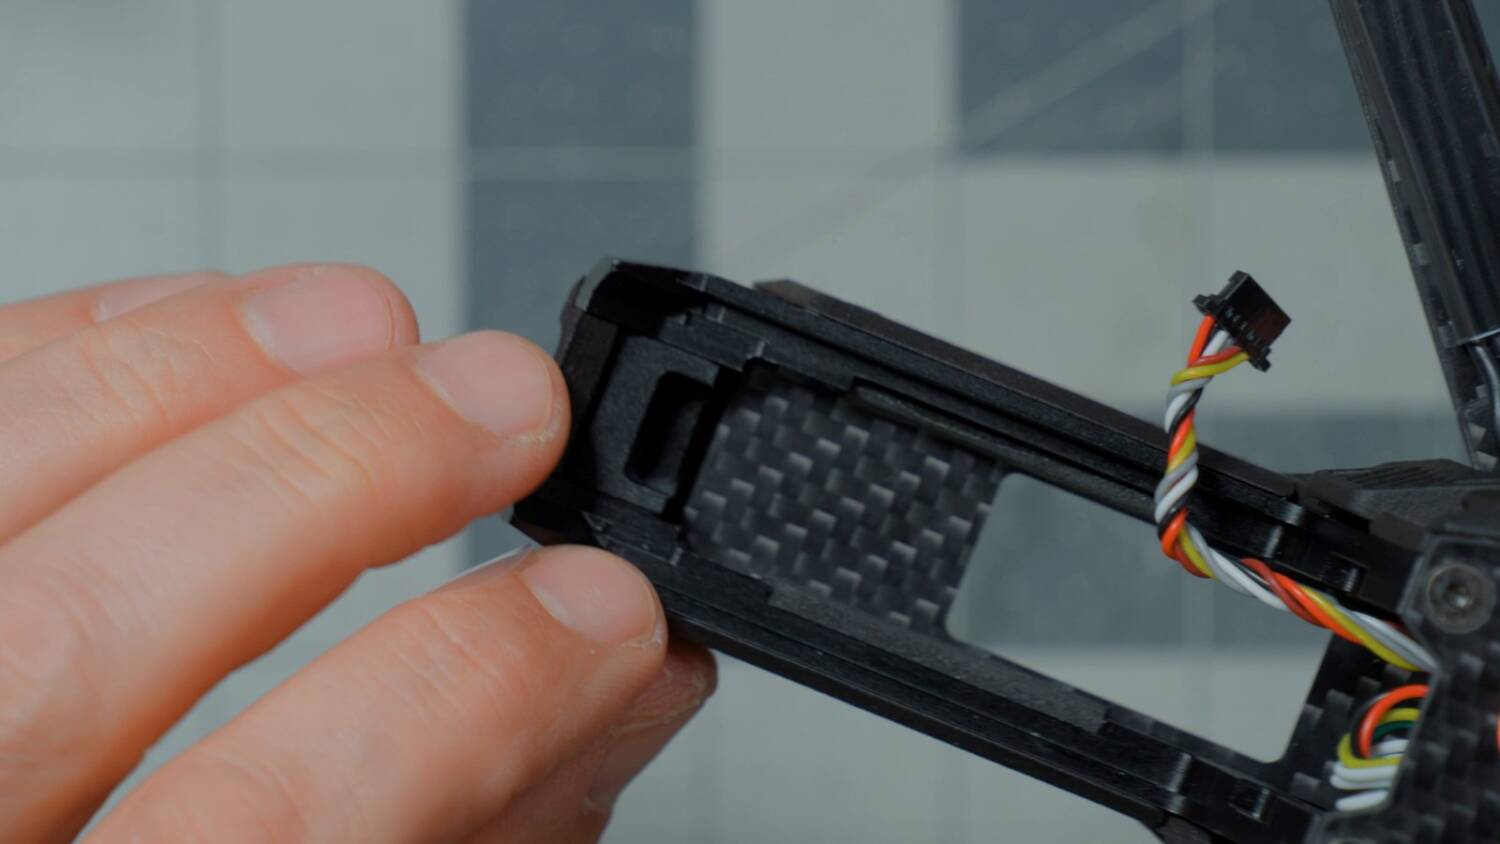
The rest of the plastic on the frame seems to be made the same way as the plastic on the front. I really think it must be an SLA printer, a resin printer. It doesn’t seem injection molded: I don’t see the little tabs where an injection mold would have been removed, and it almost looks like you can see layer lines, although they’re very, very fine. So it feels like they’re 3D printing these pieces, just not with traditional FDM printing. The plastic is quite rigid. It does feel relatively strong — it moves, but it doesn’t feel like it’s at imminent risk of cracking. We’ll have to see how it holds up to the abuse.
I am on record as not liking side plates. Side plates look cool, but I don’t think they have much functional advantage, and they make the drone harder to maintain. Some people would argue that they keep sticks and twigs out. In all the time I’ve been flying 5-inch drones, I’ve never killed a drone because a stick or a twig got in. I guess theoretically they might keep moisture out. I’m not saying they have no function, just that to me they’re more a negative than a positive. These do look pretty cool, and I’ll give them credit for not having gratuitous LEDs. They’re a little more utilitarian, which appeals to me.
The top comes off with three screws and pops right off. It’s nice that it gets out of the way so you can see what’s going on inside.
FC, ESC, motors
I’ll talk about the flight controller when we look at its Betaflight configuration, because there are a couple of unique features I wanted to confirm first. The ESC is a 65A ESC, and amp ratings are basically meaningless anyway: either it’ll smoke when you use it or it won’t, and it probably won’t.
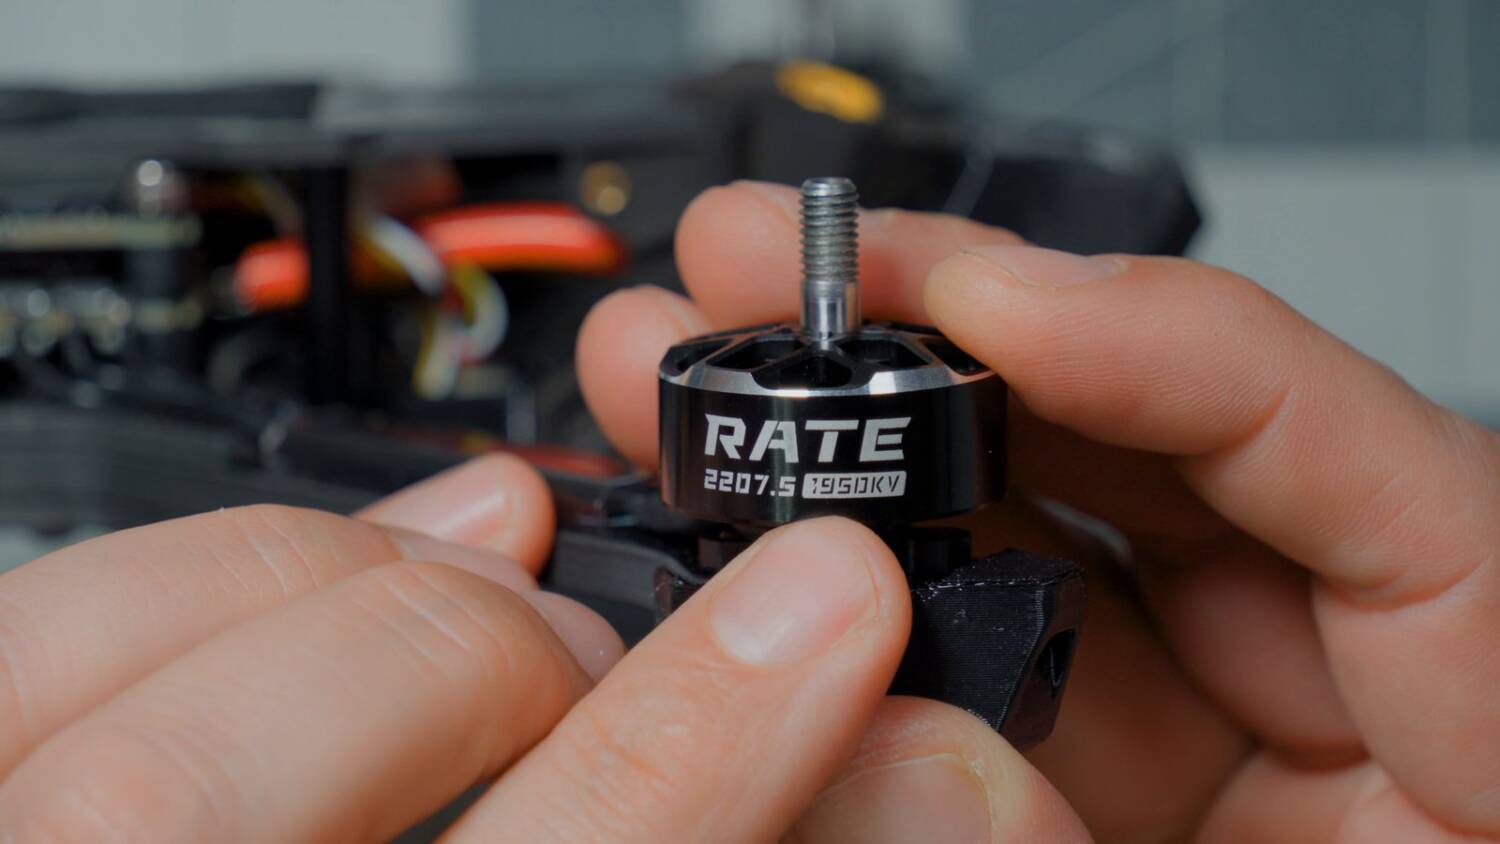
The motors are 2207.5, so just a little bigger than a typical 2207 motor. That means a little more torque and a little better heat dissipation. 1950KV is a little bit of a higher KV for 6S. Not ridiculously high, like some racers running 2100KV, but this thing is going to be powerful. You might consider using throttle scale to bring that back a little and make it easier to control, depending on your skill as a pilot.
I can’t help but notice how roomy the rear of the quad becomes when you’re not sticking an O4 air unit back there. There’s a ton of space. The receiver is mounted in a little 3D print, and it’s connectorized, so if you needed to replace it, you could buy another RateFPV receiver and just plug it in. The flight controller is fully connectorized on top, but if you did want to solder to it, there are solder pads on the underside. That’s a little annoying if you have to take it apart this far to solder to it.
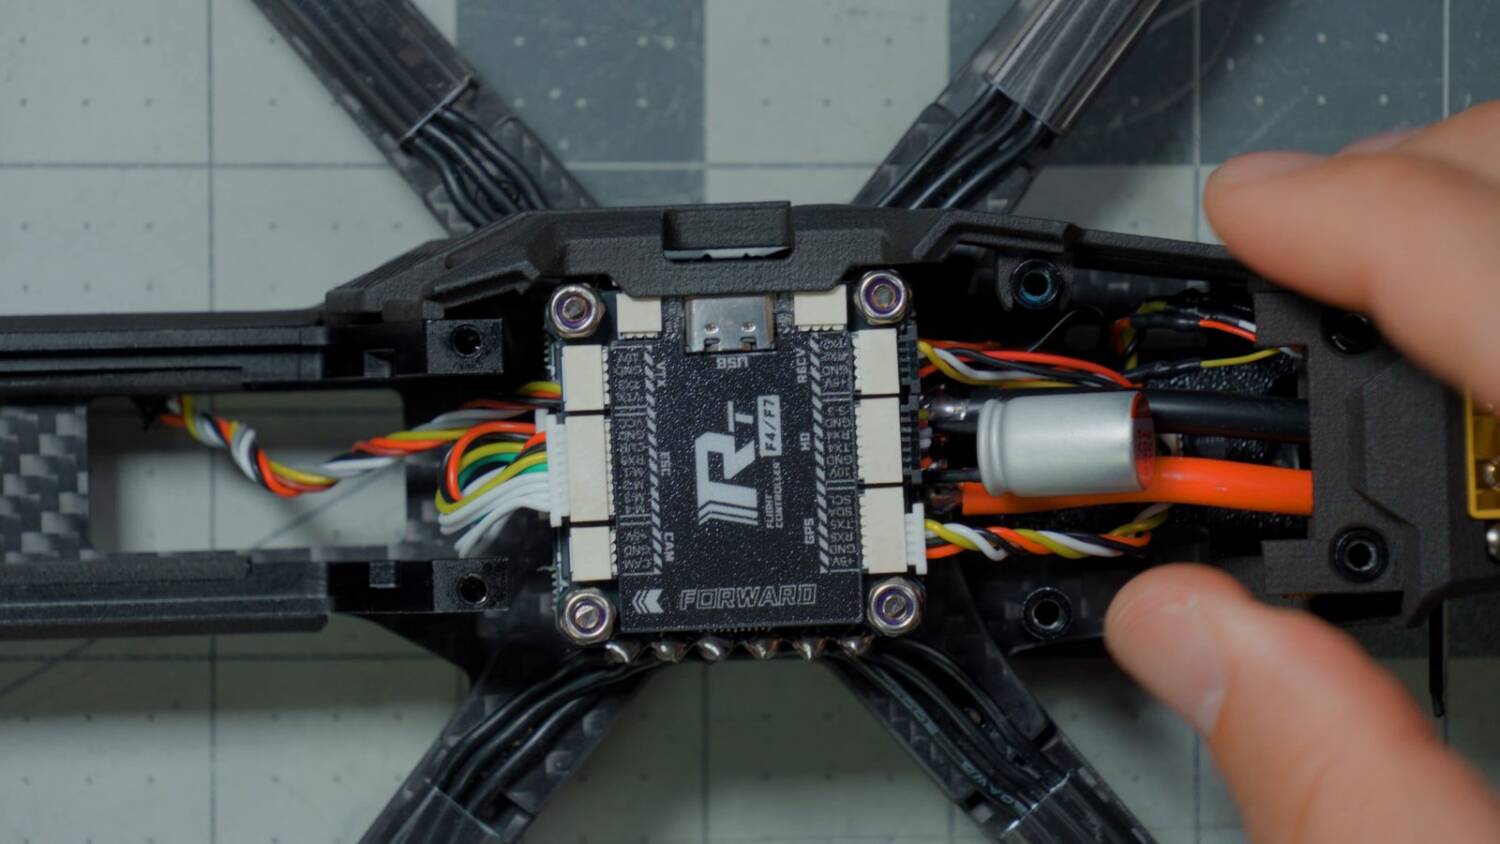
But hey, plugs are the way to go, right? Plugs are the future. I’d always rather just solder wires than solder wires to a plug. If I can buy the receiver, the GPS and the vTX, plug them into the flight controller, and they come with the wires and plugs ready to go, great. You’ve saved me a step. But if you give me a connectorized flight controller and I buy a receiver, and the next thing I have to do is solder a plug to it, a lot of times that’s more work rather than less. Not always, but a lot of times. So I guess: buy RateFPV peripherals for this flight controller, and they’ll come preconfigured and ready to go.
A few changes I’d make to the capacitor and GPS
With the top off, we can check out the capacitor. It’s soldered directly to the ESC, and that’s a pretty typical way of doing it. I like that there’s heat shrink protecting the bare capacitor legs from shorting against something. What I don’t like is that the capacitor is loose. A lot of times, when the capacitor comes this way, it vibrates and shakes over the course of the drone’s life, and eventually the little legs, which were never intended for permanent installation, crack and break. Then you have a problem: potentially a fried motor or a fried ESC. In my humble opinion — not that humble — RateFPV should be shipping this with a zip tie.
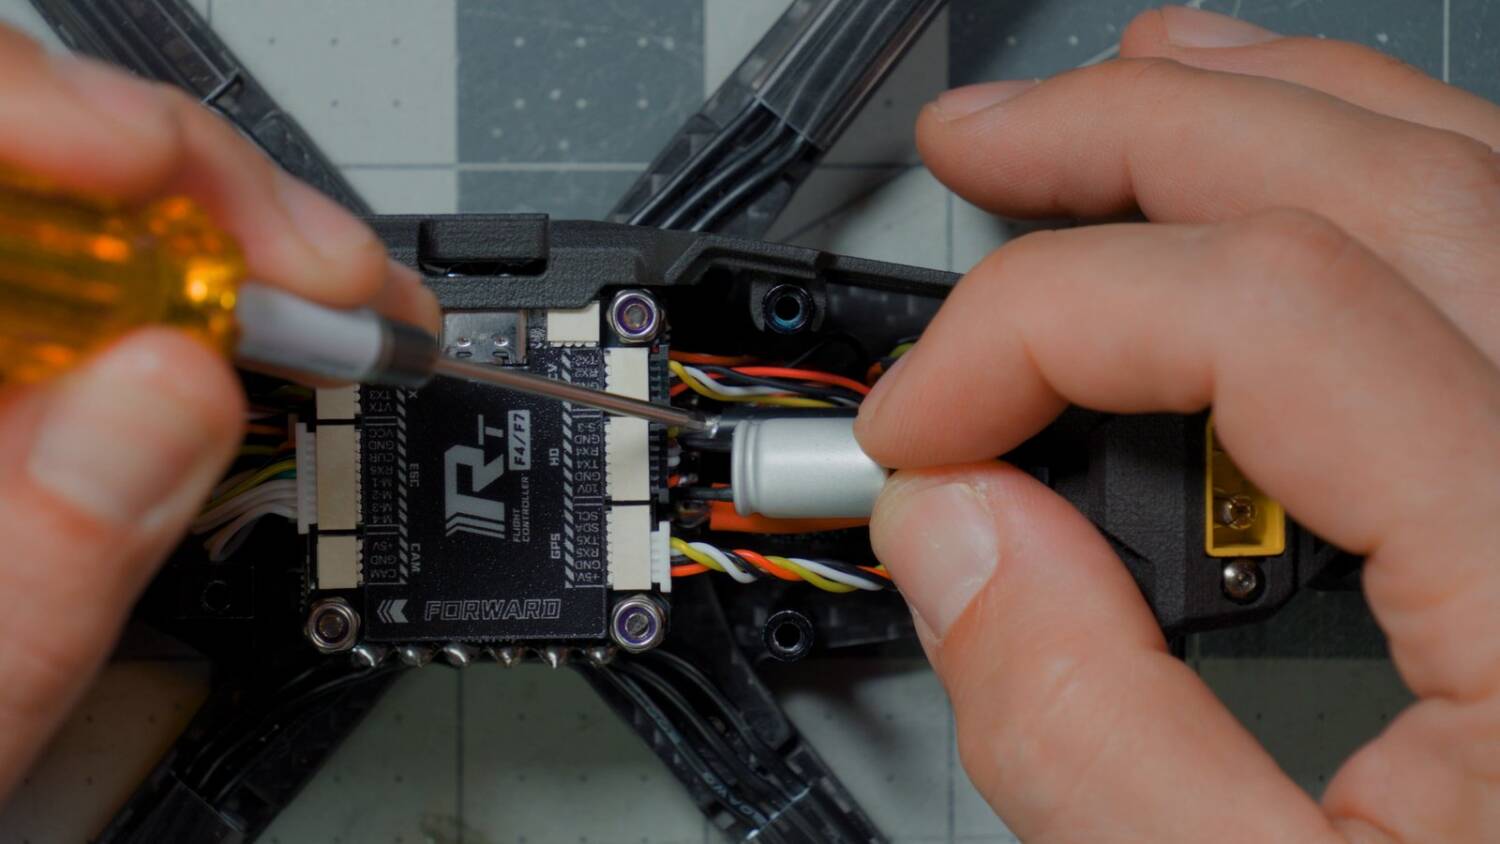
Zip tie the capacitor to the XT60 wires, and make sure the zip tie only goes around the XT60 wires, not any of the other wires. This is especially good when there’s a bulkhead connector for the XT60, like here, because then those wires don’t really move, the capacitor doesn’t really go anywhere, and it’s much less likely to break off.
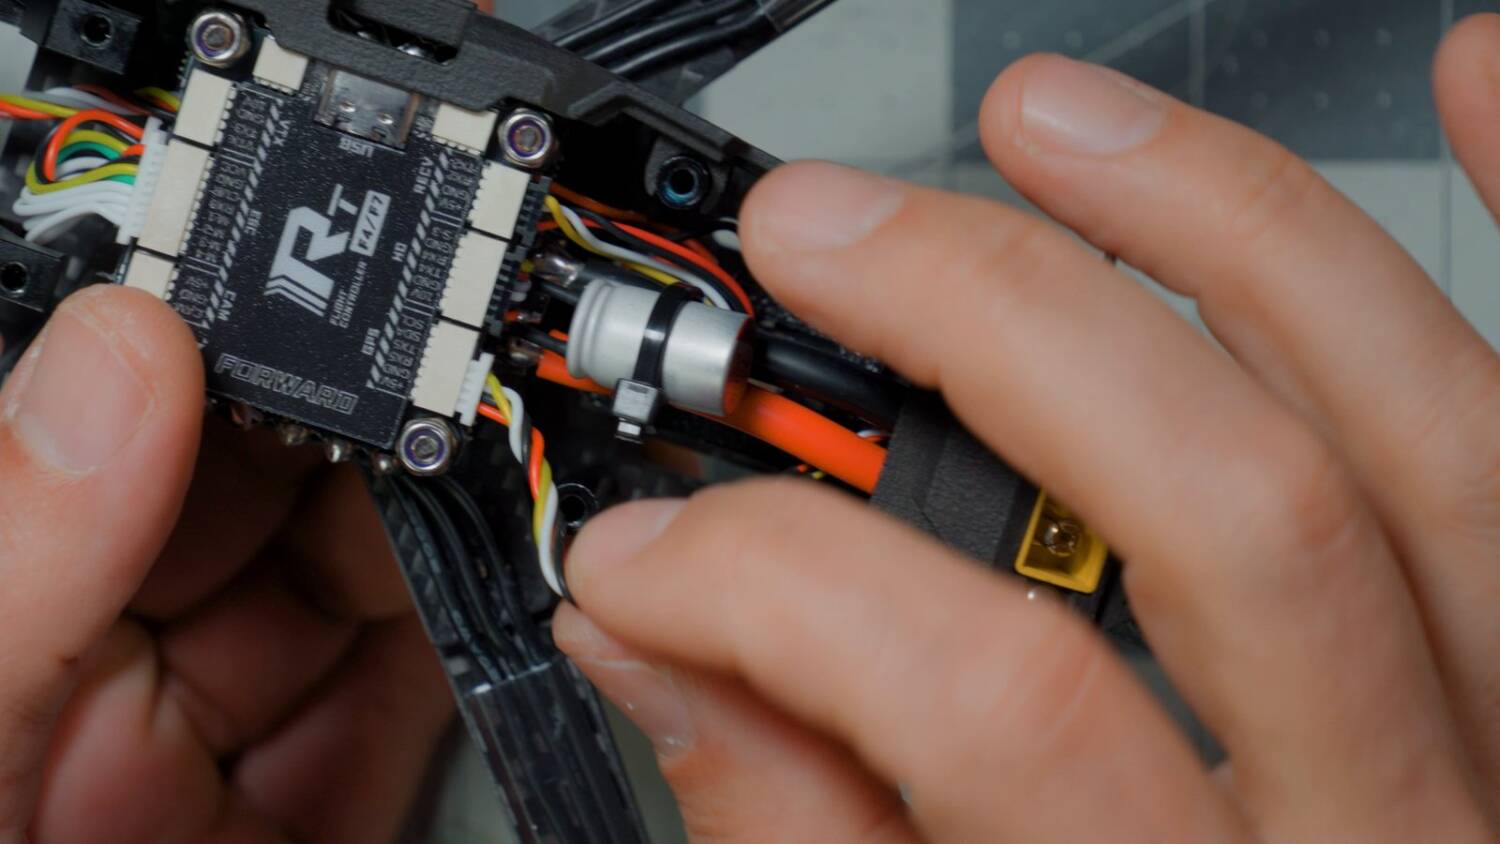
The drone comes with a GPS. That’s cool. I like GPS. Betaflight, especially the more recent versions, can do altitude hold, position hold and return to home, and even on a 5-inch acro drone, there are times when those features come in handy. At the very least, GPS lets you see how fast you’re going when you’re ripping it up.
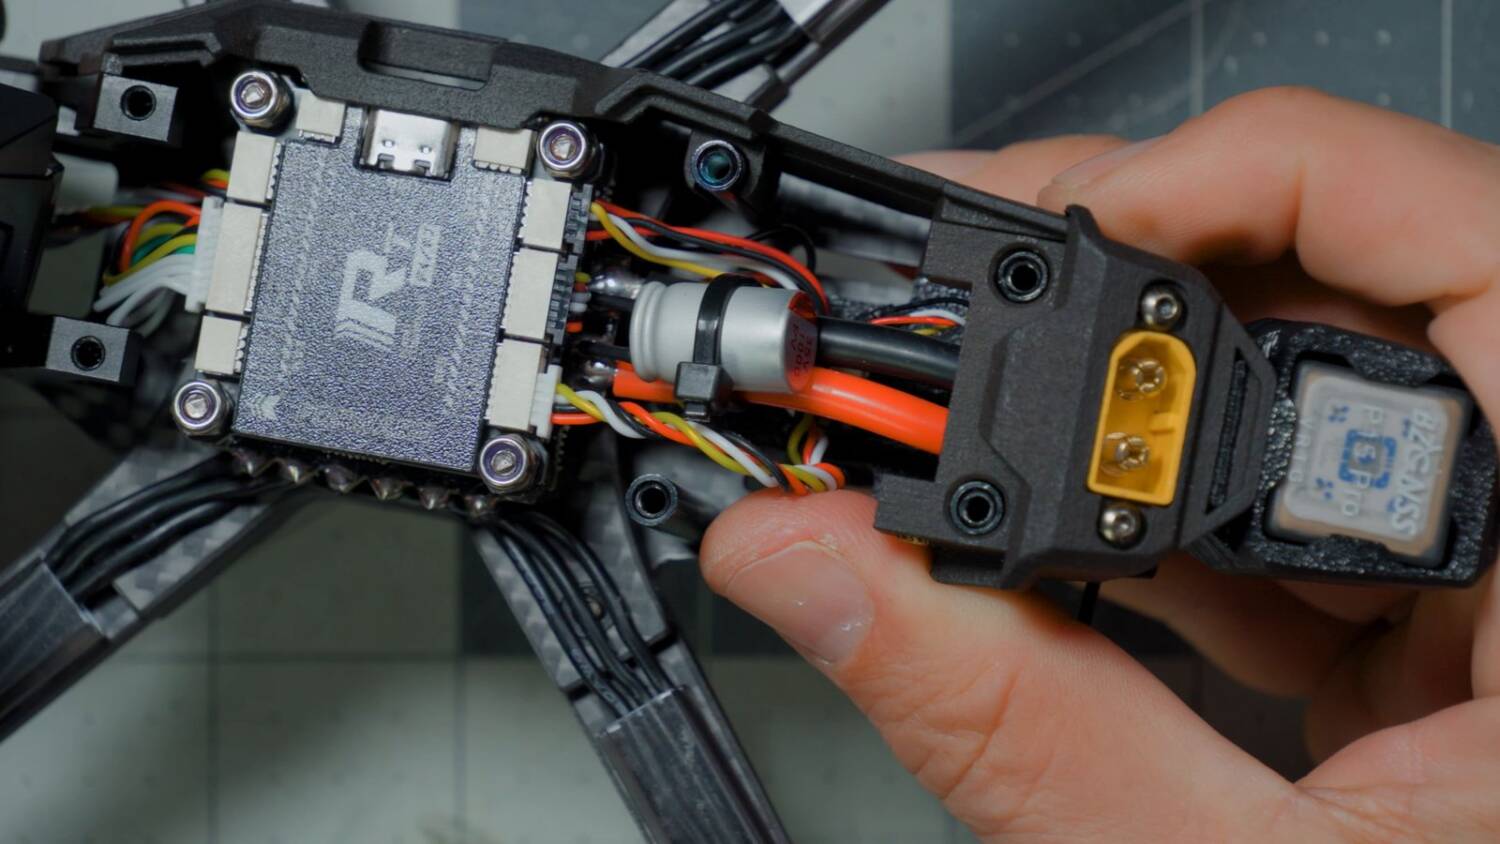
I will note, however, that the GPS wires are completely unprotected. Having the air unit in the front is going to help, as opposed to having it in the back blasting in the GPS’s ear. But on every build I’ve ever done, GPS performance improved when I put some kind of foil tape around the GPS wires. That is standard practice on every build I do. If we got 28 sats locked, I’d say, “Well, okay, I guess it wasn’t necessary.” But if we got something like six or seven, I’d say they should have done it. I predicted the second one. But hey, the whole point of this review is for me to make predictions and for RateFPV to prove me wrong, so that’s just one more opportunity for them to make me look like a fool.
AT32 FC, not STM32
Now let’s look at the flight controller itself and its Betaflight configuration, which is where the first of those little quirks shows up. When I went to connect to the flight controller, I didn’t see the STM32 I’d usually expect. This has an AT32 chip on it. That’s fine, but it does mean you may need to download different drivers, because the AT32 chip uses different drivers than the STM32. So if you plug it in and you don’t see it, and you can’t figure out why, that’s why.
Finding the download on the chip maker’s site took me some hunting. What you need is the virtual serial port PC driver: download the AT32 Virtual Serial Comport driver here.
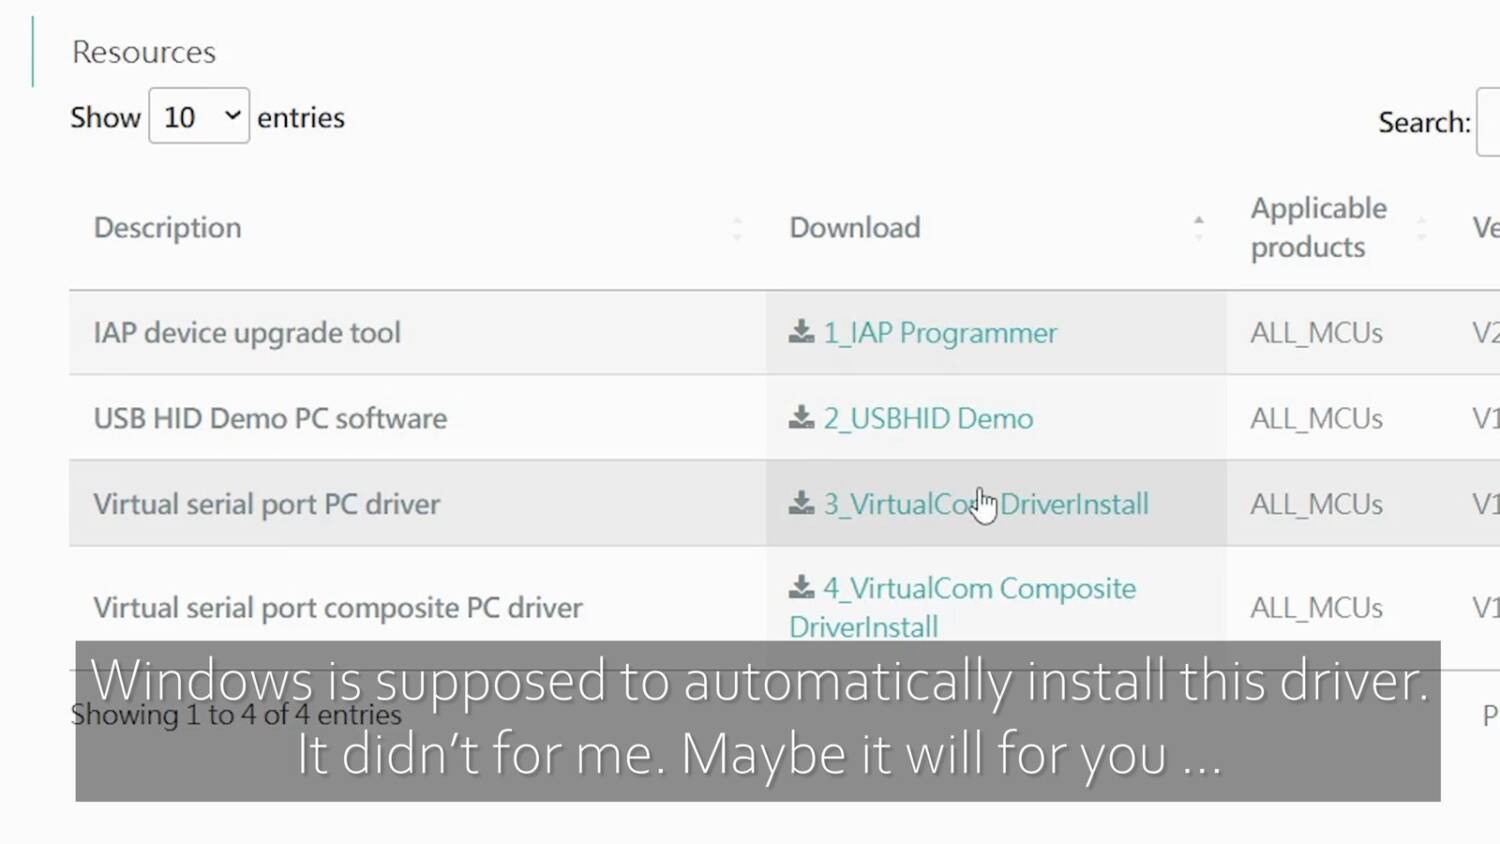
Windows is supposed to install this driver automatically. It didn’t for me, but maybe it will for you.
A few FC settings I’d change
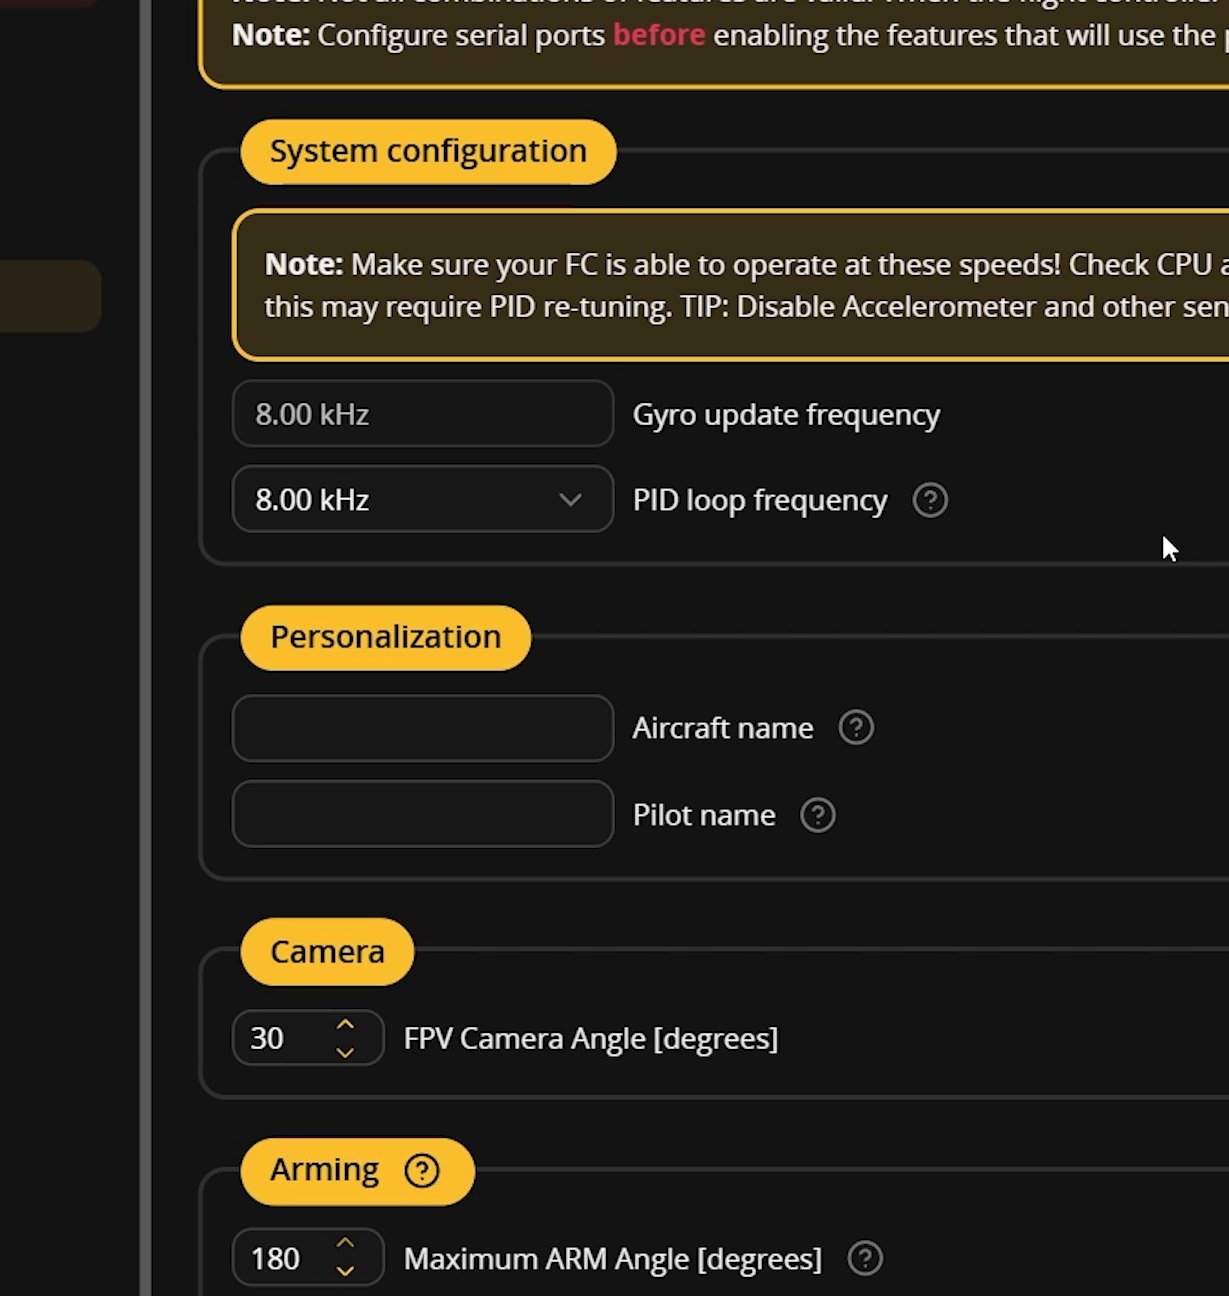
On the Configuration tab, the PID loop frequency is set to 8K. On basically all modern versions of Betaflight, especially with GPS, it should be set to 4K. You will not notice the difference in how it flies. But look at the CPU load: 40%. Save and reboot at 4K, and it goes down to 21%. I know you’re thinking 40% is probably fine, and it might be in a lot of cases. But as you start flying and things start stacking up, sometimes you get spikes of usage that overload the flight controller. The Betaflight devs recommend that most processors run at 4K, and since I don’t feel like keeping a list of the processors that are probably fine at 8K, I just set everything to 4K.
They’ve also set the FPV camera angle to 30 degrees. I do not like that. What that does is automatically mix in yaw. Normally, if you’re at 30 degrees of uptilt and you yaw, you have to put in roll to make the drone turn flat. With the FPV camera angle set, if you’re at 30 degrees of uptilt and you put in yaw, it yaws flat. That sounds like a good thing. The problem is that at any other angle, you have to mix in roll anyway, and if you’re flat and you yaw, it actually acts like you have 30 degrees of down tilt. So mathematically, it just makes it seem like you have 30 degrees less camera angle than you really do. Just learn to fly.
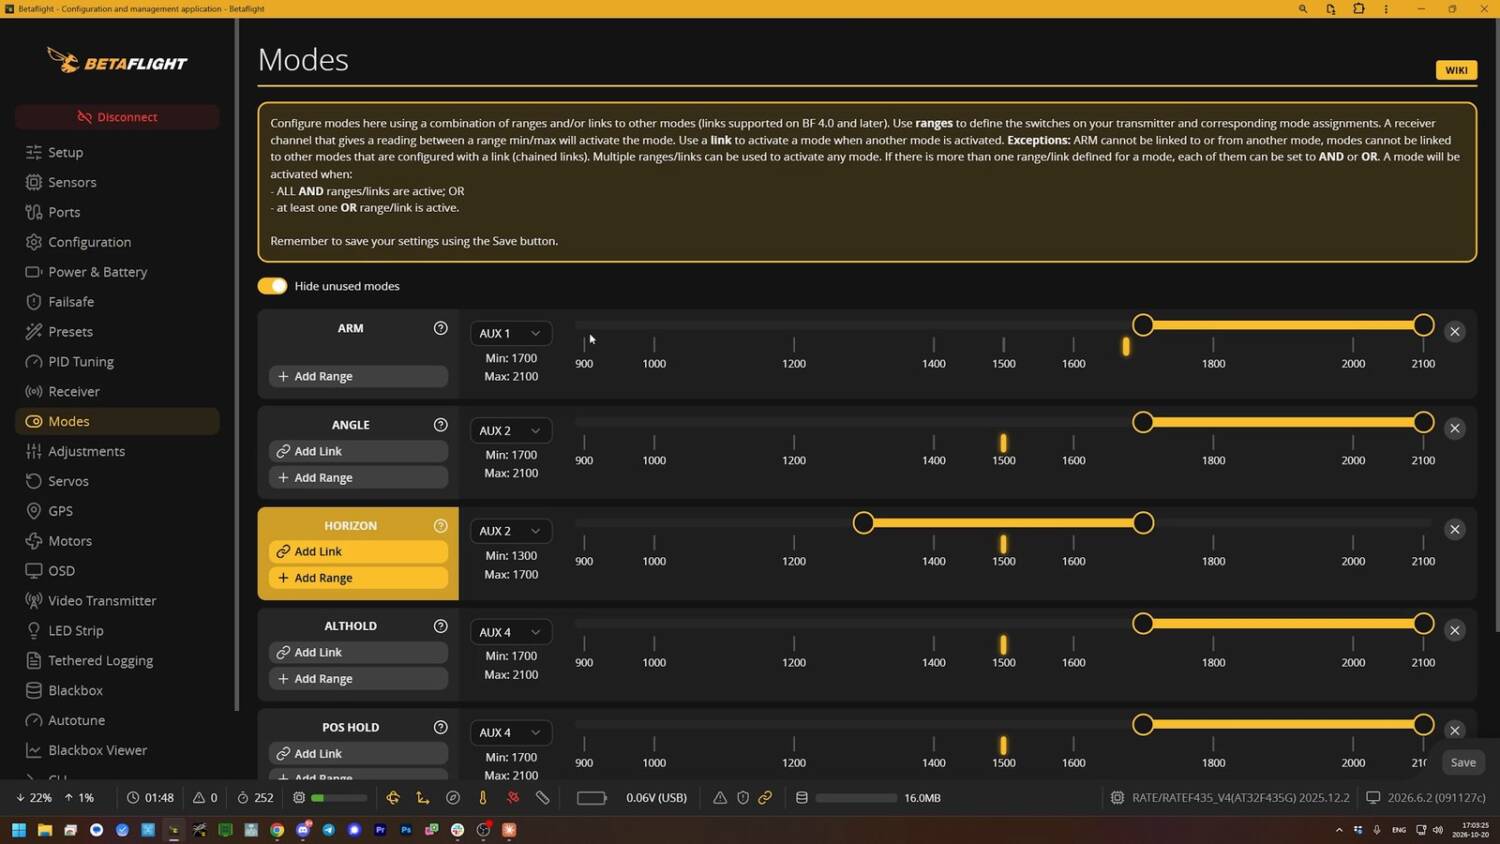
The other thing: someone pointed this out to me on a livestream, and I was sure they were wrong, but they were right. On the Modes tab there’s no camera angle mode, and if that mode isn’t there, the setting has no effect. I’d have thought it worked the other way: always active if the mode isn’t there, and switchable once you add the mode. No. I had Claude look at the Betaflight source code to verify this, and Claude confirms it, which doesn’t mean it’s right 100% of the time. So this setting is having no effect whatsoever, because they didn’t set up the mode. I’m glad, because I don’t think you should use this setting anyway. But they clearly intended it to be active, which I don’t think they should have done, and then they didn’t actually set it up right.
ELRS receiver has no official target
Before I could fly, I had to update the receiver firmware to ExpressLRS 4.x. Unfortunately, RateFPV is not on the list of official hardware vendors, which means you can’t find their firmware in the official ExpressLRS web flashers. You can get the firmware from RateFPV’s private database, but that’s not good enough for me, for two reasons. Number one, most people won’t know it exists. RateFPV tells me you can flash the BetaFPV 2.4GHz Nano RX target and it will work just fine.
But that highlights an even bigger problem. To get your target into the official ExpressLRS configurator, you have to send a piece of hardware to the ExpressLRS devs. They check it out and make sure it works right, has good performance, and hasn’t done anything dumb that will create a bad experience for the user. RateFPV not having an official target means they’ve bypassed that process. That doesn’t mean their hardware is bad, but it means it might be bad, and frankly, I don’t like this. I would highly encourage RateFPV to get an official target. It shows they’re doing everything above board, gives everybody confidence, and makes it easy for people who didn’t see this review to actually flash their god dang receiver.
Battery straps inadequate. No GoPro.
A couple of things before flying. The battery straps are completely inadequate. I’m sorry. They’re thin, and they don’t have a rubberized backing. I would not use them. I would throw them in the trash. But I’m doing a product review, so I tested it as delivered, to see whether they just bust off.
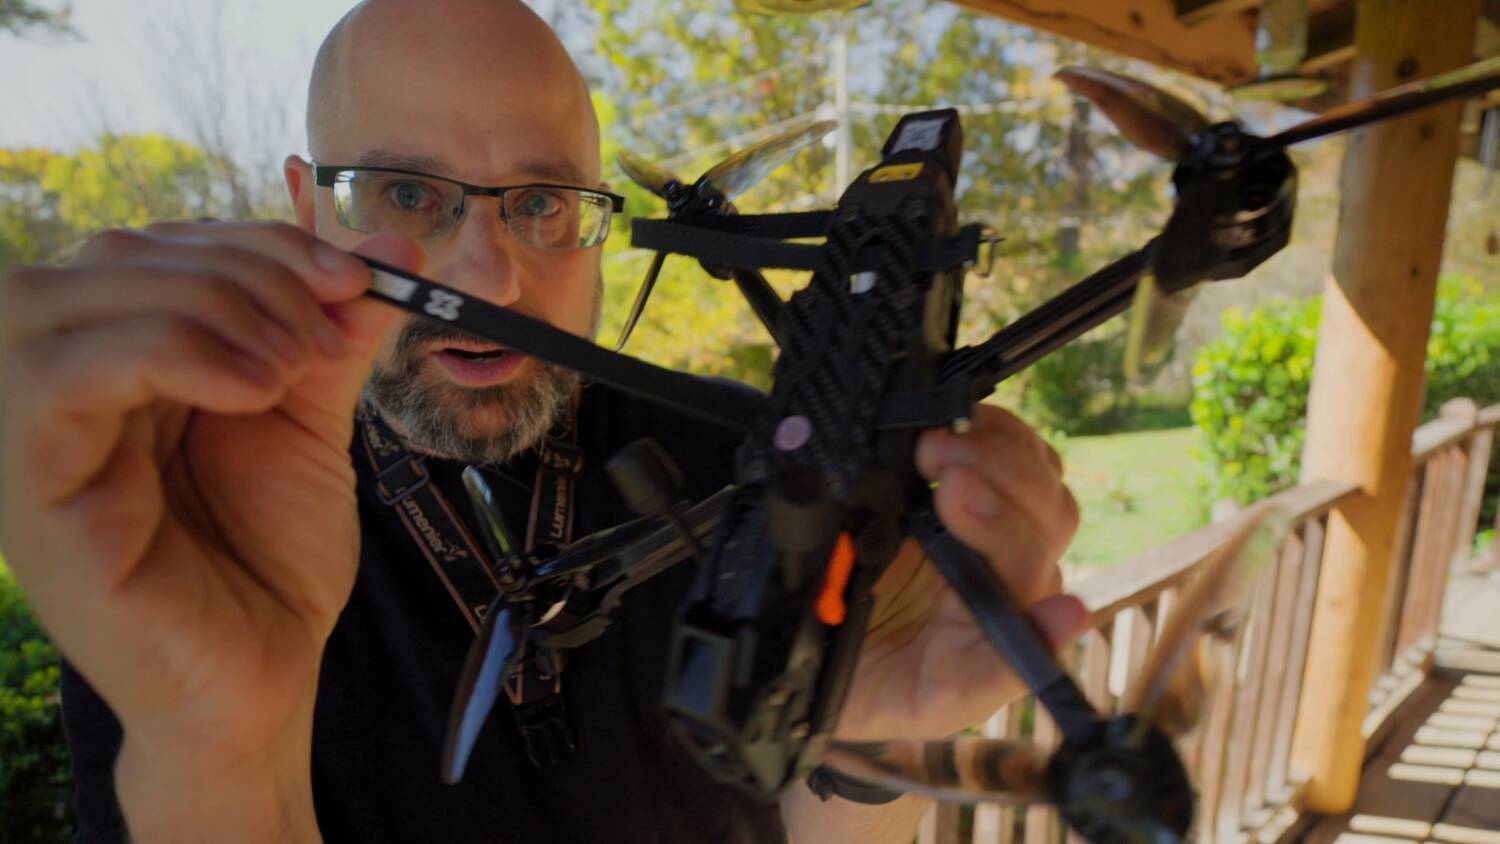
The other thing I noticed: if you wanted to put a GoPro on this, I kind of don’t know how you’d do it. Normally the GoPro mounts up top, but that’s where the head is, and there’s no way of attaching a GoPro mount. I’m sure somebody could 3D print something, but more weight up there would also make the head more likely to break off. I just don’t see any other realistic way to get a GoPro mounted on there. It’s an O4 air unit, so we don’t need a GoPro, right? Except I’d sure have liked to let you hear how the motors sound, and an onboard GoPro is the best way to do that.
Quick sat lock but mediocre number of sats
The GPS locked eight sats in 1 minute and 10 seconds from cold. That’s pretty good. The HDOP was 2.6. Ideally you want an HDOP of less than 2.0, but eight sats after 1 minute and 10 seconds is pretty good.
Initial test flight
The first thing I like to do is just listen to how smooth the motors are. These motors sound nice and smooth. Good and smooth through the throttle punch, too, and that wasn’t even full throttle. No prop wash at the bottom of the drop. For those who may be new to this, prop wash is where the drone shakes, usually at the bottom of a big drop or during a sharp turn. It flies good, with no destabilization as I whip it around.
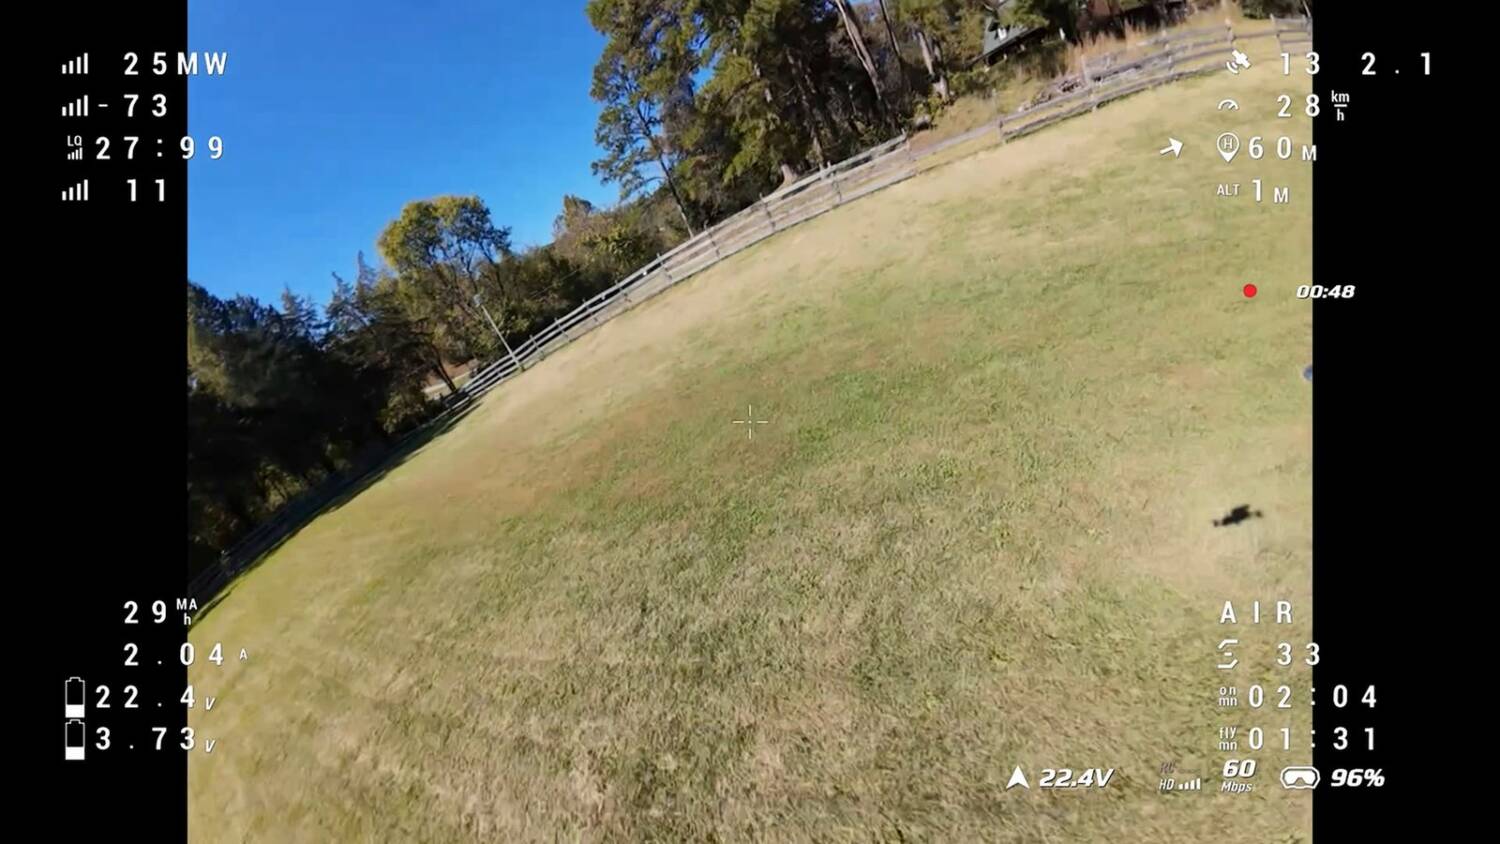
In fact, it was flying so well that I put the O4 into race mode to get the latency down. I felt like this thing flies good enough to deserve it. If you have the O4 air unit, you can put the goggles and the air unit into racing mode, which reduces the latency pretty significantly. It’s still not as low as analog, but it’s a lot lower than it normally is, and the way this drone flies, I wanted that.
Then some freestyle, and crash testing began a little early: I hit something, and the front end didn’t come off. Impact, yes. Effect, none. The props got a little beat up, but I kept flying. Something about the field of view of this camera messed me up, though. Things weren’t where I thought they should be. I could have planned one exit a little better, but it was a pretty flat yaw spin, and I was happy about that. She flies pretty good.
Durability testing!
One more thing before the crash testing. The GPS looked like it was working well, and the drone comes with position hold and altitude hold, so I tried them out of the factory. It drifted a little at first, then locked in. Position hold works.
So how should you crash test this? Nose impacts seemed like the right thing. A cartwheel across the ground would mostly hit the motors, so I found something that would hit the front end head-on. I didn’t want to mess up my O4 camera, though — and then I got a camera error. At first look, no harm done: the front end was still tight. The battery just moved and came unplugged, and it didn’t even move that much. Honestly, these straps held on better than I would have guessed. I’d still like them thicker, more secure and rubberized, but they impressed me.
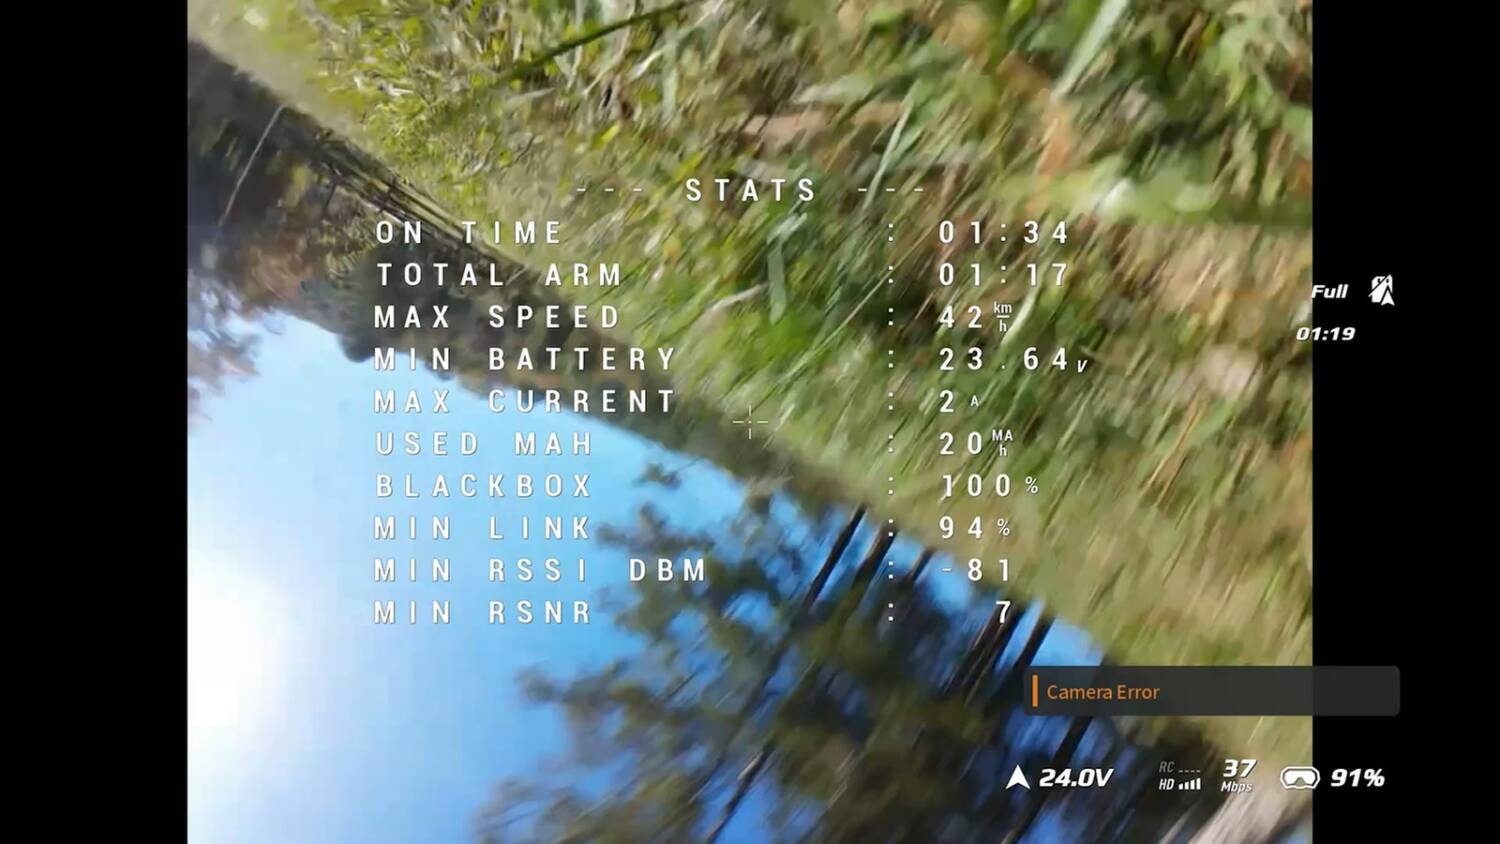
Gyrogate: yes
Before the crash results, let’s check whether this air unit and this frame are affected by gyrogate. In case you don’t know: a while back, DJI changed the gyro chip on the O4 air unit. That means if you turn on RockSteady stabilization, or try to use Gyroflow or any third-party stabilization software, the gyro data it records is messed up. And this one is affected. With RockSteady on, you can see twitching in the footage right after takeoff. These twitches aren’t visible to the pilot. They’re only in the stabilized footage, and the drone isn’t actually doing this, as you could tell from the flight.
I say both the air unit and the frame are to blame because, number one, the air unit has to have the new gyro, which this one obviously does, or we wouldn’t have the problem. Number two, a frame with sufficient soft mounting will hide the problem or prevent it from happening. So not every frame shows the problem, even with an air unit that has that gyro.
I don’t necessarily consider this a deal breaker. Number one, many people fly without stabilization. Especially if you’re doing freestyle, you’re just going to fly, have a good time and get what you get, and if that’s you, this doesn’t really affect you. Number two, some frames do have soft mounting good enough to prevent this issue, but relatively few of them in my experience. A lot of frames I consider good frames still have this problem. So I don’t find this inherently disqualifying. This is more DJI’s fault, for messing up the gyro, than the frame’s. But if you’re very, very concerned with stabilization in Gyroflow or RockSteady, this may not be the frame for you.
Or you can send your air unit to NewBeeDrone in the United States, and they’ll swap the gyro for you: they desolder it and put a different gyro chip on, and it’ll be fine. They just started offering this service. You can also buy an O4 air unit from Flywoo with the gyro pre-swapped, although I don’t think Flywoo is swapping the gyro in existing ones. Not all of those solutions will be right for everybody, but you do have options. Third, there’s software out there that claims to fix this. I haven’t played with it yet, and I’m probably going to try it on this very footage. Nevertheless, if you’re looking for a frame that isn’t affected by gyrogate, this isn’t it.
Crash test results
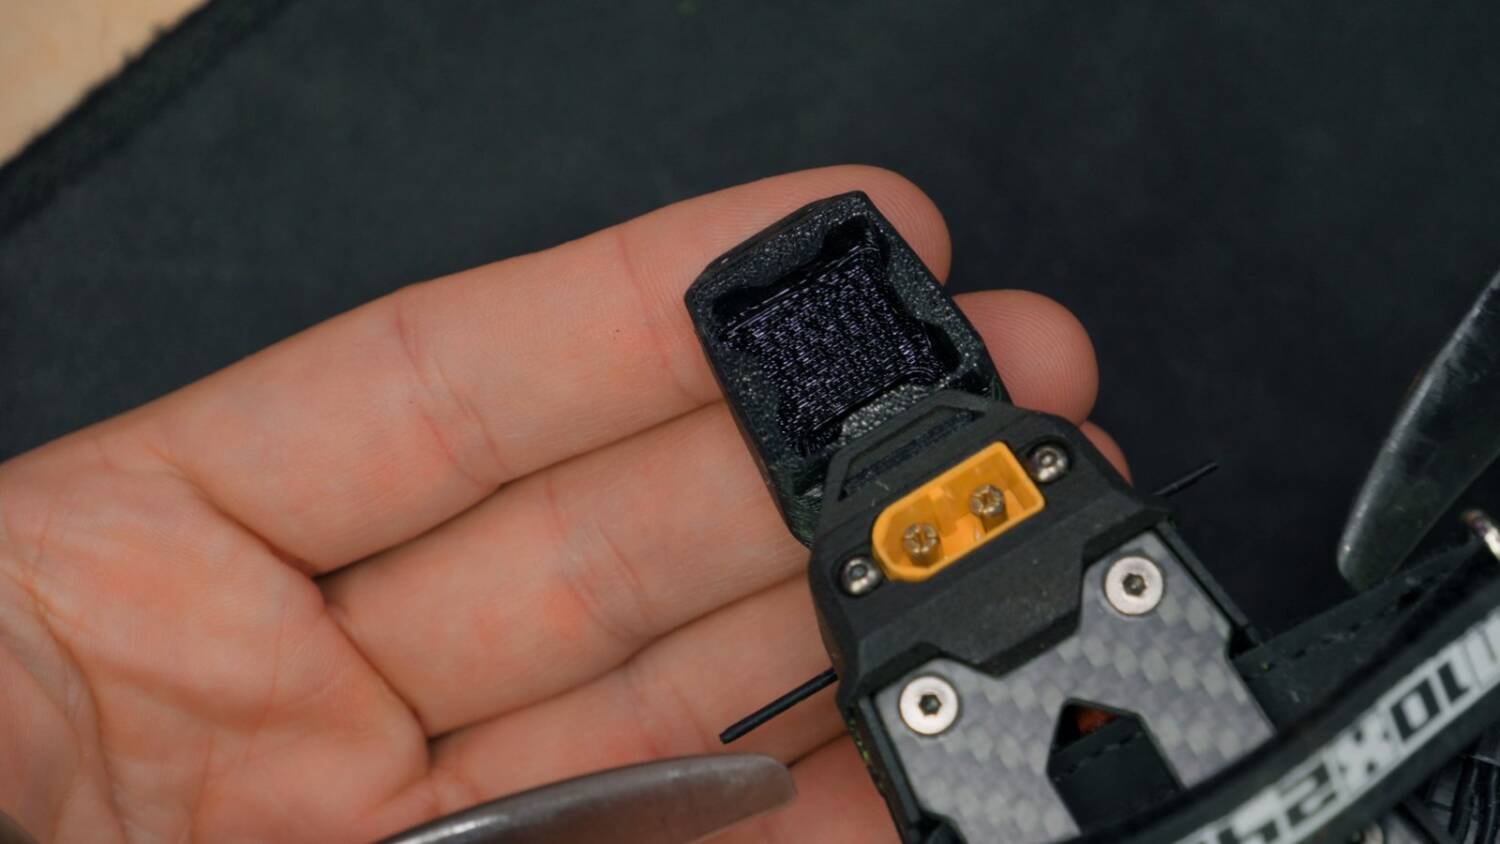
So what happened to the front end when I smashed it into a tree? Even though I have it removed here, it did not come out of the frame. I originally speculated that in a crash, this quick-release mechanism would break loose. It did not. It was rock solid. Maybe after months and months of beating on it, if the frame lasted that long, something would eventually come loose. But it did way better than I thought, and I do have to eat my words. The quick-release mechanism, at least as much as I’ve tested it, passes muster. But it does have a weak spot.
The O4 camera came out, and the reason it came out is a crack in the plastic camera cage. I said at the very beginning of the review that it’s plastic, and well, we found a weak spot in the plastic. It just gave out completely, and the O4 ripped out. I don’t know whether the screws ripped out of the plastic or stripped the O4. I haven’t really tried to put them back in yet. But this front end is basically hosed.
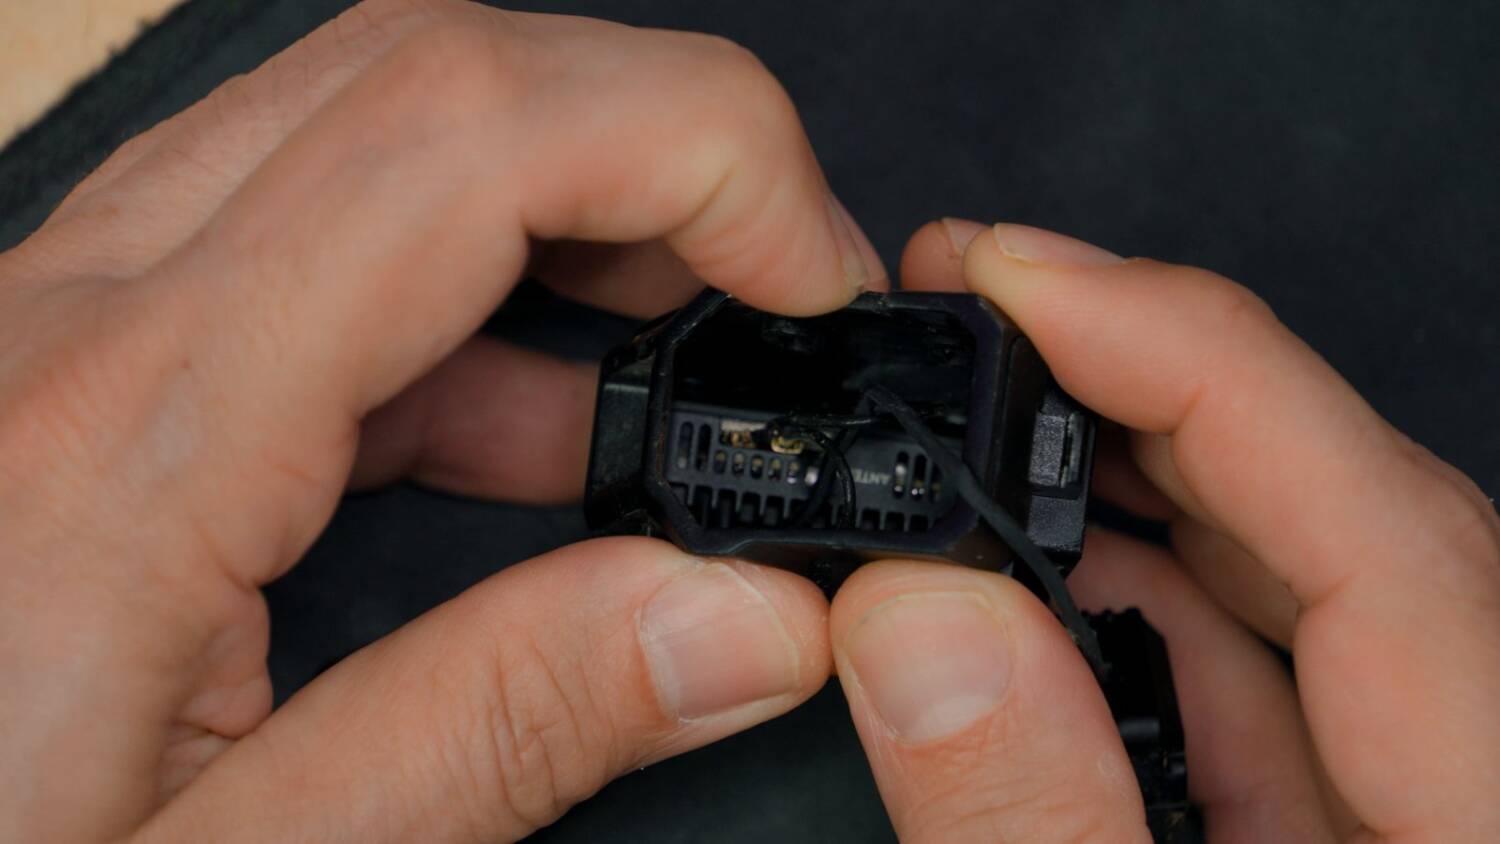
Speaking of durability, the GPS also ejected in one of those crashes. I don’t know which one. It’s gone, and I’ll never see it again. So: cool, but also do better. Maybe put a zip tie around the GPS to hold it in.
Conclusion
With that being said, I still think this drone is worth a look, especially when you look at the price. The drone by itself — motors, flight controller, ESC and frame, without an air unit or any other video transmitter — is $161. If you buy it with the O4 Pro air unit, it’s $446. Compare that to some of the other O4 Pro drones out there, which are more in the $550, maybe even $600, range. This is a very competitive price for what you’re getting.
The frame itself feels very sturdy, and I feel like it’s going to hold up pretty well. There’s the metal at the front, nice thick arms, and everything seems really sturdy and reinforced. It has a nice, burly feel. It feels like a traditional drone, not overwrought and filigreed with plastic and LEDs and little spiky bits so it looks like a spaceship. It just looks like a drone, and it seems like it can hold up to a beating.
Except there’s this weak spot, especially if you slam it into a tree five times in a row. Okay, maybe anything would have broken if I’d done that. If I had to give one piece of feedback to RateFPV, I’d like to see some kind of reinforcement there. Maybe a piece of metal coming around the front, or maybe that whole front piece could be metal, so it holds up a little better. I don’t know exactly. They’re the CAD designers, not me. It clearly isn’t going to have the kind of durability you want if you’re really going hard, and because the rest of the frame seems relatively strong, that seems like a real oversight.
Then again, maybe you’re not flying somewhere where you’re bashing the nose into something again and again and again, and this is a reasonable amount of durability for the kind of flying you do.
Honestly, though, this is probably the best-designed modular vTX head unit of any I’ve seen. If you want to see what I didn’t like about the competitors, take a look at my review of the GEPRC Cinebot25 V2 and Cinebot35. I’ve liked GEPRC’s cinewhoops for years and years. These were a big miss for me, and some of the specific things they did with the removable head unit played into that.
The full review, with the flight footage and the crash tests, is on my YouTube channel.